How I Made My Favorite Bolognese Sauce In An Instant Pot
Bolognese is one of my all-time favorite Italian sauces for pasta. I think of it as comfort food, a meal that makes me feel good. I like it so much; I have a few versions of it on my website, including Bolognese Sauce Recipe, Bolognese Sauce Recipe #2, and Genovese sauce, which is very similar to Bolognese.
So when I received an Instant Pot for Christmas, I was curious to see how well Instant Pot Bolognese would turn out, and I was pleasantly surprised with both flavor and the overall cooking time it saved me.
More On Timing
One of the best features of pressure cooking is the amount of time it saves you, especially when cooking tough cuts of meat that usually take hours to cook in a Dutch oven. However, you still must spend the same amount of time prepping, precooking (browning, sautéing), getting the pressure cooker up to pressure, and then letting the pressure release.
If you are doing a natural pressure release, as I suggest in this recipe, it could take 15 to 20 minutes before all the pressure releases, and you can remove the lid.
The actual cooking time after all the ingredients are prepped and browned is just 15 minutes once the Instant Pot gets up to pressure. So, the total time includes
- Prepping all the ingredients – 15 minutes
- Browning the meat, onion, & garlic – 11 minutes
- Bring the InstaPot up to pressure – 10 – 14 minutes
- Actual cooking – 15 minutes
- Natural Pressure Release – 12 – 15 minutes
- Total Time – 63 to 70 minutes
If I were preparing this in my Dutch Oven or large soup pot, it would take the same amount of time to prep the ingredients and brown the meat and vegetables, but cooking time can be 2 to 3 hours for a total time of somewhere between 2 ½ hours to 3 ½ hours—quite a difference.
Does One Taste Better Than the Other?
First, whether you make this sauce in an Instant Pot or a Dutch Oven, both taste better the next day. I even wrote a post called Why Do Some Meals Taste Better The Next Day?
I liked the Instant Pot version of the Bolognese sauce, and so did my family. But taste can be so subjective.
For example, take this same dish and serve it with friends at a dinner party with a nice bottle of wine or serve it up during the week at the kitchen table with everyone hurrying to get through dinner to finish their homework. Which do you think will taste better?
I’m still getting used to my Instant Pot and the concept of cooking foods fast under pressure, but I’ll get there. I’m still getting used to cooking a steak in a vacuum-sealed bag in low-temperature water for an hour and a half when I sous vide, and I love the results.
This recipe is not much different than my other two Bolognese recipes, but there are a few differences, and adding some ingredients makes a difference. For example, if you are adding milk or half & half to the sauce to give it more richness, you add it after cooking in the Instant Pot.
If you want to make one of the best pasta sauces ever in less time, especially during the week when time is at a premium, I think you’ll love the Instant Pot version.
Instant Pot Bolognese Sauce Recipe
Ingredients
- 2 tablespoons olive oil
- 1 large onion yellow, finely chopped
- 3 carrots diced
- 2½ pounds ground meat beef, veal, pork combination
- 6 ounce tomato paste
- ½ cup red wine
- 43½ ounces tomatoes diced or 3 - 14.5 cans
- 1 tablespoon thyme fresh, finely minced
- 1 tablespoon sage fresh, finely minced
- 2 tablespoons parsley friesh, finely minced
- 3 bay leaves
- salt & pepper to taste
- 1 cup whole milk or ½ cup half & half
- Parmesan cheese freshly grated for serving
Instructions
- Plug in the Instant Pot and press the “saute” button.
- Let the Instant Pot heat up, and add the oil. When the oil is hot, add the onion, saute for 3 minutes and add the diced carrots. Be sure to stir occasionally so nothing burns.
- Push the onions & carrots to the sides of the pot and add the tomato paste. It should soften up a little with the pan's heat, and then you can combine it with the rest of the ingredients.
- Continue cooking for another 3 minutes, then add the ground meat. Be sure to break the meat up with your hands as you add it and then with a wooden spoon as it is browning, so there are no large pieces.
- Season with a bit of salt and pepper to taste.
- Continue cooking the meat until it browns, about 5 minutes. Remember, it doesn’t have to cook through, just brown. It will be fully cooked when you pressure cook it.
- Add the wine, stirring the bottom of the pot to scrape up bits and pieces that may have stuck to it. Let the wine cook down until it is almost completely gone. This should take about 4 minutes.
- Add the diced tomatoes, fresh herbs, and bay leaves, and season with a bit of salt and pepper.
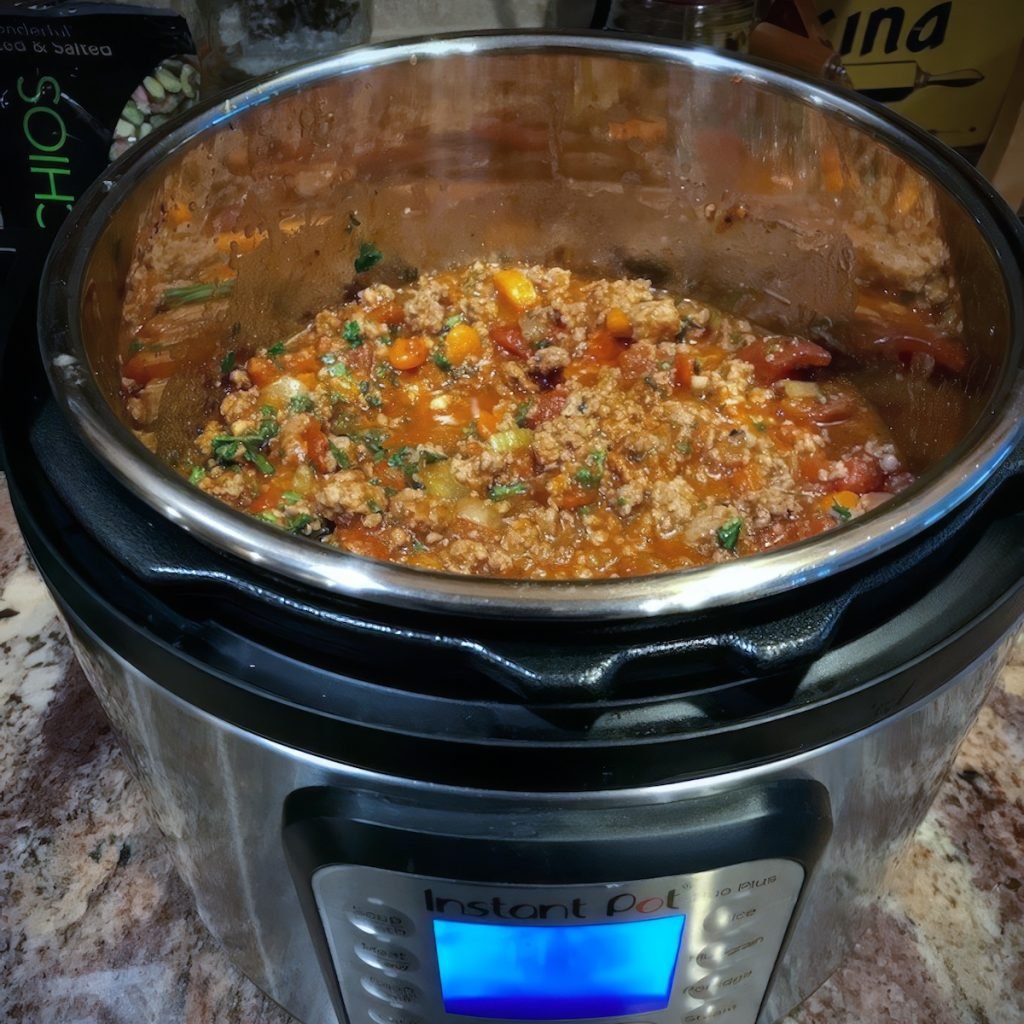
- Turn off the Instant Pot, place the cover back on and set it to cook at high pressure for 15 minutes. Make sure your pressure release valve is turned to close or what they call Sealing.
- It’s going to take 10 to 14 minutes for the pressure to build up in the Instant Pot. This is because the cooking timer doesn’t start until the pressure is just right. Once it gets there, it will cook for 15 minutes and stop.
- While it is getting to pressure, the LED display will show “ON.” When the Instant Pot reaches working pressure, the LED display with change to a number of minutes, indicating how many minutes are left to cook.
- When the cooking time is up, the InstaPot will go into a cycle called “Keep Warm.” For this recipe, you will use Natural Release, which means leaving the release valve in the “Sealing” position and naturally letting the pressure release slowly over time.The opposite method is called “Quick Release,” where you CAREFULLY turn the release valve to “Venting” to let all the steam out quickly. I like to use a dish towel when performing this chore so I don’t get burned.How long it takes to Naturally Release depends on the ingredients being cooked and how much liquid is in the pressure cooker. It can take as little as a few minutes to over 30 minutes for the pressure to naturally release. You’ll know the pressure is released when the little silver float value drops down next to the pressure release value. And don’t worry about the InstaPot being in the Keep Warm setting. It will release the pressure in this mode.If you get impatient with how long it takes to release naturally, I have been known to help it along after 10 or 15 minutes with a quick release. But as my high school coach once told me, “Patience is a virtue.”
- When the pressure is fully released, carefully remove the lid if there is any residual steam by removing the cover away from you.
- Add the milk or half & half, stir, taste, and adjust seasonings with salt & pepper.
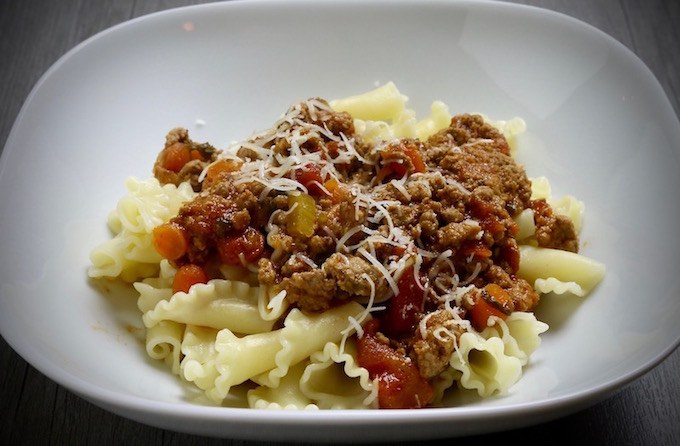
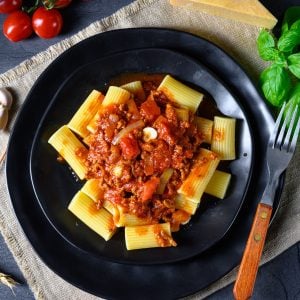
- Serve over pasta or any other type of noodles you prefer. In our house, we typically serve Bolognese sauce with penne pasta, but for this recipe, we served it with Gigli (Campanelle) pasta, shaped like a cone with a ruffled edge.
- And don’t forget to garnish the dish with freshly grated Parmesan cheese.









8 Responses
I have read but not yet cooked the Bolognese sauce, but I will. I just wanted to comment that I like your time comparisons. So many people who publish Instant Pot recipes stress how quick it can cook but ignore or dismiss the pressure build-up time or pressure release time when those two times are often as long or longer than the actual cook time. I have another brand of the electric pressure cooker and it works very well but I don’t think it is always the best cooking utensil in every instance as some would like to believe. All cookware has its place.
I like your teaching style. I also admire how you say you learned to cook. There are many very good cooks and most do not have a TV show or training at a culinary school. My mother was an outstanding cook. She learned to cook from her grandmother and by trial and error, but she could really put on a delicious meal.
Hi Charlie, I think the best tip I can give you about Bolgnese sauce is to make it today for tomorrow night’s dinner. Whether you cook it on your stovetop or in your oven or in an InstaPot, it always tastes better the next day. And I agree, there are some foods that work well in an InstaPot and can save you time but when you figure in the prep time, the browning time, the getting up to temperature time and the natural release time, it adds up. I am still new to this machine and will write more about it as I get more experience. Thanks for your kind words.
I love the instapot which is good for cooking. Lots of nice recipes to cook delicious meals. Thanks for your nice sharing. What do you suggest this brand with the other ones? I am looking to make some meals with instapot for my husband and friends to try. Waiting for your suggestion. Thanks.
Making it now and it appears good so far. A couple observations:
1) most bolognese recipes I’ve seen have little or no tomatoes but. Just tomato paste and beef stock. Which brings me to the second point
2). Your items lists an entire can of 6oz tomato paste but I don’t see it in the instructions.
So, I’ve used 1/2 tube of double concentrated paste in the browning meat phase. Only 1 can tomatoes and 1 cup beef stock. We shall see how it goes.
Hi Rizzo, good catch on leaving out the tomato paste in the instructions. I fixed what should have been adding it right after cooking the onions and carrots.
There are lots of bolognese recipes on the Internet. This is how I like to make my bolognese but I always suggest people use this as a starter and make any recipe their own by adding ingredients they like or think would make a better dish. Thanks again for contacting me.
I enjoy your recipes very much but you have repeatedly said “InstaPot” and show a photo of an “Instant Pot”.. I’m sure it’s not a big deal to you but you are passing the error along to your followers.. The Instant Pot people prefer it’s called by the correct name I’m sure.. j/s
Thank you
Hi Pam, thank you for pointing that out. I have heard people call it an InstaPot but you are correct, it is an Instant Pot. I will correct that right away. Much appreciated.
I tried this recipe but kept getting the burn notification. What did I do wrong?