

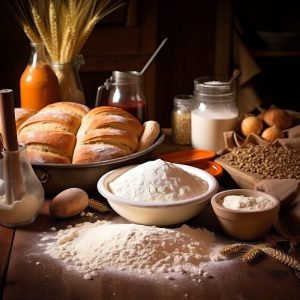
Most home cooks think sautéing means “cook it in a pan.” But great sautéing is really about heat, space, and timing. Once you understand those three things, your vegetables brown better, your chicken cooks faster, and your food starts tasting restaurant-level instead of steamed and soggy.
Fast Answer
- Sautéing means cooking food quickly in a hot pan with a small amount of fat.
- Use medium-high heat and avoid overcrowding the pan.
- Dry the food before cooking so it browns instead of steams.
- Keep ingredients moving, but don’t stir constantly.
- The goal is fast browning with tender interiors.
How to Sauté Properly: Heat, Oil, Pans, and Pro Tips Explained
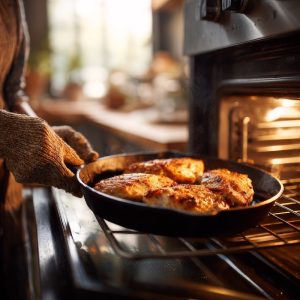
Sautéing is one of the fastest ways to build flavor in the kitchen. With a hot pan, a small amount of oil, and the right technique, you can cook vegetables, shrimp, chicken, and more until beautifully browned instead of steamed or soggy.
In this guide, you’ll learn how to sauté properly, including the best pans, oils, temperatures, and timing cues to use. Once you understand how heat, space, and movement work together, sautéing becomes one of the easiest and most reliable cooking methods for quick weeknight meals.
Why Heat Matters in Sautéing
Sautéing works because food cooks quickly over relatively high heat. The hot surface of the pan rapidly browns the outside while keeping the inside tender and juicy.
When the heat is too low, food releases moisture faster than it can evaporate. Instead of browning, the food steams in its own liquid and turns pale, soft, and soggy.
Good Sautéing Depends on 3 Things
- High heat creates fast browning
- Dry surfaces help food caramelize instead of steam
- Enough space allows moisture to escape quickly
This is why overcrowding the pan causes problems. Too much food lowers the pan temperature and traps steam, making it difficult to develop that golden crust sautéing is known for.
A good sauté should sound lively and steady. If you hear gentle sizzling and see gradual browning, you’re on the right track.
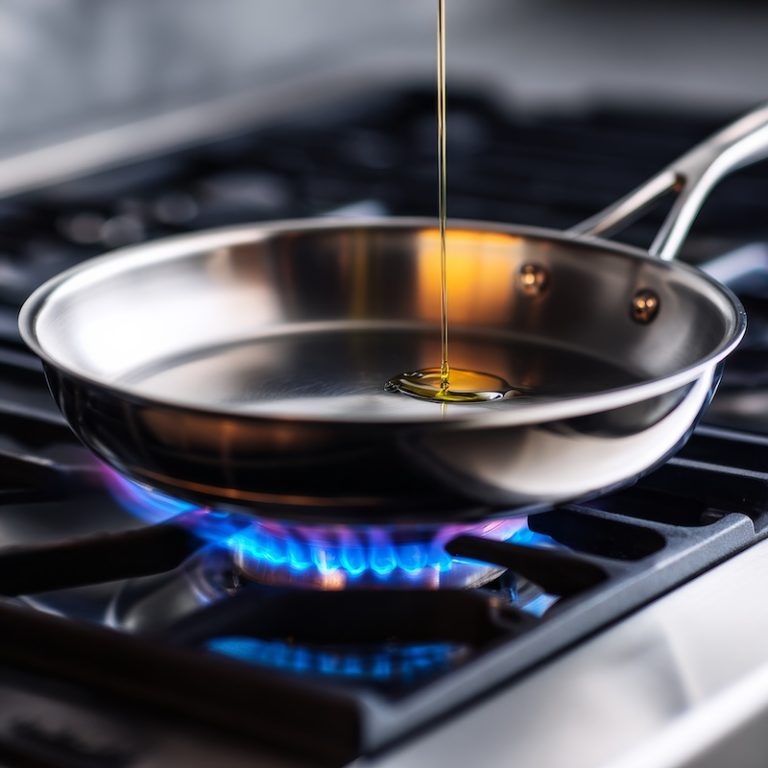
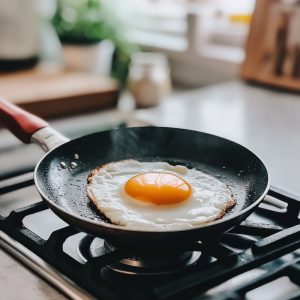
How to Preheat a Pan for Sautéing
A properly heated pan is the difference between golden browning and soggy steaming. The goal is to get the pan hot enough to create immediate sizzling without overheating the oil or burning the food.
How to Know Your Pan Is Ready
- Oil shimmers and flows easily across the surface
- Butter foams gently but does not brown instantly
- Food sizzles the moment it touches the pan
- The pan smells warm and toasty, not smoky
Simple Preheating Method
| Step | What To Do | What You’re Looking For |
|---|---|---|
| 1 | Place the empty pan over medium-high heat | The pan gradually heats evenly |
| 2 | Wait 1–3 minutes depending on pan thickness | The surface feels hot and responsive |
| 3 | Add oil or butter | Oil shimmers or butter foams gently |
| 4 | Add food immediately | You hear a steady sizzling sound |
What Your Pan Is Telling You
- Too Cool: Weak sizzling, pale food, moisture pooling in the pan
- Too Hot: Smoking oil, rapidly browning butter, burned garlic
- Just Right: Steady sizzling and gradual golden browning
One of the biggest sautéing mistakes is heating the pan while still chopping ingredients. By the time the food is ready, the pan is often overheated and the oil begins to smoke.
That’s why professional cooks prep everything first, then heat the pan. Once sautéing starts, things move quickly.

How to Tell If Your Sauté Is Working
✅ Your Pan Is Ready
- Oil shimmers and moves easily in the pan
- Butter foams gently but does not brown instantly
- Food sizzles the moment it touches the surface
- The pan smells warm and slightly nutty, not smoky
Start cooking immediately for best browning.
🔥 Your Heat Is Too High
- Oil smokes heavily before food is added
- Garlic browns in seconds
- Butter turns dark almost immediately
- Food burns outside before cooking inside
Lower heat for 30 seconds before adding food.
💨 Your Food Is Steaming
- Liquid pools in the pan
- You hear little or no sizzling
- Food turns pale or gray instead of golden
- The pan feels crowded and wet
Start cooking immediately for best browning.
Choosing the Right Fat for Sautéing
The fat you use can make or break a sauté. Butter adds incredible flavor but burns quickly, while refined oils tolerate higher heat and help food brown more evenly.
Quick Tips for Sautéing Fats
- Butter adds flavor but can burn fast
- Refined oils like canola or peanut oil handle higher heat better
- Combining butter and oil gives you both flavor and heat protection
- If the oil smokes heavily, the pan is too hot
One of my favorite approaches is using half butter and half oil. The oil raises the smoke point while the butter adds rich flavor and beautiful browning.
Add the oil first, then swirl in the butter. When the butter melts and foams gently, your pan is ready for sautéing.
Prep Matters More Than Most Cooks Realize
Sautéing happens fast. Really fast. Once the pan is hot, there’s very little time to stop, chop, or rethink your next step. That’s why good sautéing starts before the pan ever touches the burner.
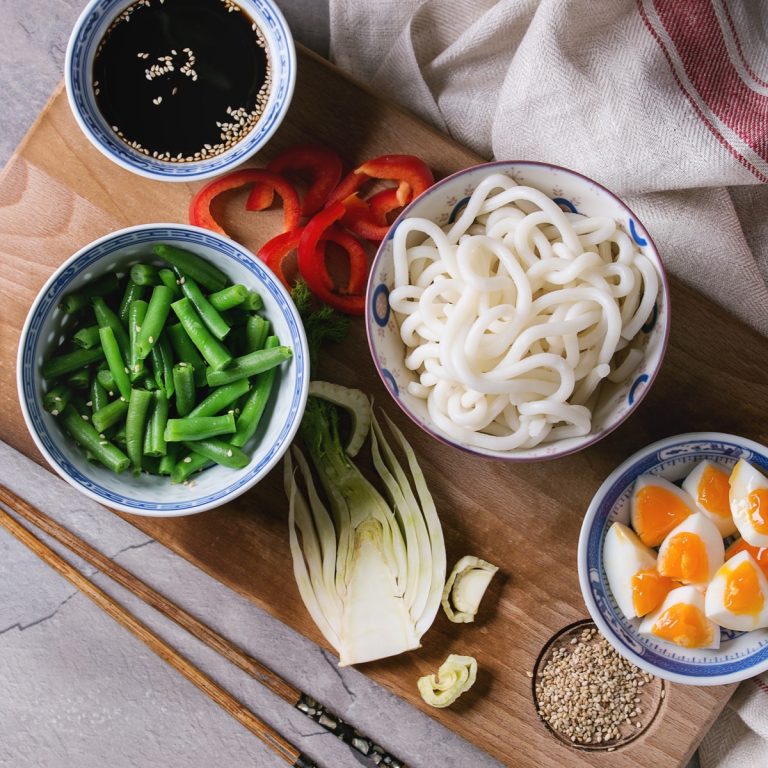
Start With Small, Even Pieces
- Thin or small cuts cook quickly and brown evenly
- Large pieces burn outside before the center cooks through
- Uniform size helps everything finish at the same time
- Smaller cuts create more surface area for browning and flavor
Best Sizes for Sautéing
| Ingredient | Ideal Size | Why It Works |
|---|---|---|
| Chicken breasts or pork chops | About ½ inch thick | Cooks through before the outside burns |
| Steak strips or stir-fry meat | ¾-inch chunks or thin slices | Browns quickly while staying juicy |
| Onions, carrots, celery | ¼-inch dice | Cook evenly and soften at the same rate |
| Garlic and aromatics | Finely minced | Releases flavor quickly into the pan |
Prep Everything Before Heating the Pan
- Chop and measure ingredients first
- Heat the pan only after everything is ready
- Add oil or butter once the pan is hot
- Start cooking immediately after adding fat
Professional chefs call this mise en place, a French term meaning “put in place.” It simply means getting organized before cooking starts.
This prevents one of the biggest sautéing mistakes: overheated pans and burned oil while you’re still chopping ingredients.
A good sauté should feel controlled and calm. No scrambling. No burned garlic. Just steady sizzling and better browning.

The Formula To A Great Saute
Saute Technique = Good Saute Pan + High Heat + A Little Fat + Uniformly Cut Ingredients
How to Sauté Step-by-Step
- Preheat the pan before adding oil
- Add just enough oil to lightly coat the surface
- Pat food dry to encourage browning
- Place food in a single layer
- Leave it alone long enough to develop color
- Toss or stir occasionally, not constantly
- Cook until browned outside and tender inside
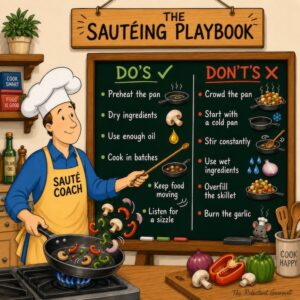
Most Sauté Problems Come Down to 3 Things
- Your pan isn’t hot enough
- Your pan is overcrowded
- You’re moving the food at the wrong time
Why Your Sauté Isn’t Working
| Mistake | What Happens | Quick Fix |
|---|---|---|
| Pan isn’t preheated | Food sticks and browns unevenly | Heat the pan first, then add oil or butter |
| Cold ingredients go straight into the pan | Pan temperature drops and food steams | Let ingredients sit at room temperature for 10–15 minutes |
| Overcrowding the pan | Moisture gets trapped and food turns soggy instead of golden | Cook in batches and leave space between ingredients |
| Heat is too high | Oil smokes and food burns before the inside cooks | Lower the heat if butter darkens quickly or oil smokes heavily |
| Using too much fat | Food becomes greasy instead of lightly sautéed | Use only enough oil or butter to lightly coat the pan |
| Moving food at the wrong time | Too much movement prevents browning; too little causes burning | Let food sit briefly to develop color, then stir or toss as needed |
| Using the wrong pan | Uneven heating makes browning difficult | Use a heavy-bottomed skillet or sauté pan for better heat retention |
| Ignoring visual and aroma cues | You miss the perfect moment for browning and doneness | Watch for sizzling, color changes, and nutty aromas instead of relying only on time |
🔥 Take the Sauté Quiz
Click the best answer. Let’s see if you sauté like a pro!
Sautéing FAQ: Everything You Need to Know
What does sauté mean in cooking?
Sauté comes from the French word sauter, meaning “to jump.” In cooking, it refers to cooking food quickly in a shallow pan over relatively high heat using a small amount of fat. The food moves frequently, either by stirring or tossing, so it browns evenly without burning.
What is the purpose of sautéing?
Sautéing develops flavor through browning while keeping food tender and moist. The high heat encourages caramelization and Maillard reactions, which create deeper, richer flavors in vegetables, meats, and aromatics.
What temperature is best for sautéing?
Medium-high to high heat works best. The pan should be hot enough that food sizzles immediately when it hits the surface. If the pan is too cool, food releases moisture and steams instead of browning.
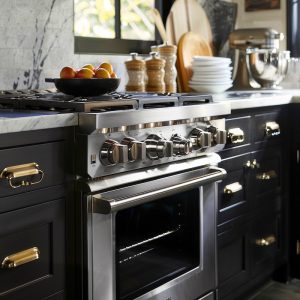
What kind of pan is best for sautéing?
Wide, shallow pans with straight or slightly flared sides work best. Stainless steel, carbon steel, and cast iron are excellent choices. Nonstick pans can be used, but they limit browning and fond development.
More FAQ Questions & Answers
How much oil should I use when sautéing?
Use just enough oil to lightly coat the bottom of the pan. Too little oil causes sticking. Too much oil leads to shallow frying rather than sautéing.
What oils are best for sautéing?
Choose oils with a higher smoke point, such as avocado oil, grapeseed oil, peanut oil, or refined olive oil. Butter can be used but often works best combined with oil to prevent burning.
Why is my food sticking to the pan?
Food sticks when the pan isn’t hot enough, the oil hasn’t heated properly, or the food is moved too soon. Once browning begins, food naturally releases from the pan.
Why does my food turn out soggy instead of browned?
Crowding the pan lowers the temperature and causes moisture to build up. This leads to steaming rather than sautéing. Cook in batches if needed.
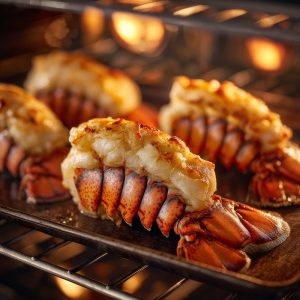
What foods are best for sautéing?
Vegetables, thin cuts of meat, seafood, aromatics, and sliced proteins work especially well. Uniform size ensures even cooking.
Can you sauté without oil?
You can use broth or water, but the result is closer to steaming than sautéing. Oil or fat is essential for proper browning and flavor development.
What’s the difference between sautéing and pan-frying?
Sautéing uses higher heat and less fat, with constant movement. Pan-frying uses more oil and slightly lower heat, allowing food to sit longer and form a thicker crust.
Should I season before or after sautéing?
Light seasoning before cooking enhances flavor, but finishing with salt at the end helps prevent moisture release and preserves browning.
How do you sauté vegetables properly?
Start with a hot pan and oil. Add vegetables in a single layer, avoid crowding, and stir occasionally. Hard vegetables go in first; tender ones follow.
How long does sautéing usually take?
Most sautéing takes between 3 and 10 minutes, depending on the ingredient. The goal is quick cooking with visible browning.
What are the most common sautéing mistakes?
Using a cold pan, overcrowding, moving food too often, using the wrong oil, and cooking at too low a heat are the biggest issues.


11 Responses
Thanks, that was very helpful.
How do I choose what type of meat is best to saute?
Choose tender cuts that cook quickly over high heat, such as chicken cutlets, pork tenderloin, shrimp, thin steaks, or boneless fish fillets. Tough or thick cuts usually need slower cooking methods because the outside can burn before the inside finishes cooking.
Anyway to tell what temperature your stove is on without a thermometer, cause I have a gas stove and it only goes by low numbers(2-10). I put it on 4 because 6 seems too hot (or maybe I wait too long), but it still steam immediately. Can it also cause steaming immediately if you don’t put enough of fat?
Hi Sharelle,
Steam can happen even before your fat is hot enough, and here’s why:
Too little fat – If there’s not enough oil or butter, water released from food doesn’t have room to spread and evaporate fast. It steams and simmers instead.
Crowded pan – Too much food too fast drops the pan’s temp. Steam builds before browning starts.
Wet ingredients – Moisture on veggies or meat creates instant steam. Pat them dry with paper towels before cooking.
Pan not hot enough yet – Even on medium heat, a pan might not be fully preheated. Always wait until the oil shimmers (or butter bubbles) before adding food.
Really excellent, specific teaching, yet explained well enough for a first timer like me. Tomorrow will be the test and this stuff is Gold!
Many thanks.
Dan
“The Reluctant Gourmet uses a combination of the two. This way I get some of the flavor from the butter and a higher smoking point from the oil.”
You realise that the butter is going to burn to matter how much oil you add to it? It’s the solids in the butter that burn.
Use Clarified butter .
Clarified butter is probably one of the most important ingredients to any chef. You will never find a professional kitchen without an abundant supply of this liquid gold! Except for fast food places. If you removed any ingredients from a saute station, that person could make do with something else. Take away their clarified butter and they walk out!
Using half oil and half butter is an ancient frying technique in some regions of Europe (e.g. in Piedmont). My grandmother always used to fry with half-half; so do I, with exceptions. The butter will NOT burn (unless you neglect it, of course).
Regarding clarified butter: I love it – make it myself (as well as beurre noisette) – but it does not impart he same full flavour that good butter does.
Teeton9, butter contains about 15–20% milk solids and water, and those solids burn quickly, usually around 350°F (177°C). That’s why pure butter starts to brown or smoke even at medium heat.
When you mix butter with oil: The oil raises the overall smoke point of the mixture. It dilutes the milk solids, slowing their browning. The pan stays hot enough to sauté while reducing the risk of burning the butter.