10 Best Ways to Cook Bacon: From Stovetop to Sous Vide

Stovetop Cooked Bacon

Most Recent Posts

24% Off at Amazon

Air Fryer
Ninja Air Fryer

30% Off at Amazon

Nugget Ice Maker
Nugget Ice Maker

The Best Techniques for Cooking Bacon: Grill It, Fry It, Bake It

Bacon is one of the kitchen’s most versatile and beloved ingredients, and there’s no shortage of delicious cooking methods. Whether you’re after crispy strips for breakfast, chewy pieces for a sandwich, or flavorful bits to top a salad, the method you choose makes all the difference. 

Each technique brings out different textures and flavors in bacon from the stovetop to the oven and even the microwave or air fryer. Some methods are quick and convenient, while others offer more control and a gourmet touch.

In this post, I’ll explain the many ways to cook bacon and show you how to get the results you want every time. You’ll learn the pros and cons of each method, tips to avoid common mistakes, and tricks for easy cleanup. 

Whether you’re a seasoned bacon lover or just getting started, you’ll find a new favorite way to prepare it. No matter how you cook it, bacon always adds a savory, smoky punch to any dish. Let’s dive into the sizzle and explore what makes each method unique—and how to make the most of every strip.

10 Ways to Cook Bacon

Here’s a full list of the many ways you can cook bacon, each with its own perks depending on the texture, flavor, and convenience you’re after:

  1. Stovetop (Skillet or Frying Pan)
    • Classic method
    • Great for crispy or chewy texture control
  2. Oven-Baked
    • Even cooking, less mess
    • Perfect for cooking large batches
  3. Air Fryer
    • Fast and crispy
    • Less grease, easy cleanup
  4. Microwave
    • Quickest method
    • Good for small servings, but can get rubbery if overcooked
  5. Grill or BBQ
    • Smoky flavor
    • Great for thick-cut or flavored bacon
  6. Baked on a Wire Rack
    • Renders fat away
    • Results in crispy, evenly cooked strips
  7. In the Oven on Parchment Paper or Foil
    • Easy cleanup
    • Bacon cooks in its own fat for rich flavor
  8. Sous Vide (then seared)
    • Uncommon but precise
    • Keeps bacon tender before finishing it with a crisp sear
  9. Deep Fried
    • Super crispy
    • Quick but very rich
  10. In a Waffle Iron or Panini Press
  • Fun and fast
  • Pressed bacon = extra crispy

On the Stovetop

Cooking bacon in a frying pan on the stovetop is a timeless method that delivers unbeatable flavor and texture. It puts you in full control, letting you adjust the heat, monitor doneness, and choose between soft, chewy slices or crispy perfection.

Whether you’re preparing breakfast, building a sandwich, or adding bacon to a recipe, the stovetop method offers a satisfying sizzle and rich aroma that fills the kitchen.

Start by placing cold bacon strips in an unheated pan—preferably cast iron or stainless steel. As the pan warms, the fat slowly renders, helping the bacon cook evenly and develop deep flavor. There’s no need for extra oil; bacon provides its own. You can turn the strips occasionally for even browning, adjusting the heat to prevent burning.

One of the best parts about pan-frying bacon is that you can see and feel each step, making it easy to get the results you want. Plus, the rendered fat left behind is liquid gold for cooking eggs, vegetables, or cornbread.

 If you love bacon, this method is a must-master.

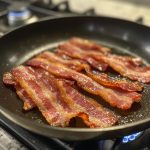
Cooking Bacon on the Stovetop in Fry Pan

The classic way of cooking bacon
Course: Breakfast
Cuisine: American
Keyword: bacon, stovetop
Servings: 3 people

Equipment

  • 1 frying pan or skillet
  • tongs or fork
  • paper towels
  • plate for draining

Ingredients

  • 6 slices bacon or as many as fit in your pan without overlapping

Instructions

Start cold

  • Lay the bacon strips in a cold pan. Do not overlap. This helps the fat render slowly and evenly.

Turn on the heat

  • Set the stove to medium heat. As the pan heats, the bacon will begin to sizzle and shrink.

Flip as needed

  • Use tongs to turn the bacon every couple of minutes. Flip more often for even cooking and to control crispness.

Adjust the heat

  • If the bacon starts smoking or browning too fast, lower the heat slightly to prevent burning.

Check doneness

  • Cook for 8–12 minutes, depending on thickness and preferred crispiness.

Drain

  • Once done, transfer bacon to a paper towel-lined plate to drain excess grease.

Save that fat (optional)

  • Carefully pour the rendered bacon fat into a heat-safe jar to use in future recipes.
Oven Cooked Bacon

In the Oven

Cooking bacon in the oven is one of the easiest, cleanest, and most efficient methods—especially when feeding a crowd. It delivers evenly cooked, crispy strips without the constant flipping or splattering you get on the stovetop. All you need is a baking sheet, some foil or parchment paper, and an oven set to 400°F (204°C).

To start, line a rimmed baking sheet with foil or parchment for easy cleanup. Arrange the bacon strips in a single layer, making sure they don’t overlap. If you want extra-crispy bacon, place a wire rack on the sheet and lay the strips on top. This allows the fat to drip down and the heat to circulate more evenly.

Bake the bacon for 15–20 minutes, depending on thickness and desired crispness. There’s no need to flip—just watch it closely in the final minutes. Once done, transfer the strips to a paper towel-lined plate to absorb any excess grease.

Oven-baking also gives you the bonus of clean, rendered bacon fat in the pan, which you can save for cooking later. Whether you’re making breakfast for a crowd or prepping bacon for recipes, the oven method is reliable, hands-off, and delivers delicious, picture-perfect results every time.

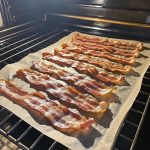
Cooking Bacon in the Oven

Surefire way to cook bacon perfectly in the oven.
Course: Breakfast
Cuisine: American
Keyword: bacon, oven cooked bacon
Servings: 4 people

Equipment

  • Rimmed baking sheet
  • Aluminum foil or parchment paper
  • Optional: wire rack
  • tongs
  • paper towels
  • Plate for draining

Ingredients

  • 12 slices bacon or as many as fit in a single layer on your sheet

Instructions

Preheat oven

  • Set your oven to 400°F (204°C) and let it fully preheat.

Prep the pan

  • Line a rimmed baking sheet with foil or parchment paper for easy cleanup.Optional: Place a wire rack on top for extra-crispy bacon.

Arrange the bacon

  • Lay the strips in a single layer, with no overlapping. They can be close, but not touching too much.

Bake

  • Cook for 15–20 minutes, depending on thickness and crispness preference.Start checking around the 12–15 minute mark to avoid overcooking.

Drain

  • Remove bacon with tongs and place on a paper towel-lined plate to drain.

Save the fat (optional)

  • Let the fat cool slightly, then pour into a heatproof jar to use for cooking later.
Air Fryer Cooked Bacon

In An Air Fryer

Cooking bacon in an air fryer is fast, easy, and results in beautifully crispy strips with minimal mess.

The circulating hot air crisps up the bacon evenly, and the excess fat drips away into the bottom of the basket, making this method slightly less greasy than traditional pan-frying. It’s perfect when you want bacon in a hurry—most batches are ready in under 10 minutes.

To start, preheat your air fryer to 350°F (175°C) if your model recommends it. Lay the bacon strips in a single layer in the basket or tray. Depending on the size of your air fryer, you may need to cut the strips in half or cook in batches. Slight overlap is okay; the pieces will shrink as they cook.

Air fry the bacon for 7–10 minutes, checking for doneness around the 6-minute mark. Thinner bacon cooks faster, while thick-cut may need a minute or two longer. Once crisped to your liking, transfer the bacon to a paper towel-lined plate to absorb any extra grease.

Cleanup is easy—just empty and wipe down the grease tray. The air fryer is a great option if you’re looking for a quick, hands-off method that still delivers that satisfying crunch.

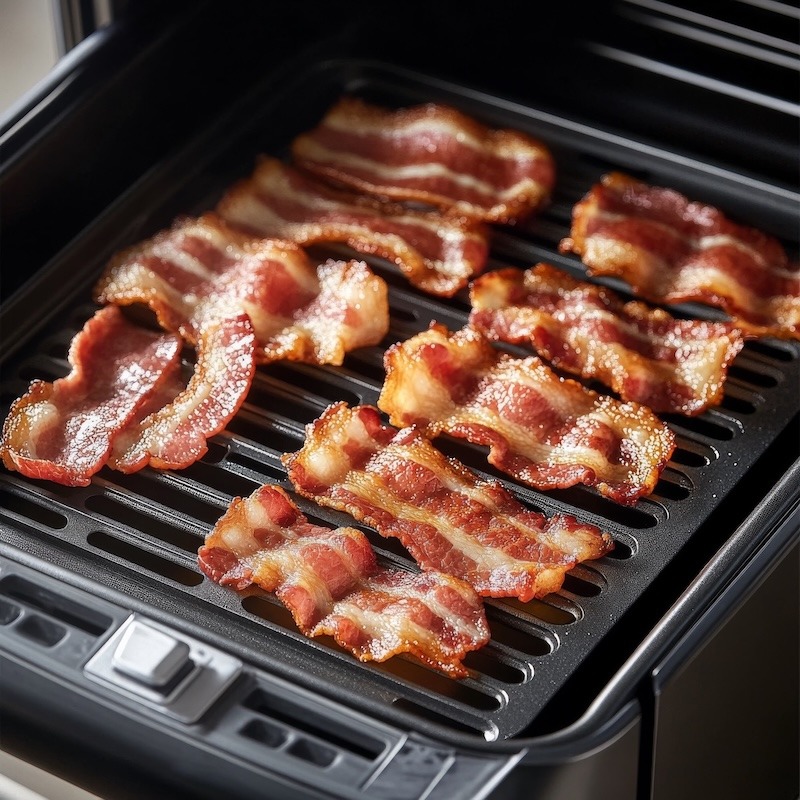
Air Fryer Bacon Recipe

Make bacon fast and crispy in an air fryer
Course: Breakfast
Cuisine: American
Keyword: air fryer bacon, bacon
Servings: 3 people

Equipment

  • Air Fryer
  • tongs
  • paper towels
  • Plate for draining

Ingredients

  • 6 slices bacon regular or thick-cut

Instructions

Preheat (if needed)

  • Some air fryers require preheating—if yours does, set it to 350°F (175°C) and let it warm up.

Arrange the bacon

  • Place the bacon in a single layer in the basket or tray. Slight overlapping is okay since bacon shrinks, but avoid crowding. For large batches, cook in rounds.

Cook

  • Air fry at 350°F (175°C) for 7–10 minutes, depending on thickness and your preferred crispiness.Thin-cut: 7–8 minutesThick-cut: 9–10 minutes

Check and flip (optional)

  • At the halfway point (around 4–5 minutes), check progress. Flip if you want extra even crisping.

Drain

  • :Use tongs to transfer bacon to a paper towel-lined plate to absorb extra grease.

Clean up

  • Let the grease tray cool, then empty and wipe clean.
Microwave Cooked Bacon

In the Microwave

Cooking bacon in the microwave is fast, convenient, and surprisingly effective when you’re short on time. This method works best for small batches and delivers crispy results with minimal mess. Using just a microwave-safe plate, some paper towels, and a few minutes, you can go from raw to ready without turning on the stove.

Start by lining a microwave-safe plate with paper towels to absorb grease. Lay the bacon strips flat in a single layer without overlapping. Cover them with another paper towel to prevent splattering. Microwave on high for 4 to 6 minutes, depending on your microwave’s power and the thickness of the bacon. Check for doneness around the 4-minute mark and continue cooking in 30-second increments if needed.

The bacon will continue to crisp slightly as it cools, so don’t worry if it looks a little soft at first. Once done, remove the bacon and drain it on a paper towel-lined plate.

This method doesn’t render fat as cleanly as oven or skillet methods, and the texture may vary slightly—but when you need bacon quickly, the microwave delivers. It’s perfect for weekday breakfasts, sandwiches, or any time you want bacon with zero fuss.

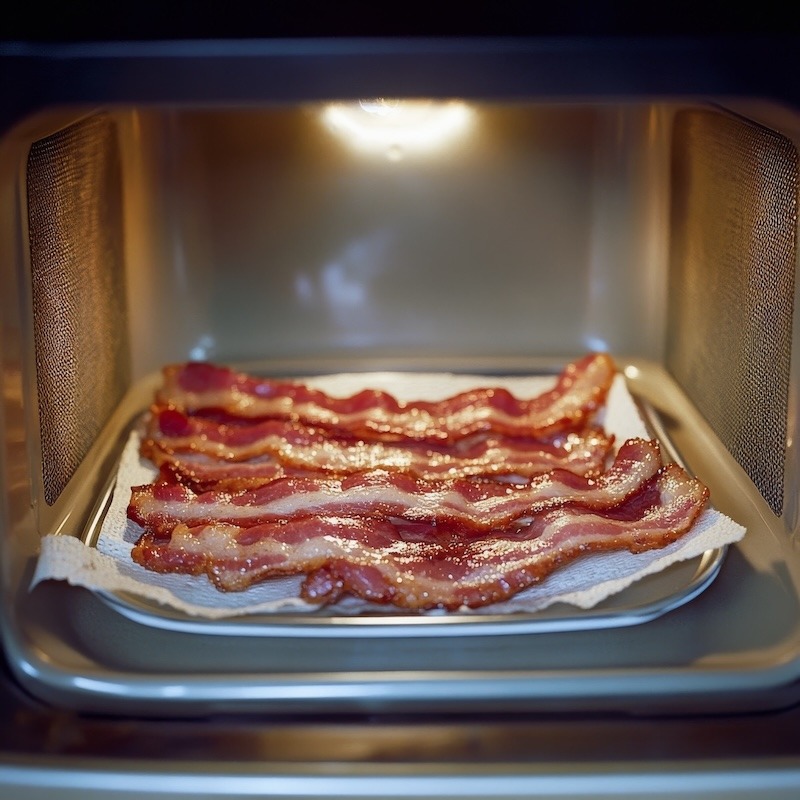
Microwave Bacon Recipe

Fast and easy way to cook bacon.
Course: Breakfast
Cuisine: American
Keyword: bacon, microwave bacon
Servings: 3 people

Equipment

  • Microwave-safe plate
  • paper towels
  • Microwave
  • tongs or fork

Ingredients

  • 6 slices bacon regular cut works best

Instructions

Line the plate

  • Place 2–3 layers of paper towels on a microwave-safe plate. These will soak up the grease.

Arrange the bacon

  • Lay the bacon strips in a single layer on top of the paper towels. Avoid overlapping for even cooking.6 slices bacon

Cover it

  • Place another paper towel over the bacon to catch splatters.

Microwave

  • Cook on high for 4–6 minutes, depending on your microwave and the thickness of the bacon.

Regular-cut:

  • Start with 4 minutes.

Thick-cut:

  • Start with 5 minutesAdd time in 30-second increments until it reaches your desired crispness.

Cool and drain

  • Use tongs to transfer the bacon to a fresh paper towel to cool and crisp further.

Notes

RG Tip: Want perfectly flat bacon? Place a second plate on top (over the paper towel cover) to keep it from curling!
Grilled Bacon
Grilled Bacon

On the Grill Bacon

Grilling bacon adds a smoky, charred flavor that takes this classic ingredient to the next level. The open flame crisps the edges while infusing the strips with that irresistible grilled taste. Whether you’re cooking it alongside burgers or making it the star of the show, grilling bacon is a flavorful, fun method that’s great for outdoor cooking.

To get started, preheat your grill to medium heat—around 350°F to 400°F. Use thick-cut bacon for best results, as thinner strips may burn or fall through the grates. To prevent flare-ups and sticking, lay the bacon perpendicular to the grates or use a grill-safe tray or cast iron skillet.

Place the bacon directly on the grill and close the lid. Let it cook for about 5–7 minutes, then flip with tongs and grill for another 3–5 minutes, depending on how crispy you want it. Keep a close eye on it—bacon cooks fast, and flames can flare.

Once it’s done, transfer the bacon to a paper towel-lined plate to drain. Grilled bacon pairs perfectly with breakfast, burgers, salads, or even as a smoky snack.

Grilling bacon may take a little more attention, but the flavor is absolutely worth it. Give it a try next time you fire up the grill!

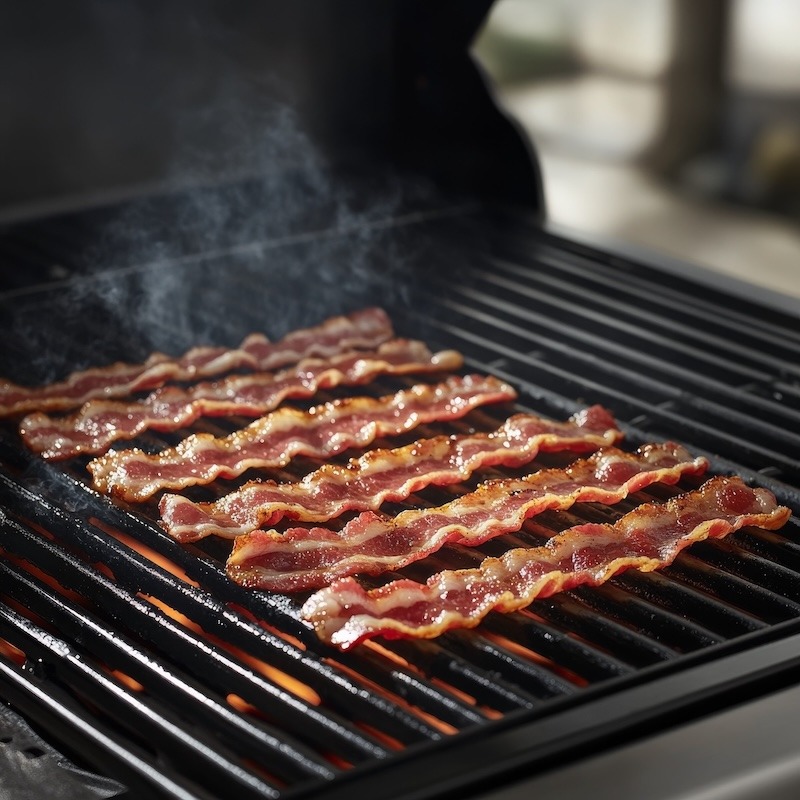
Grilled Bacon Recipe

How to grill bacon to perfection.
Course: Breakfast
Cuisine: American
Keyword: bacon, grilled bacon, grilled bacon recipe
Servings: 4 people

Equipment

  • Outdoor grill (gas or charcoal)
  • tongs
  • Grill-safe tray, cast iron skillet, or foil (optional but helpful)
  • paper towels
  • Plate for draining

Ingredients

  • 8 slices bacon thick-cut

Instructions

Preheat the grill

  • Heat your grill to medium heat (350°F–400°F).

Prep the bacon

  • Use thick-cut bacon to reduce the risk of burning or slipping through the grates.Optional: Line a grill-safe tray or pan with foil for easier handling.8 slices bacon

Grill the bacon

  • Place strips directly on the grates perpendicular to the lines, or on your grill-safe tray/skillet.Close the lid and cook for 5–7 minutes.

Flip

  • Use tongs to carefully flip the bacon. Grill for another 3–5 minutes until crispy and browned.

Drain and cool

  • Remove bacon and place on a paper towel-lined plate to absorb extra grease.

Serve

  • Enjoy as a side, topping, or snack—grilled bacon adds smoky flavor to any dish.
Sous Vide Cooked Bacon

Sous Vide Bacon

Cooking bacon using the sous vide method may sound unconventional, but it offers precise temperature control and a unique texture that combines tenderness with rich, deep flavor. This technique allows the bacon to slowly cook in its own fat, infusing each slice with smoky goodness while keeping it juicy and meaty. It’s ideal for thick-cut bacon or for recipes where you want a more tender bite without sacrificing flavor.

To start, place bacon strips in a single layer inside a vacuum-seal or zipper-lock bag using the water displacement method if necessary. Seal the bag and set your sous vide water bath to 145°F (63°C) for chewy bacon or 165°F (74°C) for a more traditional, rendered texture. Let the bacon cook for 8 to 24 hours, depending on how rich and tender you want it.

After sous vide cooking, the bacon won’t be crispy—yet. To finish, quickly sear the strips in a hot skillet or under a broiler for 1–2 minutes per side to add a crispy edge.

This method takes time, but it rewards you with bacon that’s intensely flavorful, evenly cooked, and incredibly tender. It’s a great choice when you want to prep bacon ahead and finish it fresh right before serving.

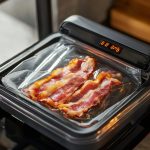
How to Sous Vide Bacon

Unique but very effective, sous vide bacon.
Course: Breakfast
Cuisine: American
Keyword: bacon, sous vide bacon, sous vide bacon recipe
Servings: 3 people

Equipment

  • Sous vide immersion circulator
  • Large pot or sous vide container
  • Vacuum sealer or zipper-lock freezer bag
  • Skillet or broiler (for finishing)
  • tongs
  • paper towels

Ingredients

  • 8 slices bacon thick-cut

Instructions

Prep the bacon

  • Arrange the bacon strips in a single layer inside a vacuum-seal bag or a zipper-lock freezer bag. If stacking, separate layers with parchment paper.

Seal the bag

  • Use a vacuum sealer, or if using a zipper bag, use the water displacement method: slowly lower the bag into the water to push out air, then seal.

Sous vide cook

  • Set water bath to 145°F (63°C) for chewy texture, or 165°F (74°C) for more rendered, tender bacon.
  • Submerge the sealed bag and cook for 8–24 hours.

Remove and dry

  • Take bacon out of the bag and pat dry with paper towels.

Crisp and serve

  • Sear in a hot skillet or under a broiler for 1–2 minutes per side until crispy. Serve immediately.

Leave a Reply

Your email address will not be published. Required fields are marked *

Recipe Rating


This site uses Akismet to reduce spam. Learn how your comment data is processed.