A Thanksgiving Checklist for a Perfect Meal
Thanksgiving is a time to celebrate family, friends, and gratitude—but let’s be honest, it can also be stressful. Between prepping the turkey, baking pies, and setting the table, it’s easy to feel overwhelmed. This is where a Thanksgiving checklist comes in handy.
That’s where a Thanksgiving checklist comes in. You can transform a potentially hectic day into a smooth, enjoyable celebration with a little planning and organization.
Think of this checklist as your roadmap to success. It will help you stay on top of tasks, from defrosting the turkey days in advance to timing your side dishes perfectly. Plus, we’ve included some pro tips to handle last-minute hiccups and ensure everything comes together without a hitch.
Whether you’re hosting your first Thanksgiving or a seasoned pro, this guide can help streamline your day, leaving more time for what really matters: sharing a meal with loved ones and creating lasting memories. So, grab a pen, pour yourself a coffee, and let’s tackle this holiday together. By the end, you’ll be ready to serve a meal you’re proud of, without feeling frazzled. A stress-free Thanksgiving is possible—you just need the right plan. Let’s dive in!
When You Should Take the Turkey Out of the Freezer
You should start defrosting a frozen turkey in the refrigerator 24 hours for every 4 to 5 pounds of weight. For example:
- 4 to 12 pounds: 1 to 3 days
- 12 to 16 pounds: 3 to 4 days
- 16 to 20 pounds: 4 to 5 days
- 20 to 24 pounds: 5 to 6 days
Be sure to place the turkey in a container or on a tray to catch any juices as it thaws, and keep the refrigerator at 40°F (4°C) or below. Starting early ensures the turkey thaws evenly and safely. If you’re running short on time, a cold water thawing method is also an option, but it requires constant attention and frequent water changes.
I Forget to Defrost the Turkey
If you’ve forgotten to defrost the turkey and it’s Thanksgiving day, don’t panic—there are still options to save the meal! Here are a couple of methods you can try:
-
Cold Water Thawing:
- Time required: About 30 minutes per pound.
- Place the turkey in a sink or large container filled with cold water, ensuring it’s fully submerged. Change the water every 30 minutes to keep it cold. Once thawed, cook the turkey immediately. This method can defrost a 12-pound turkey in about 6 hours, so if you’re in a pinch, this could be your best bet.
-
Cook It from Frozen:
- Time required: Add about 50% more cooking time.
- If you’re really running short on time, you can cook the turkey directly from frozen. It will take longer than a thawed turkey (about 50% more cooking time), but it’s completely safe. Roasting a frozen turkey will keep it moist and flavorful, and the skin will crisp up beautifully. Just be sure to check the internal temperature (165°F in the breast and 175°F in the thigh) before serving.
In both cases, you’ll still have a delicious Thanksgiving turkey—just a little more time pressure!
OK, The Turkey Is Defrosted and Sitting in the Refrigerator. When Do I Need To Take It Out?
You should remove the turkey from the refrigerator 30 to 60 minutes before cooking. Allowing it to sit at room temperature for this short period helps it cook more evenly. If it’s too cold when placed in the oven, the outer parts may cook faster than the center, resulting in uneven cooking.
Just be sure not to leave the turkey out for more than 2 hours, as leaving it at room temperature too long can pose food safety risks. Once it’s out, you can proceed with seasoning and prepping for roasting or whichever cooking method you’ve chosen.
Have Your Ingredients Ready to Cook or Mise en Place
To ensure your ingredients are ready to go before cooking, follow these steps:
-
Read Through Your Recipe:
Carefully read the entire recipe to understand the process and timing. This will help you anticipate what needs to be done ahead of time. -
Gather All Ingredients:
Lay out everything you need for the recipe—meats, vegetables, herbs, spices, liquids, etc. This way, you won’t have to scramble for ingredients while cooking. -
Measure and Prep Ingredients:
- Measure out all spices, liquids, and dry ingredients into separate bowls or containers. This is known as mise en place (everything in its place) and ensures you’re not rushing to measure while cooking.
- Chop, dice, or slice vegetables, herbs, and meats as needed. For the turkey, you may want to trim excess fat or remove the giblets if not already done.
- Make sure all items are prepped and ready for the next steps. For example, if your recipe requires marinating, do this ahead of time.
-
Preheat Your Oven (or Cooking Equipment):
If your recipe calls for baking, roasting, or grilling, preheat the oven or cooking equipment so it’s ready when you are. -
Organize Your Tools:
Make sure your pots, pans, knives, and cooking utensils are all clean and ready. Having them within reach will make the cooking process more efficient.
By doing this, you’ll feel more confident and have a smoother cooking experience. It’s all about preparation!
Look over your menu.
Looking at the menu before starting is essential for a smooth cooking experience, especially for a big meal like Thanksgiving. Here’s why:
-
Plan Your Timing:
By reviewing the menu, you’ll have a better sense of when to start cooking each dish. Some items (like the turkey) take longer to cook than others (like salads or sides). Knowing what needs to be done first helps you manage the timing, ensuring everything is ready to serve at the same time. -
Avoid Overlaps and Confusion:
A quick look at the menu helps you identify which ingredients or tools you may need for multiple dishes. You can prep them all at once and avoid confusion while cooking, saving time. -
Know What Needs Prepping:
Some dishes require longer prep times, such as marinating or resting. Reviewing the menu gives you a heads-up on which dishes need attention ahead of time, like setting the turkey out to warm up before cooking or letting dough rise. -
Double-Check Ingredients:
Reviewing the menu helps you confirm that you have all the ingredients needed for each dish, preventing last-minute trips to the store. -
Anticipate Cooking Methods:
Knowing how each dish is prepared (baked, sautéed, grilled, etc.) will help you set up your cooking space, choose the right equipment, and avoid multitasking errors.
By looking over your menu first, you’re setting yourself up for a more organized, stress-free cooking experience.
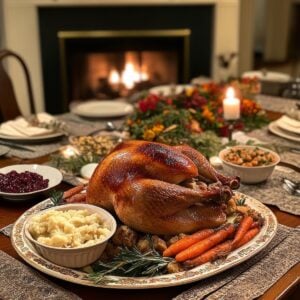
Set the table.
Setting the table in the morning before the big meal offers several key benefits that help reduce stress and ensure everything runs smoothly when it’s time to serve:
-
Avoid Last-Minute Rush:
Thanksgiving can get hectic, especially with the final touches on the meal. Setting the table early eliminates one task from your to-do list, giving you more time to focus on cooking, greeting guests, or dealing with any unexpected hiccups. -
Ensure You Have Everything:
When you set the table beforehand, you can double-check that you have all the necessary items—plates, silverware, glasses, napkins, and any special serving dishes. If something’s missing, you’ll have time to grab it before the meal begins. -
Create a Calm, Welcoming Atmosphere:
Setting the table in the morning allows you to arrange things thoughtfully, add decorative touches (like candles or centerpieces), and create a warm, welcoming environment for your guests without feeling rushed. -
Less Stress During Meal Time:
When the meal is ready, you’ll be able to focus on serving and enjoying the food with your guests instead of scrambling to set the table last minute. This also helps with timing, as you won’t have to worry about the presentation while everyone is seated. -
Free Up Time for Family Interaction:
Setting the table early gives you the freedom to spend quality time with your family or guests rather than feeling stuck in the kitchen. It’s one less thing to think about when you’re ready to sit down and enjoy the meal together.
By getting the table ready in the morning, you ensure a smoother, more relaxed Thanksgiving Day from start to finish.
Get your pans ready.
Getting your pans ready before you start cooking is important for several reasons:
-
Saves Time:
Prepping your pans in advance means you can immediately start cooking when the ingredients are ready. This helps you avoid delays, especially for dishes that require quick action, like searing meat or sautéing vegetables. -
Ensures Proper Heat Control:
Different cooking methods require different types of pans and heat levels. Having your pans ready ensures that they are heated to the right temperature before adding ingredients, which is crucial for achieving the best texture and flavor—whether you’re frying, sautéing, or roasting. -
Prevents Overcrowding:
If you’re making multiple dishes or need to cook large batches (like searing meat or vegetables), having the right pans available allows you to work in batches without overcrowding. This ensures even cooking and prevents ingredients from steaming instead of searing. -
Reduces Stress:
When you’re in the middle of cooking, the last thing you want is to have to scramble for the right pan. Having your pans prepped and in place eliminates unnecessary stress, letting you focus on the cooking process itself. -
Avoids Cooking Mistakes:
Some dishes require specific pans (like a nonstick pan for eggs or a heavy-duty pan for searing). Preparing your pans ahead of time ensures you’re using the correct one, preventing cooking mistakes and achieving the desired results.
Prepping your pans in advance ensures smoother cooking and better results, helping you stay organized and efficient.
Get all of your equipment ready.
Getting the rest of your kitchen tools ready before cooking is just as crucial as prepping your pans. Here’s why it’s important:
-
Efficient Workflow:
Having all your tools—knives, measuring spoons, tongs, whisks, etc.—within reach means you can move seamlessly between tasks without wasting time searching for what you need. This smooth workflow is especially important when you’re juggling multiple dishes. -
Prevents Last-Minute Stress:
Cooking during a busy holiday meal can get frantic. By organizing your kitchen tools ahead of time, you’ll avoid the frustration of scrambling to find a missing utensil in the middle of cooking. This makes the process more relaxed and enjoyable. -
Accuracy and Precision:
Having the right tools available ensures you can follow the recipe accurately. For example, using a zester, peeler, or garlic press will give you the exact texture or flavor profile the recipe calls for, and measuring spoons and cups will help with precise ingredient amounts. -
Helps You Stay Safe:
Certain tools, like cutting boards, can help prevent accidents. If you’ve set everything up correctly—like using the proper knife for each task and having a stable cutting surface—you reduce the risk of mishaps in the kitchen. -
Keeps You Organized:
Having all the necessary tools ready and within easy reach keeps your workspace tidy and prevents clutter. This reduces distractions, allowing you to focus on preparing the meal without feeling overwhelmed. -
Prepares for Multiple Tasks:
If you’re using different methods (e.g., roasting, sautéing, or boiling), you’ll need tools suited to each. By having them ready, you can easily switch from one task to another without having to clean or grab new tools mid-cooking.
By organizing and preparing your kitchen tools ahead of time, you’ll create a smoother, more efficient cooking experience. This preparation helps minimize stress, keeps everything moving smoothly, and ensures a more successful meal.
Wine time!
When it comes to wine for a holiday meal like Thanksgiving, there are several things to consider to ensure you have a great selection and are prepared to serve it properly:
-
Choose Your Wines Ahead of Time:
Decide which wines will pair best with your meal, considering both the turkey and any side dishes. Typically, a white wine like Chardonnay or Sauvignon Blanc works well with turkey, while a red wine like Pinot Noir or Merlot can complement the richness of gravy and sides. Offering both red and white options ensures there’s something for everyone. -
Ensure You Have Enough:
It’s easy to underestimate how much wine you’ll need, so it’s a good idea to plan for about half a bottle of wine per guest, especially if you’re serving wine throughout the meal. Consider having a bit extra on hand, just in case. -
Chill White Wines and Sparkling Wines:
Make sure white wines, rosés, and sparkling wines are chilled to the right temperature (typically 45-55°F). You can place them in the fridge the night before or, if needed, chill them in an ice bucket for about 20-30 minutes before serving. -
Decant Red Wines (If Needed):
For red wines, especially older ones or fuller-bodied wines like Cabernet Sauvignon, decanting can help soften tannins and enhance flavors. Doing this about 30 minutes before serving is ideal. If you’re serving lighter reds like Pinot Noir, they can be served straight from the bottle without decanting. -
Prepare Glassware:
Make sure you have enough wine glasses for everyone—typically a glass for red wine and one for white wine. Glasses should be clean and dry to avoid any unpleasant flavors or odors. If you’re serving multiple wines, ensure there’s enough space for guests to enjoy both red and white without confusion. -
Offer Non-Alcoholic Options:
Some guests may prefer non-alcoholic beverages, so it’s thoughtful to provide a few options, like sparkling water, juice, or even non-alcoholic wine. -
Serve at the Right Time:
Wine should be served during the meal or with appetizers, but make sure it’s not rushed. Allow guests to enjoy wine with different courses, especially with the main meal and dessert. Consider having a wine toast before sitting down to eat as well. -
Have a Wine Opening Strategy:
Open the wine in advance, especially bottles with corks, to avoid struggling with a corkscrew during dinner. If you’re serving a lot of wine, try opening a couple of bottles at a time so you don’t run out mid-meal.
By planning your wine choices and prep ahead of time, you’ll elevate the meal and ensure a smooth, enjoyable dining experience for all your guests.
Get cooking!
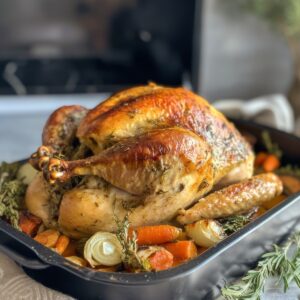
When roasting a turkey at 350°F, plan for about 12-15 minutes per pound. Keep in mind that this time increases if you’re stuffing the bird.
However, these times are just estimates. The best way to know when your turkey is done is by checking the temperature. This is why investing in a good thermometer is key.
Avoid relying on pop-up thermometers—they often signal the turkey is overcooked and too dry by the time they pop up!
For the most accurate results, remove the turkey from the oven when it reaches 150-160°F in the breast meat or 160-165°F in the thigh. As the turkey rests, the temperature will continue to rise by 5-10°F.
The USDA recommends cooking a whole turkey to a minimum internal temperature of 165°F, measured with a food thermometer in the thickest part of the breast and the innermost part of the thigh and wing.
While the USDA standard ensures safety, I find that breast meat can be dry at this temperature, so adjust based on your preference.
Plan your side dishes accordingly to ensure everything is hot at serving time. If made ahead, you can reheat them in the oven or microwave while your turkey rests.
For salads, wait to dress them until just before serving to avoid soggy lettuce.
Rest your turkey!
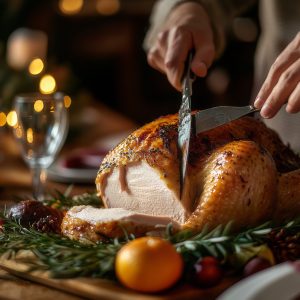
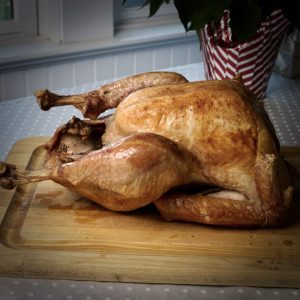
Resting the turkey after cooking is a crucial step to ensure a juicy, flavorful bird. After you remove the turkey from the oven, let it rest for 20 to 30 minutes before carving. This allows the juices to redistribute throughout the meat, making it more tender and moist.
If you carve the turkey right away, the juices will run out, leaving the meat dry. The resting period helps the muscle fibers relax, locking in moisture and enhancing flavor. Plus, while the turkey rests, the internal temperature will continue to rise, ensuring it reaches the perfect doneness.
To rest the turkey, tent it loosely with aluminum foil to keep it warm. You can also use this time to prepare gravy or finish off other dishes.
While it’s tempting to carve right away, taking the time to rest the turkey is well worth it for the best results. Your guests will appreciate the extra juiciness, and you’ll enjoy a stress-free carving experience!
Most importantly, have a very happy and safe Thanksgiving, and remember to thank someone today who might not have been expecting it.

