Homemade Pie Crusts: Tips and Techniques
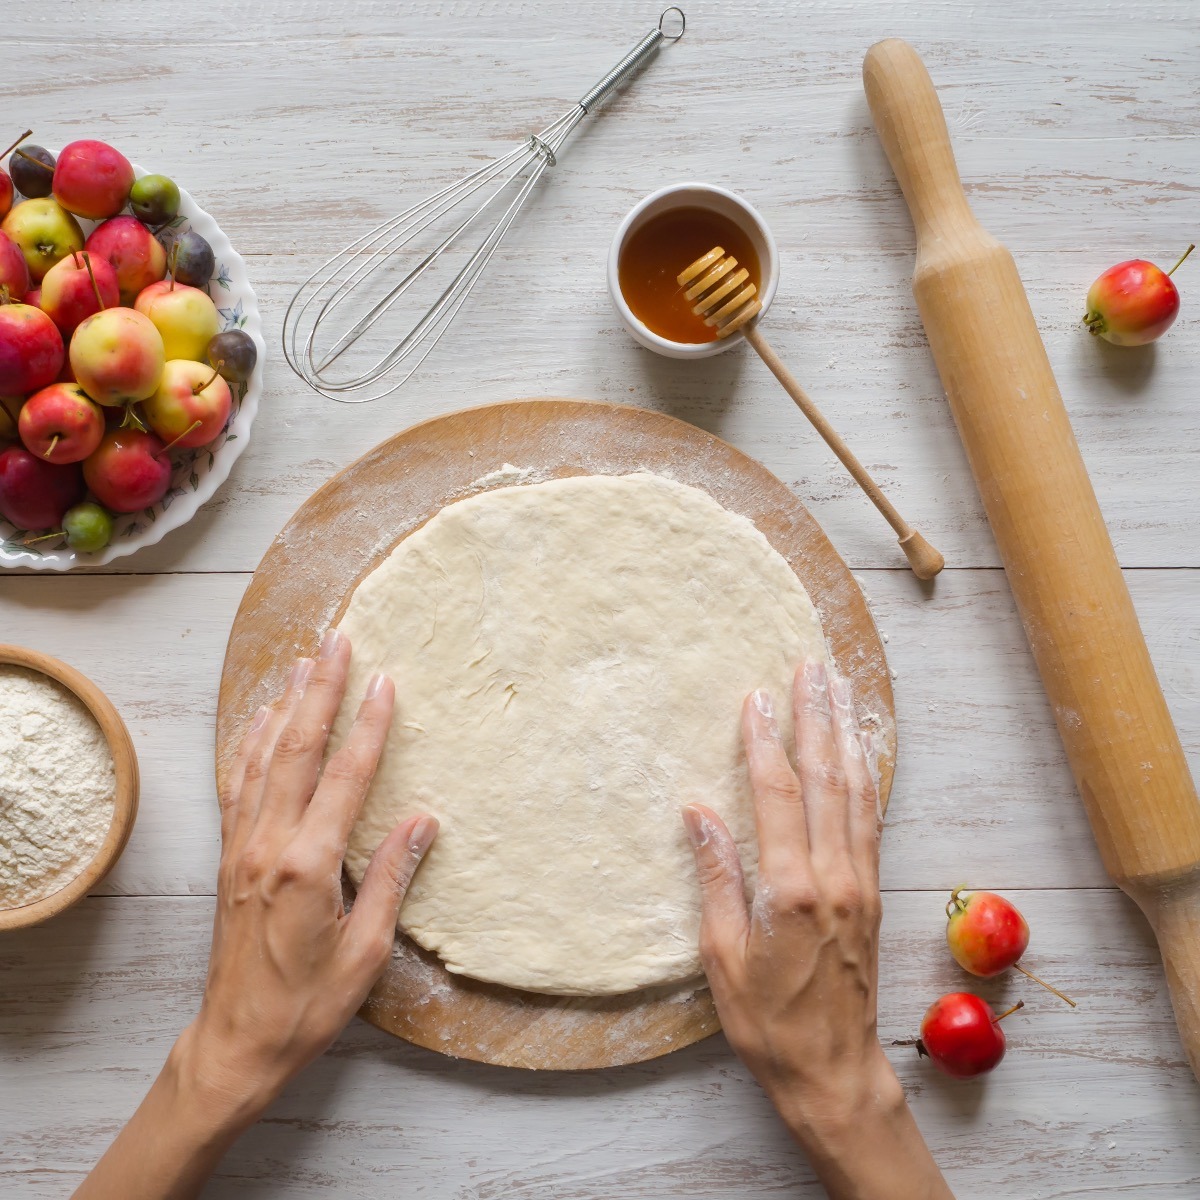
My wife makes a fantastic apple pie. She is good at it and can assemble a perfect apple pie in about fifteen minutes. She uses commercial pie crust found in the supermarket's refrigerator section and feels no guilt.
She is a full-time working mom with very little extra free time for baking on the weekends and staring at a basket of gorgeous apples from the farmer's co-op, so she doesn't mind a shortcut. But does she really need a shortcut when it comes to pie crust?
Store-bought pie crust (which can be frozen, by the way) is certainly convenient, and if my wife can use it to make a great homemade pie, I'm all for it. So then, I started wondering what's in the commercial pie crust. Here's what I found out.
Store Bought Pie Crust
According to the back of the box, Pillsbury refrigerated pie crust contains the following ingredients:
enriched flour, bleached; wheat starch; partially hydrogenated lard with BHA & BHT; water; potassium sorbate & potassium propionate; xantham gum; yellow #5 and red #40; citric acid; rice flour; salt.
That's a lot of ingredients I don't recognize and don't love the sound of.
Homemade Pie Crust
Making a homemade pie crust is a rewarding process that brings a rustic charm and superior flavor to any pie. The essential ingredients for a classic pie crust are delightfully simple: flour, fat (such as butter or shortening), salt, and water. However, the technique and attention to detail in combining these ingredients make all the difference.
The first step in making a pie crust is to mix the dry ingredients, typically all-purpose flour and a pinch of salt. Cold butter or shortening is then cut into the flour until the mixture resembles coarse crumbs. This can be done using a pastry cutter, two knives, or even your fingers. The goal is to keep the fat cold and create small pockets within the dough, resulting in a flaky texture when baked.
Once the fat is incorporated, cold water is gradually added. Add the water a tablespoon at a time, mixing gently until the dough comes together. Overmixing can lead to a tough crust. The dough should be handled as little as possible to maintain tenderness.
After the dough is formed, it should be divided into two disks (if making a double-crust pie), wrapped in plastic wrap, and chilled in the refrigerator for at least an hour. This resting period, though it may test your patience, is crucial. It allows the gluten in the flour to relax, making the dough easier to roll out and preventing shrinkage during baking.
When ready to use, the dough should be rolled out on a lightly floured surface to the desired thickness, typically about ⅛ inch. The dough can then be carefully transferred to a pie dish, trimmed, and crimped as desired. For a double-crust pie, the second disk is rolled out and placed over the filling, with edges sealed and vents cut to allow steam to escape.
Baking a homemade pie crust to perfection involves balancing time and temperature. Many recipes call for blind baking (pre-baking) the crust, especially for custard or cream pies, to ensure it stays crisp. Weights such as pie weights or dried beans are used to prevent the crust from puffing up.
A homemade pie crust, with its flaky, tender texture and rich, buttery flavor, is a testament to the joys of home baking. It elevates any pie to a new level of deliciousness. While it requires a bit of practice and patience, the result is well worth the effort, making each bite a satisfying reward for your dedication.
📖 Recipe
Pie Crust – Store Bought or Home Made
Ingredients
- 12 ounces all purpose flour
- 9½ ounces butter very cold
- lard or trans-fat shortening or a combination try 4 oz. fresh lard and 4 oz. butter
- 1½ teaspoons salt
- 2 tablespoons sugar
- 4 ounces ice water a glass with ice cubes and then add water
Instructions
- Whisk together the flour, salt, and sugar in a large bowl.
- Cut the cold fat into ½" cubes.
- Toss the fat cubes with the flour mixture until all the fat is coated with flour.
- Using just the tips of your fingers (the coolest part of your hands), break the fat into smaller pieces and rub some of the fat into the flour between your thumbs and fingers. This is easiest to do with butter since it is the firmest fat at refrigerator temperatures.
- Keep breaking up/rubbing in the fat until the largest pieces are no larger than pea-sized and the rest looks like coarse meal. Be careful not to overwork the fat and flour mixture, or you'll have a paste. Make sure that if the fat begins to get too soft while working with it, put the whole bowl into the freezer for ten minutes or the refrigerator for half an hour.
- Sprinkle about 2 tablespoons of ice water as evenly as you can over the flour/fat mixture. Toss the water and the flour with your fingertips. Try to go in down the sides of the bowl and then toss the flour up a bit. You don't want to start mixing right on top of the water, or you could develop too much gluten, making your crust tough.
- Once you've thoroughly tossed the flour/fat and water, sprinkle on another 2 tablespoons of water and toss together as described above.
- At this point, take a small handful of dough - it should still look very sandy at this point - and squeeze it gently in your fist. If it holds together and doesn't break apart when you gently press it flat, you have added enough water. You heard right. The dough will still look very sandy. If the dough does not hold together or it splits apart into sandy chunks when you press on it, sprinkle on another tablespoon of water and toss.
- Continue adding a bit of water at a time, tossing, and testing by gently squeezing a bit of dough. If you're unsure, err on the side of a little too dry rather than a little too wet.
- Rather than dumping the sandy/floury dough out on the counter, compacting it in the bowl you mixed it in is easier. So press the dough together in a disc at the bottom of the mixing bowl. Cut in half. Take each half out and shape them into ½" thick discs. Roll each disc between two pieces of parchment paper to a thickness of about ⅛".
- Put the rolled discs in the refrigerator for an hour. This will let the flour thoroughly hydrate. After the hour, you will notice that if the dough was a little dry before, it is no longer sandy. At this point, you can either use the dough or freeze it for later.
- To store in the freezer, remove from the refrigerator until pliable. Then gently roll the dough, parchment, and all, into a cylinder. Wrap the cylinder in heavy-duty plastic wrap and store it in the freezer for up to two months.
Notes


Barbara: Art and Barb Live in Italy!
I've never had a problem making a pie crust, altho many people seem to be intimidated by the very idea. Maybe my mom just did a great job teaching me how to do it, and her 2 secrets were: always use ICE COLD water, and never overwork the dough once you've added the water.
Recently when I complained that my crusts weren't browning, a friend suggested using MILK instead of water - and it works! I just put a small dish in the freezer for a few minutes before adding it to the flour mixture.
I hope your post will encourage others to try making their own pie crust at home - you're right - it's SOOO much better than a store-bought crist!
ENID LUCHETTI
Have been making pie crust since 3rd grade. Egg, Yolk, vinegar and ice water. So very moist every time I switch recipes I end up going back.
RG
Thanks Barbara for your suggestion. Can't wait to try it myself.
emmet solomon
I do not like dough that is not browned before adding ingredients. Brown the crust for 10-12 minutes before adding ingredients.
Kimberly
Home-made every time! I tried this recipe when I baked tarts for my husband, earlier this year; which was the first time I'd tried to make any pie dough. He loved it.
I use a fool-proof pie dough recipe that I found online. It is simple, sweet and browned nicely each time I used it. The recipe calls for vodka (which evaporates when baking) - I think that's what caught my eye when searching.
Vodka??? Sounds interesting. - RG
Lisa
I've just discovered your website and and am so encouraged with every post I read. Thanks for breaking things down and making them so simple and doable! 🙂
Blessings, Lisa
You are welcome and Happy New Years to you. - RG
Barb
My mother always used cold orange juice instead of water in her pie crust. It made it quite flaky. It has no orange taste, so it can be used for savory pies.
That's an interesting substitution that I will have to try some time. - RG
Jean
I found your blog on google and read a few of your other posts. I just added you to my Google News Reader. Keep up the fantastic work Look forward to reading more from you in the future.
Nancy
I use a mixer to make my crust. Do the shortening and flour mix until the size of peas and then add your cold water and mix until it starts to form a ball. Roll out and fill. No refrigeration needed. Makes perfect flaky crust every time will minimal work or mess.
Thanks Nancy for good tips - RG
Karen-in-WA
Using a pastry blender has always worked for me and there's no concern for hand warmth turning things to mush. I've taught many classes of high-school students, as well as adults, the joys and secrets of simple pie crust making. I believe it's been a lost art in current generations, but your excellent article is helping it become found again. Thanks for that! Keep up the good work ;o)
Hi Karen in WA, thanks for your comments and please become a regular. I'm sure my readers would love to hear you thoughts on baking. - RG
Karen W
At what temperature do you bake the pie?
Hi Karen, this is not a pie recipe, but a pie crust recipe. You would bake a pie using this crust at the temperature recommended for whatever pie you are preparing. - RG
Tina
Hi, I just made a great key lime pie after reading your recipe. This is my first time doing baking. It was so much fun and then I started to follow more of your recipe. I have problem digesting some types of oil and I did a bit research saying that shortening may contain too much trans fats. I'm not sure if that's the same shortening you mentioned here and I'm wondering if there's any substitute for it. Thank you very much!
Hi Tina, Crisco, made by J.M. Smucker Co., is now selling a shortening with zero grams trans fat per serving.
It "still has a small amount of artificial trans fat but the U.S. Food and Drug Administration allows any product with less than 0.5 grams trans fat per serving to list zero grams trans fat in its nutrition facts."
If you do a google search on "0 trans-fat shortening" you can find out more information and other sources. - RG
Tina
Thank you for the reply. I've tried it once with lard and butter only. May I ask at what temperature and for how many minutes should I set for the oven before the pie crust can be used? For this time I used mixer and then I set 325 ℃ for 20 minutes for a banana cream pie. the crust didn't hold well and I can taste the flour's flavor. I assumed all the flavors should all blend into one. Is it because I used only one teaspoon sugar? Thank you in advance!
Hi Tina, 325degrees C! You must meant 325F!
Assuming that you baked at 325F, the next question is: is the filling baked as well as the crust? If you need a fully baked crust because the filling will not require baking, here's what I would do:
1) Line the pie pan with the dough and crimp decoratively (or not). Poke lots of little holes in the bottom of the crust with a thin knife.
2) Freeze the crust and pan for about 30-45 minutes. Baking from frozen can help minimize shrinkage.
3) Line the frozen crust with a very large coffee filter or some parchment paper.
4) Fill the crust with dried beans (I like chick peas). If you have pie weights, you can use those instead.
5) Bake the crust, beans and all, for about 15 minutes.
6) Carefully lift out the parchment/filter to remove the weights. Brush the inside of the crust, especially the bottom, with a thin coat of egg wash (1 egg well beaten with 1 teaspoon of water)
7) Return to the oven and bake until light-to-medium golden brown all over. If the edges start to brown too much, cover them with foil and turn the heat down to 350F. You really want to make sure the bottom of the crust is completely baked, or you will end up with a gummy, under baked crust.
8. Cool completely on a rack and fill with filling of your choice.
If you're making a filling that requires baking, I'd still do the blind-bake (with beans) and follow the above procedure through step 6. The only difference would be to paint the egg wash in the bottom of the crust at the beginning of baking.
Either way, you're looking at at least 30 minutes in the oven. Don't be afraid to let it brown just a bit--the caramelization is where you get the flavor. Otherwise, you end up with a soft, rather taste-less crust.
I hope this helps. Happy baking
PS You can forgo the egg wash if you plan on serving the pie--the whole pie--the same day. Otherwise, use the egg wash as a moisture barrier between a wet filling and your crisp pie crust.
Tina
Hi,
Yes, it's 325 F/160 ℃ I meant. For banana cream pit, I baked only the crust. I'll try your suggestion in a few days and will let you know about the outcome. Thank you very much.
Jack in Victoria BC
When pre-baking a pie crust, using pennies instead of beans or other weights has been recommended as copper if a better conductor of heat than legumes or other metals. The liner of parchment or coffee filter paper is still needed. Canada may eliminate the penny from its currency soon, so I bought several rolls to use.
Thanks Jack, great tip! - RG
Tina
Hi, it's me again! Just wanna say thank you so much 'coz I've tried the procedure you suggested several times and I got good pie crusts every time! 🙂
Hi Tina, glad it worked out for you. Thanks for letting me know. - RG
Mindy
Hello, i feel that i saw you visited my web site thus i came
to return the desire?. I'm trying to to find things to enhance my site!I guess its OK to use some of your ideas!!
Hi Mindy, for the record, all content on this site is protected by copyright so you may not use it on your site. - RG
Richard
Not saying that some of those commercial ingredients are harmful is being negligent in your duties to the public and makes the article useless...
G. Stephen Jones
Richard, I am not a food scientist so it's not my place to tell people what ingredients are bad for them. I suppose you can find many if not all those ingredients in half the commercial products you purchase. Sorry you feel the way you do about the rest of the article.
Annie
I’m making a banana cake it calls for 3 lrg bananas I want to add one more by adding a fourth will it make the cake gummy? Because I really want to taste the bananas.
Michael Rice
I made my own piecrust 20 years ago, but somehow have lost my touch....I thought I'd give it another try today, but after reading all your steps....I'm off to the store now to buy frozen. LOL Sorry.
Sharon Ratini
I have searched far and wide for information on how to make my own rolled out pie crust sheets that can be frozen. Thank you!