Guide to Measuring Liquid & Dry Ingredients
Measuring ingredients correctly can make or break a recipe. Home cooks often overlook this step, but accuracy is key to consistent results. Using the right equipment ensures precision. Dry measuring cups work best for flour, sugar, and grains. Liquid measuring cups are designed for water, milk, and oil. Avoid guessing or using spoons that aren’t standardized. Even small errors can affect texture, taste, and baking outcomes.
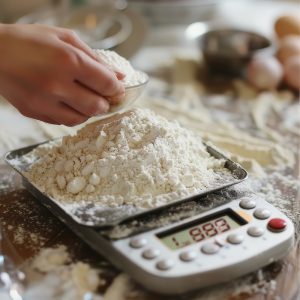
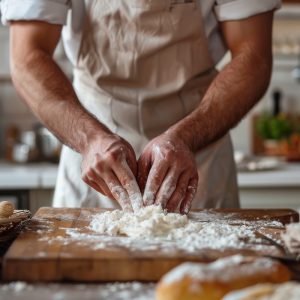
Technique matters as much as tools. Spoon flour into a cup and level it with a knife. Don’t scoop directly from the bag—this compacts the flour and adds too much. When measuring liquids, place the cup on a flat surface and read the measurement at eye level. Use a digital scale for the most accurate results, especially for baking.
Some ingredients, like brown sugar, should be packed. Others, like cocoa powder, need sifting. Understanding the right approach prevents mistakes and improves your confidence in the kitchen. Knowing both the right ways and wrong ways to measure ingredients saves time, avoids frustration, and ensures delicious results every time. With proper equipment and techniques, you’ll master precise measurements and elevate your cooking and baking skills.
Complete Guide to Measuring Ingredients Accurately
Measuring Techniques for Cups
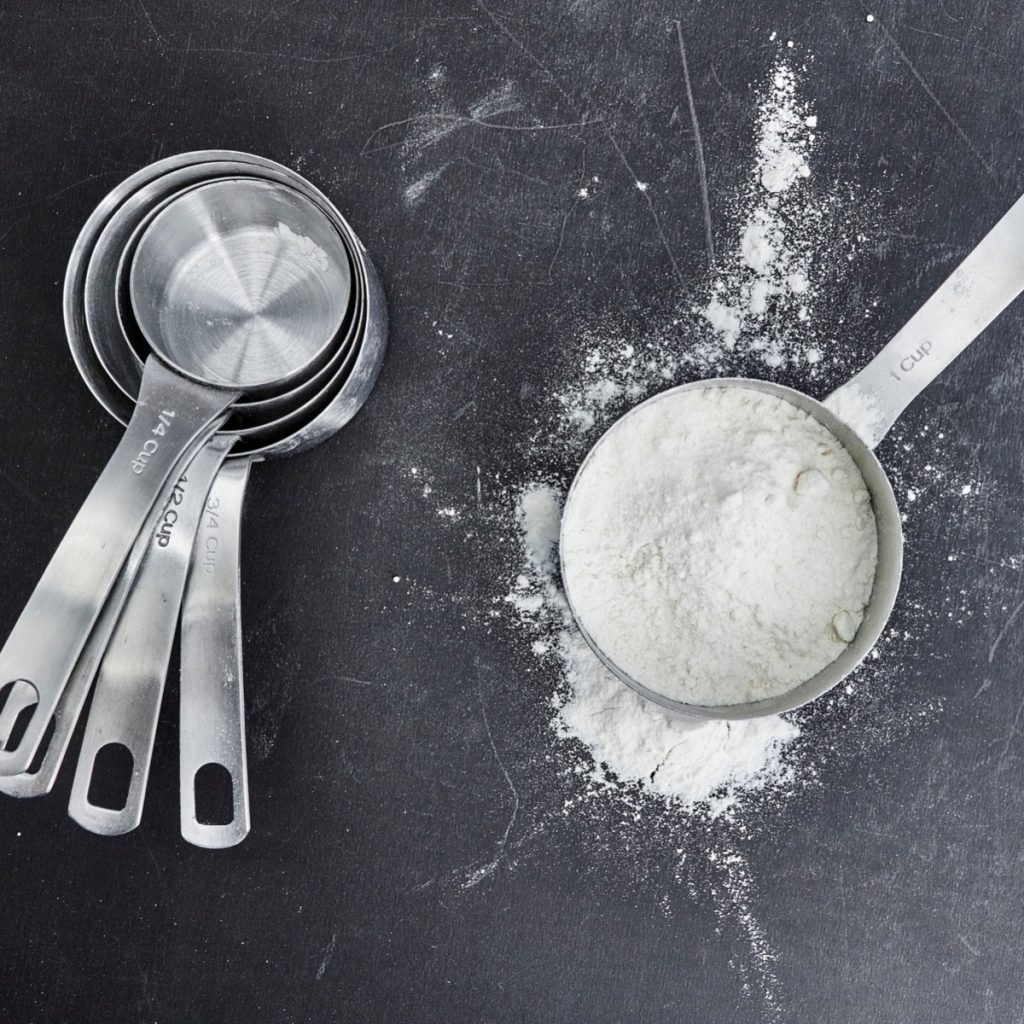
Use the Correct Cup Size
Choose the measuring cup that matches the recipe’s quantity. Common sizes: 1 cup, 1/2 cup, 1/3 cup, 1/4 cup.Fill to the Rim for Liquids
Pour liquids to the marking at eye level. Align the meniscus (curved surface) with the line.Level Off Dry Ingredients
Use a flat edge to remove excess for accurate measurement.Handle Dry Ingredients with Care
Spoon ingredients like flour into the cup rather than packing them. Level off after spooning.Pour Into the Mixing Bowl
Transfer the measured ingredient carefully. Use a spatula or knife to release any remaining bits.Clean Between Ingredients
Wipe or rinse the cup when measuring multiple ingredients to prevent cross-contamination.Consider the Shape
Pack ingredients like brown sugar, but spoon and level flour.
Measuring Techniques for Spoons
Select the Right Size
Pick the spoon that matches the recipe’s quantity. Common sizes: 1 tbsp, 1 tsp, 1/2 tsp, 1/4 tsp.Fill the Spoon
Scoop ingredients using the correct spoon. Level off dry ingredients; fill liquids to the brim.Level Off Dry Ingredients
Use a flat edge, like the back of a knife, to remove excess.Pour Into the Mixing Bowl
Gently tap the spoon to release the contents.Clean Between Ingredients
Wipe or rinse between measurements to maintain accuracy.
Essential Measuring Equipment
Measuring Cups (Nesting Cups)
For dry ingredients like flour, sugar, oats, and grains. Use a flat edge to level off excess.Measuring Spoons
For small quantities of dry ingredients like spices, baking powder, and salt.Digital Kitchen Scale
Provides the most precise measurements, especially for baking. Measures ingredients by weight.
Measuring Liquids
Liquid Measuring Cups
Have a spout and clear markings. Common sizes: 1 cup, 2 cups, 4 cups. Measure at eye level.Measuring Spoons
Can measure small quantities of liquids. Fill to the brim and pour.
Small and Specialty Measuring Tools
Mini Measuring Cups
Measure very small quantities of liquids (tablespoons or milliliters).Butter Dish with Measurement Markings
Helps portion butter accurately using tablespoon markings.Coffee Scoop
Measures coffee grounds precisely for consistent brews.Adjustable Measuring Spoon
Allows measuring different quantities with the same spoon.Powder Measuring Scoop
Ideal for protein powder or powdered sugar, ensuring precise measurements.
Mixing and Measuring Bowls
Graduated Mixing Bowls
Bowls with markings inside, useful for combining ingredients accurately.Pyrex Measuring Cup
Glass cup with clear markings. Suitable for liquids and some dry ingredients.
This guide covers cups, spoons, scales, specialty tools, and proper techniques to ensure accuracy, consistency, and professional results in both cooking and baking.

Essential Tips for Measuring Ingredients
Accuracy Matters
Precise measurements are essential for recipe success. Small variations can significantly affect taste, texture, and overall results.Dry Ingredients: Packed vs. Loose
Check whether the recipe calls for packed or loose measurements. For example, brown sugar is often packed into the cup.Consistency in Measurement
Use the same type of measuring tools throughout the recipe to maintain accuracy and consistent results.Adjust for Altitude
High-altitude cooking may require adjustments, especially for leavening agents. Refer to altitude-specific guides for best results.Use Proper Techniques
Spoon flour or other dry ingredients into the measuring cup rather than scooping directly from the container. Level off with a flat edge for accuracy.Measure Liquids at Eye Level
Place the liquid measuring cup on a flat surface and read the measurement at eye level to avoid errors.Clean Between Ingredients
Wipe or rinse measuring cups and spoons between ingredients to prevent cross-contamination and maintain precision.Weigh Ingredients for Precision
Use a digital kitchen scale for the most accurate measurements, especially in baking where small differences matter.Temperature Can Affect Ingredients
Ingredients like butter or honey can change volume with temperature. Follow recipe guidance for best results.Double-Check Units
Ensure you’re using the correct measurement units (cups, tablespoons, grams, ounces) to prevent mistakes.Read the Recipe Carefully
Some recipes may have special instructions, such as “loosely packed” or “sifted” ingredients—always follow them.
Why Measuring Ingredients Is Important
Measuring food items correctly is crucial for several reasons, particularly in the context of cooking and nutrition. Here are some key reasons why accurate measurement of food is important:
| Reason | Description |
|---|---|
| Recipe Accuracy | Precise measurements ensure the intended taste, texture, and result. Too much or too little can alter the dish. |
| Consistent Results | Accurate measurements help recreate the same flavors and textures each time. |
| Nutritional Information | Essential for calculating exact nutritional content to manage calories, protein, fat, and carbs. |
| Baking Precision | Baking requires exact amounts of ingredients. Small variations affect texture, rise, and taste. |
| Cost Efficiency | Prevent waste and save money, especially with expensive or limited ingredients. |
| Food Safety | Control intake of ingredients like salt and sugar to avoid health issues. |
| Portion Control | Accurate measurements help serve proper portions and manage weight. |
| Culinary Experiments | Precise measurements provide a solid base for modifying recipes safely. |
| Professional Cooking | Consistency is key for chefs to maintain quality and reputation. |
| Education and Learning | Fundamental for understanding flavor balance and developing cooking skills. |
The Difference Between Measuring Dry Ingredients vs. Liquid Ingredients
Measuring dry ingredients and liquid ingredients involves different techniques and tools due to their distinct physical properties. For example, you want to use measuring cups for dry ingredients and liquid measuring cups, the ones with a spout for pouring and clear markings on the side for liquid measurements.
Measuring spoons can be used for both but only use spoons for measuring small amounts of dry ingredients like spices or baking powder. (1 tablespoon, 1 teaspoon, 1/2 teaspoon, 1/4 teaspoon) Measuring spoons can also be used to measure liquids if you fill them to the brim.
Using a digital scale is great for precision measuring dry ingredients especially when baking or making homemade pasta.

What is the Difference Between a Cup of Flour and a Cup of Water?
While both a cup of flour and a cup of water are measured in the same volumetric unit (cup), there are notable differences between them due to their distinct physical properties.
Density
Flour is a dry, powdery substance, and its density varies based on factors such as how it is packed. A cup of all-purpose flour weighs around 120 to 130 grams. Water is a liquid and has a consistent density. A cup of water weighs approximately 240 grams (8 ounces) at room temperature.
Consistency
Dry ingredients like flour can be compacted or aerated, leading to variations in measurement. The method of scooping, spooning, or sifting can affect how much flour fits into a cup. Liquid ingredients like water have a consistent density, and their volume is not affected by the method of measurement. A cup of water will be the same regardless of how it is poured.
Effects on Recipes
The varying density of flour means that measuring it accurately is crucial, especially in baking. Too much or too little flour can significantly impact the texture and structure of baked goods. Liquid ingredients, like water, are generally more forgiving in recipes. Small variations in water measurements are less likely to affect the outcome, especially in dishes like soups and stews.
Conversion
Flour to Water: If you need to convert between flour and water by volume, keep in mind the differences in density. For example, a cup of flour is approximately half the weight of a cup of water.
Using a Scale to Measure Dry Ingredients
Measuring dry ingredients with a digital kitchen scale is important because it ensures precision and consistency in your cooking and baking. Here’s why:
Accuracy – Dry ingredients like flour, sugar, and cocoa powder can vary widely in volume depending on how they are scooped or packed. One cup of flour from one source might weigh differently from another. Weighing ingredients eliminates this variability.
Consistent Results – Baking, in particular, is a science. Small differences in ingredient amounts can affect texture, rise, and taste. Using a scale allows you to replicate recipes exactly every time.
Simplifies Complex Recipes – Some recipes use multiple dry ingredients in precise ratios. Measuring by weight ensures the ratios remain accurate, making complex recipes easier to follow.
Reduces Waste – You only use exactly what you need. There’s no guesswork or over-pouring.
Global Standardization – Many recipes use grams instead of cups. Using a scale allows you to follow international recipes accurately.
In short, a scale removes the guesswork, improves consistency, and gives you professional-level precision in your kitchen.
Be sure to check The Reluctant Gourmet’s – Choosing Measuring Cups & Measuring Spoons
Packed or Sifted?
Some dry ingredients should be packed or sifted before weighing, and how it affects accuracy:
Flour – Flour can easily become compacted or aerated. Scooping directly from a bag can compress it, giving you more flour than the recipe intends. Sifting or lightly spooning it into the measuring container before weighing ensures you use the correct amount by weight.
Brown Sugar – Recipes often specify “packed” brown sugar. Packing removes air pockets, giving a consistent weight. If you don’t pack it, you might use less than intended, altering sweetness and moisture in baked goods.
Cocoa Powder, Powdered Sugar, and Other Fine Powders – These can clump or settle over time. Sifting before weighing prevents uneven distribution and ensures precise measurement.
Consistency Across Recipes – Following packing or sifting instructions maintains consistency, especially when converting volume-based recipes to weight.
Professional Accuracy – Chefs and bakers rely on weighing ingredients in the correct state (sifted, packed, or loose) to produce predictable results every time.
Key Takeaway: Always check the recipe notes—sift, pack, or fluff dry ingredients as instructed before weighing. This ensures precision, consistent results, and the best texture and flavor in your dishes.