How to Carve a Holiday Turkey
Carving a Thanksgiving turkey should feel simple, not stressful. Many home cooks worry they’ll make the wrong cut or lose all those flavorful juices.
But when you follow a clear method, you carve a turkey with confidence and get beautiful slices every time. I’ll walk you through the exact steps so you know where to start and how to finish strong.
A well-carved bird makes your Thanksgiving dinner look polished. Your guests get tender slices of turkey breast and juicy dark meat without any hacking at the table. You also save time by cutting the turkey efficiently instead of wrestling with it.
Good carving begins before the first slice. Let the turkey rest, gather your tools, and set up a stable carving board. These small moves make carving a Thanksgiving turkey much easier.
In this guide, I show you how to separate the legs, remove the wings, and slice the breast cleanly. You’ll learn how to follow the natural joints so every cut feels smooth.
I also share tips for keeping the meat warm and presenting your carved turkey beautifully. After you practice this method once, you’ll carve a Thanksgiving turkey like a pro every year.
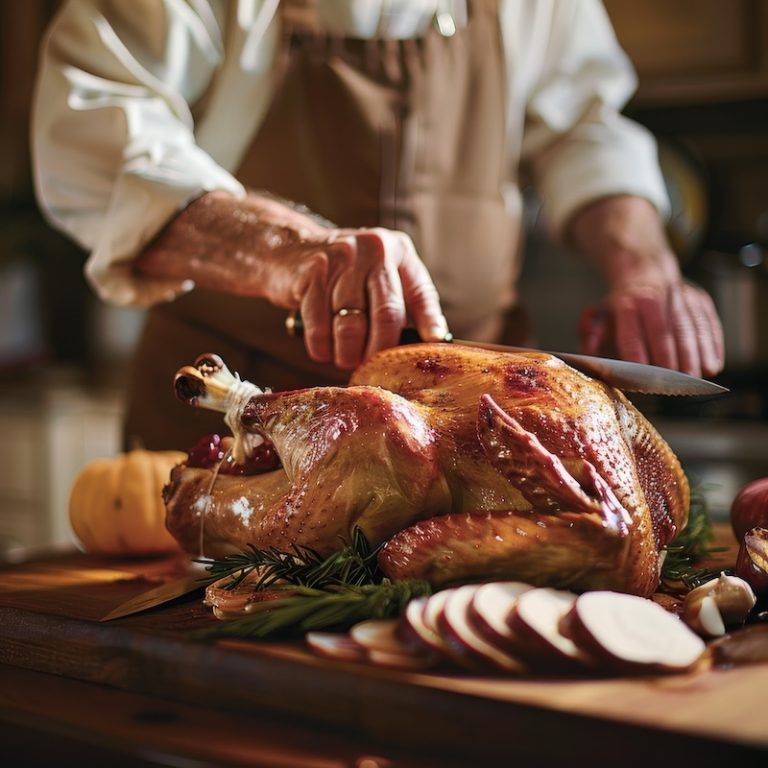
Carve a Thanksgiving Turkey – Step by Step
Step 1: Let the Turkey Rest
Action: Place the cooked turkey on a cutting board and let it rest for 20–30 minutes before carving.
Tips:
Resting keeps juices inside the meat, preventing dryness.
Cover loosely with foil to retain warmth.
This step also makes the bird easier to handle.
Step 2: Remove the Legs
Action: Pull one leg outward and slice through the joint where it meets the body. Repeat for the other leg.
Tips:
Bend the leg back to locate the natural joint.
Cut gently—don’t saw through the bone.
Keep a clean knife handy to avoid tearing the skin.
Step 3: Separate Drumsticks and Thighs
Action: Find the joint connecting the drumstick to the thigh. Bend and slice through the joint to separate.
Tips:
Use the bone as a guide to avoid cutting meat unnecessarily.
Keep the slices even for neat presentation.
Dark meat slices stay juicier if you cut just before serving.
Step 4: Remove the Wings
Action: Pull each wing away from the breast and cut through the joint where it meets the body.
Tips:
Wings are easier to carve after legs are removed.
Cutting along the joint prevents ragged edges.
Wings can be served whole or halved for presentation.
Step 5: Remove the Breast
Action: Slice down along the breastbone, then follow the ribcage to remove the whole breast in one piece.
Tips:
Keep your knife close to the bone for clean cuts.
Peel the breast slowly to avoid tearing the skin.
Save any smaller scraps for sandwiches or stuffing.
Step 6: Slice the Breast Meat
Action: Lay the breast on the cutting board and slice across the grain into even pieces, about ¼–½ inch thick.
Tips:
Cutting across the grain keeps meat tender.
Adjust thickness based on your guests’ preferences.
Use a long, sharp carving knife for smooth slices.
Step 7: Plate the Meat
Action: Arrange the breast slices on a platter, then add thighs, drumsticks, and wings neatly around the edges.
Tips:
Fan the breast slices for a professional look.
Keep light and dark meat separated for presentation.
Garnish with fresh herbs or citrus slices if desired.
The Right Knife for Carving
When it comes to carving a turkey, the most suitable knife is a long, thin-bladed carving knife. Here’s why:
Length: A carving knife typically has a long blade, often around 8 to 12 inches in length. This length allows you to make long, smooth cuts through the turkey meat without seeing back and forth, resulting in cleaner slices.
Thin Blade: The blade of a carving knife is usually thinner than that of a chef’s knife or a utility knife. This thinness allows for more precise and delicate slicing, especially when it comes to carving around bones and joints.
Sharpness: Carving knives are designed to be extremely sharp, which is essential for cleanly slicing through the turkey’s skin and meat without tearing or shredding it. A sharp knife also reduces the risk of accidents or injuries while carving.
Flexibility: Some carving knives have a slight flexibility to their blades, which can be advantageous when carving around joints and bones. This flexibility allows the knife to maneuver more easily, resulting in smoother and more controlled cuts.
Handle Comfort: Look for a carving knife with a comfortable handle with a secure grip. Carving a turkey can be lengthy, so you’ll want a knife that feels comfortable and balanced in your hand to reduce hand fatigue.
Watch This Informative Video on How to Carve a Turkey
I found this video demonstrating a professional chef carving a turkey. There may be subtle differences in technique compared to how you were taught, but you’ll get many tips from this video. Watch these videos a few times, and you’ll have the knowledge you need to carve your turkey confidently.
Have a Happy Thanksgiving, and may all your turkey be moist and delicious. – RG


