Why This Chili con Carne Recipe Works
- Built on tradition. This recipe follows the classic chili con carne framework, beef-forward, deeply savory, and slow-simmered, so flavors develop naturally without gimmicks.
- Browning is intentional. The beef is browned in batches to create real depth of flavor. Crowding the pan steams the meat; patience builds richness.
- Spices are bloomed, not dumped. Chili powder and spices are cooked briefly in fat to release their essential oils, preventing raw, dusty flavors.
- Time does the heavy lifting. A steady simmer softens the heat, thickens the sauce, and allows the flavors to knit together instead of competing.
- Seasoning is layered. Salt is added in stages, not all at once, so the chili tastes balanced and bold rather than flat or muddy.
- Flexible without losing its soul. The base recipe is classic, but small, guided adjustments let you control heat, texture, and richness with confidence.
Key Techniques That Make Chili con Carne Taste Better
Chili con carne earns its place as a classic because it relies on technique, not tricks. This recipe focuses on building deep, savory flavor from beef, chiles, and time, using methods that have anchored great chili for generations. Instead of rushing the process or masking mistakes with sugar or shortcuts, this approach lets each ingredient do its job.
We begin by browning the beef to develop richness. Spices bloom in hot fat, so they taste warm and complex rather than raw. A steady simmer transforms tough cuts into tender bites while the sauce thickens and rounds out naturally. Along the way, seasoning occurs in stages, giving you control rather than guesswork.
This chili con carne recipe stays true to its roots while teaching you how and why it works. Whether you cook chili for game day, cold nights, or make-ahead meals, this method delivers bold flavor, balanced heat, and the confidence to adjust it to your taste without losing what makes chili great.
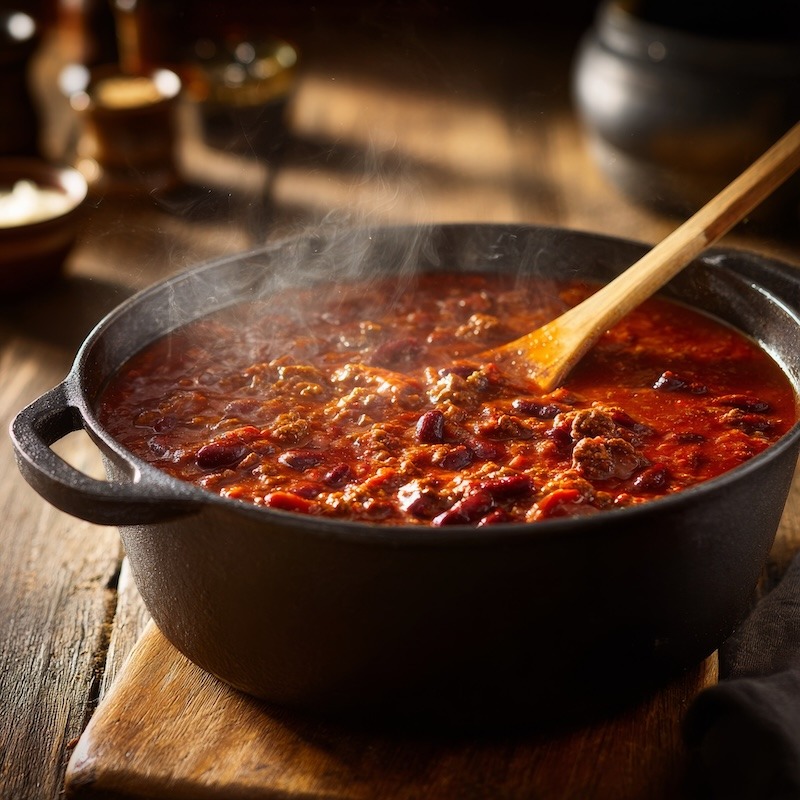
Classic Chili con Carne
Equipment
- Dutch Oven
Ingredients
- 2 pounds beef chuck cut into ½ cubes
- 2 tablespoons kosher salt divided
- 2 tablespoons olive oil extra virgin
- 1 large yellow onion finely diced
- 5 cloves garlic minced
- 3 tablespoons chili powder
- 1 tablespoon ground cumin
- 2 teaspoons smoked paprika
- 1 teaspoon dried oregano
- ½ teaspoon cayenne pepper
- 2 tablespoons tomato paste
- 2 cups beef stock
- 1 cup crushed tomatoes
- 1 tablespoon apple cider vinegar
- freshly ground pepper to taste
Instructions
Season and Brown the Beef
- Pat the beef dry with paper towels and season it with 1 tablespoon of the salt.
- Heat a heavy-bottomed pot or Dutch oven over medium-high heat and add the olive oil. When the oil shimmers, add the beef in batches. Brown each batch deeply on all sides, about 6 to 8 minutes per batch.
- Transfer the browned beef to a plate.You’re looking for dark, caramelized edges and a fond forming on the bottom of the pot. If liquid pools, the pan is overcrowded.
Build the Flavor Base
- Lower the heat to medium and add the diced onion to the pot. Cook, stirring, until soft and lightly golden, about 6 minutes.
- Add the garlic and cook until fragrant, about 30 seconds.
- Stir in the chili powder, cumin, smoked paprika, oregano, and cayenne. Cook the spices in the fat for 30 to 45 seconds until they smell warm and toasted.
Concentrate the Tomato
- Add the tomato paste and stir constantly for 1 to 2 minutes. The paste should darken slightly and cling to the pot.This step removes raw tomato flavor and deepens the chili’s backbone.
Deglaze and Simmer
- Pour in the beef stock, scraping up the browned bits from the bottom of the pot.
- Add the crushed tomatoes, vinegar, remaining salt, and several grinds of black pepper.
- Return the beef and any accumulated juices to the pot.
- Bring the chili to a gentle boil, then reduce the heat to low. Cover partially and simmer for 75 to 90 minutes, stirring occasionally.The surface should barely bubble. Aggressive boiling toughens the meat.
Finish and Adjust
- Uncover the pot for the final 15 minutes to thicken the chili. Taste and adjust seasoning with additional salt, pepper, or cayenne. The chili should taste rich, savory, and balanced, with heat that lingers but doesn’t bite.
- Let the chili rest off the heat for 10 minutes before serving. The flavors settle and improve as it stands.
Notes
Common Chili Mistakes (and How to Fix Them)
- The chili tastes flat. Add salt in small pinches and finish with a splash of vinegar or lime juice to wake everything up.
- The chili tastes bitter or harsh. Lower the heat and give it more time. Harshness usually comes from rushed spices, not too much chili powder.
- The meat is tough. Keep the simmer gentle and extend the cooking time. Tough beef means it needs patience, not more liquid.
- The chili is too thin. Uncover the pot and simmer until thickened. Avoid adding flour or cornstarch, which dulls flavor.
- The chili is too spicy. Stir in a small amount of tomato, stock, or sour cream. Adding sugar masks heat but flattens the dish.
- The flavor feels muddy. Stop adding ingredients. Reduce slightly and finish with acid or fresh onion instead.
Serving, Storage, and Freezing Tips
- Serve it rested. Let the chili sit off heat for 10 minutes before serving. The flavors settle and the texture thickens naturally.
- Finish at the table. Offer toppings like chopped onions, shredded cheese, or sour cream so each bowl stays balanced and fresh.
- Store it cold. Cool chili completely, then refrigerate in an airtight container for up to 4 days. The flavor improves overnight.
- Freeze in portions. Portion chili into freezer-safe containers or bags, leaving room for expansion. Freeze for up to 3 months.
- Thaw gently. Thaw overnight in the refrigerator or reheat slowly over low heat, stirring occasionally to prevent scorching.
- Refresh when reheating. Add a splash of stock or water and a pinch of salt to restore body and balance.
Chili con Carne FAQ
What is the difference between chili and chili con carne?
Chili con carne means “chili with meat.” Traditional versions focus on beef, chiles, and spices without beans. Many modern chili recipes include beans, but classic chili con carne stays beef-forward.
Should chili con carne have beans?
Classic chili con carne does not include beans. That said, beans work well as a variation. Adding them changes texture and body, not flavor, as long as the base chili is well seasoned.
What cut of beef is best for chili con carne?
Beef chuck is ideal. It contains enough fat and connective tissue to become tender during a long simmer while adding richness to the sauce.
Why does my chili taste bitter?
Bitterness usually comes from spices cooked too hot or too long. Bloom spices briefly over moderate heat and rely on simmering time to mellow flavors instead of adding sugar.
How long should chili con carne simmer?
Chili should simmer gently for 75 to 90 minutes. This allows the beef to tenderize and the flavors to meld without drying out or becoming muddy.
Can I make chili con carne ahead of time?
Yes. Chili con carne improves after resting. Make it up to two days ahead, cool completely, and refrigerate. Reheat gently before serving.
How do I thicken chili without flour or cornstarch?
Uncover the pot and simmer until excess moisture evaporates. Stir occasionally to prevent sticking. Reduction thickens chili while keeping flavors clean.
How do I fix chili that is too spicy?
Add tomato, stock, or a dairy topping like sour cream to soften heat. Avoid adding sugar, which flattens flavor rather than balancing it.
Can chili con carne be frozen?
Yes. Cool completely, portion into freezer-safe containers, and freeze for up to three months. Thaw overnight in the refrigerator and reheat slowly.
Why does chili taste better the next day?
As chili cools and rests, fats solidify and flavors redistribute. When reheated, the seasoning tastes more balanced and integrated.


