
Fast Answer
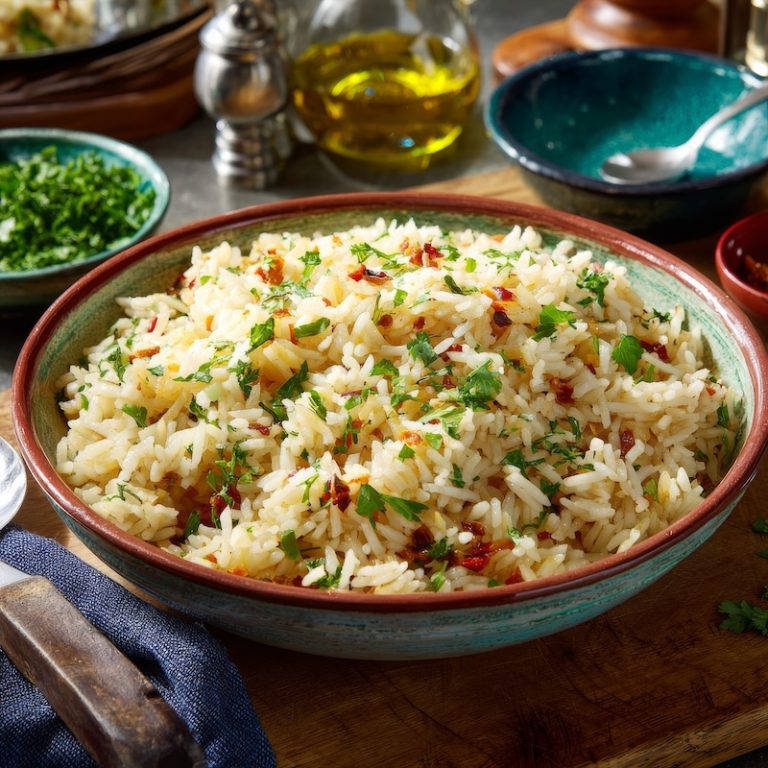
Rice pilaf is rice sautéed in fat, then cooked in warm seasoned stock instead of water — the toasting and the stock are what separate pilaf from plain rice. Ready in about 25 minutes, most of it hands-off.
Start Here
- Flavor base first: onion in butter or oil, before anything else goes in the pan.
- Toast the rice 2 to 3 minutes before adding any liquid — this is the step people skip.
- Liquid ratio: 2 cups warm stock to 1 cup rice.
- Once it's covered, leave it alone — stirring breaks grains and releases starch.
- Rest 5 minutes off the heat before fluffing. This finishes the cooking.
How My Daughter's Box-Mix Habit Became This Recipe
I didn’t think much of the box stuff at the time — it did its job, and she was proud to make dinner herself.
But when she started asking how to build a pilaf from real ingredients, I realized the box version had already taught her the important part: rice cooked in seasoned liquid beats rice cooked in water, every time. This recipe is just that idea done properly.
Why This Works
- Toasting coats each grain in fat, which is what keeps them separate instead of clumping.
- Cooking in stock instead of water means the rice absorbs flavor as it absorbs liquid, not just on the surface after.
- Resting finishes the rice gently with trapped steam, without extra heat that risks scorching the bottom.
- Pilaf isn't really about rice — it's about controlling moisture and timing. Once you understand that, you can build one out of almost anything in the pantry.
Pilaf is not about rice. It’s about controlling moisture and flavor absorption. Once you understand that, you can make pilaf from almost any grain and any flavor profile.
Basic Rice Pilaf
Equipment
- 1 medium saucepan
Ingredients
- 1 cup long-grain white rice
- 2 tablespoons butter or olive oil
- 1 small onion finely chopped
- 2 cups chicken stock or vegetable broth, warm
- ½ teaspoon salt adjust to taste
- freshly ground pepper to taste
- fresh parsley chopped, for garnish
Instructions
Build Your Flavor Base
- Melt the butter (or heat the oil) in a saucepan over medium heat.
- Add the onion and cook, stirring occasionally, until soft and translucent, 4 to 5 minutes. This is also where you'd add garlic or celery if you're using them — neither is in the base recipe, but both work well.
Toast the Rice
- Add the rice and stir constantly for 2 to 3 minutes, until the grains turn opaque and smell faintly nutty.
Add the Hot Liquid
- Pour in the warm stock — cold stock will throw off your timing — and bring to a gentle boil.
Season Early
- Stir in the salt and pepper now, not at the end. The grains absorb seasoning as they cook.
Simmer & Cover
- Reduce the heat to low, cover, and cook undisturbed for 15 to 18 minutes, until the liquid is fully absorbed. Resist lifting the lid or stirring.
Rest (don't skip this step)
- Turn off the heat and let the pan sit, covered, for 5 minutes. This finishes the rice with trapped steam — don't skip it just because it looks done.
Fluff & Finish
- Fluff with a fork, not a spoon, to keep the grains separate. Stir in the parsley just before serving.
Notes
Nutrition

What Most Cooks Get Wrong
- Skipping the toast: the pilaf ends up tasting like plain boiled rice with onions in it.
- Using cold stock: it throws off your timing and can cook the rice unevenly.
- Stirring during the simmer: releases starch and turns fluffy rice gummy.
- Seasoning only at the end: season with the onions and again with the liquid — not just at the table.
🍚 Rice Pilaf Flavor Builder Guide
| Ingredient | What It Does | Flavor & Texture Impact |
|---|---|---|
| Orzo Pasta | Small rice-shaped pasta, often toasted with rice | Adds chewiness and a subtle nutty depth |
| Chopped Onions | Sautéed until soft and translucent | Builds sweetness and aromatic base flavor |
| Garlic | Minced and sautéed early | Adds savory depth and complexity |
| Toasted Nuts | Stirred in or sprinkled on top | Brings crunch and rich contrast |
| Dried Fruits | Mixed in after cooking | Adds sweet bursts and chewy texture |
| Fresh Herbs | Added just before serving | Brightens flavor and adds freshness |
| Spices | Added with the liquid | Infuses warmth, depth, and color |
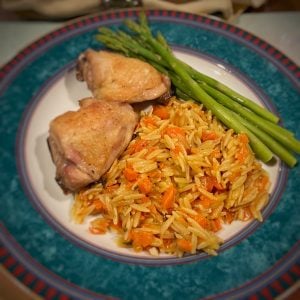
| Carrots | Sautéed or cooked with rice | Adds sweetness and slight crunch |
| Bell Peppers | Sautéed before adding rice | Contributes color, sweetness, and mild crunch |
| Mushrooms | Sautéed until golden | Adds umami depth and meaty texture |
| Celery | Sautéed with aromatics | Adds fresh, slightly bitter crunch |
| Peas | Added near the end | Provides sweetness and tender pop |
| Lemon Zest | Added at the finish | Brightens with citrus aroma |
| Shredded Coconut | Mixed in or toasted | Adds subtle sweetness and chew |
| Saffron | Soaked and added to liquid | Gives floral aroma and golden color |
| Green Onions | Added at the end | Light onion flavor and freshness |
| Chickpeas | Folded in after cooking | Adds creaminess and heartiness |
| Tomatoes | Cooked with rice or added midway | Adds acidity, moisture, and sweetness |
Think Like a Cook: Each ingredient plays a role, some build the base, some add contrast, and some finish the dish. The magic is in when you add them.
When to Add Ingredients to Rice Pilaf
- Start (Build the base): Cook onions, garlic, celery, carrots, or peppers in butter or oil to create your flavor foundation.
- Before liquid (Critical step): Add rice and toast it for a light, nutty flavor and better texture.
- With the liquid: Add spices like cumin, turmeric, bay leaf, or saffron so they infuse as the rice cooks.
- Midway or near the end: Add vegetables like peas, mushrooms, or tomatoes to keep their texture and color.
- After cooking: Stir in nuts and dried fruits so they stay distinct and add contrast.
- Final touch: Add fresh herbs, green onions, or lemon zest just before serving for brightness.
Think Like a Cook: Layering ingredients isn’t random, it’s timing. Add things when they benefit most from heat, not all at once.
Quick Fixes and Tips
- Rice came out mushy? Use slightly less stock next time, or check whether your pan is too small and trapping too much steam.
- Bottom scorched? The heat was too high during the simmer — go lower than you think you need to.
- Want more flavor without more work? Toast the rice a little longer, until it smells distinctly nutty, before adding the stock.
- Making a bigger batch? Keep the 2:1 liquid-to-rice ratio, but use a wider pan so the rice cooks in a shallower layer.
What to Serve With This
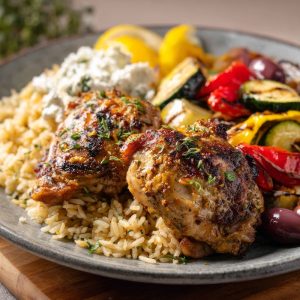
- Grilled or roasted chicken: the classic pairing — the stock makes them read like one dish.
- Lamb or lamb chops: pilaf's Middle Eastern roots make this the natural match.
- Roasted vegetables: carrots, zucchini, or Brussels sprouts round out the plate.
- A simple green salad: cuts the richness of the butter and stock.
- Wine: a light Sauvignon Blanc works, though this dish is unfussy enough to skip pairing entirely.
Storage and Make-Ahead
- Keeps in the refrigerator up to 4 days in an airtight container.
- Reheat with a splash of stock or water to loosen the grains — a few minutes covered on low heat, or a quick spin in the microwave.
- Freezes well for up to 2 months; thaw overnight in the refrigerator before reheating.
Where Pilaf Actually Comes From
- It started in ancient Persia: cooks there developed the core idea this recipe still uses — frying rice in fat before simmering it in broth, instead of just boiling it in water.
- The word traveled with the technique: "pilaf" entered English in the 1610s as "pilau," from Turkish "pilav," from Persian "pilaw" — nearly every language that adopted the dish kept some version of the same word.
- The Ottomans spread it wide: as the empire expanded, pilaf traveled with it into the Balkans, North Africa, and across the Middle East, picking up local grains, fats, and spices along the way.
- It reached India under Muslim rule in the medieval period, where it evolved into pulao and, eventually, biryani.
- Central Asia built its own version: Uzbek and other Central Asian cooks make plov, often loaded with meat and carrots and cooked in one wide pan.
- What ties every version together: Turkish pilav, Persian polow, Indian pulao, Uzbek plov — all of them still do what this recipe does. Fat and toasting first, broth second.
- Toasting the rice is really a sauté technique — see my sauté, pan-fry, and stir-fry guide for the heat control behind it.
- Homemade stock changes this recipe more than anything else you can do to it — see how to make homemade chicken stock.
- If you've never thought much about what an onion actually does to a dish, cooking onions at home is worth a read.
- Not all rice behaves the same in a pilaf — my guide to rice covers the differences.
- Pair this with grilled pork loin chops for a straightforward weeknight plate.
- Or build out a bigger spread with grilled corn with parmesan butter.
Frequently Asked Questions About
What is rice pilaf? Rice cooked by first sautéing it in fat, then simmering it in seasoned liquid instead of water, which keeps the grains separate and infuses flavor throughout.
What makes a pilaf a pilaf? The technique, not the ingredients — toasting the rice in fat before it ever touches liquid is what defines a pilaf, whether you’re using white rice, brown rice, or another grain entirely.
What are the most common mistakes with rice pilaf? Skipping the toasting step, using cold stock, stirring while it simmers, and seasoning only at the end.
What gives rice pilaf its flavor? Cooking the rice in stock instead of water, plus the fat and aromatics used to toast it — the grains absorb flavor as they cook, not after.
Can I use brown rice instead of white? Yes, but it needs more liquid and a longer simmer, closer to 40 to 45 minutes.
Can I make rice pilaf ahead of time? Yes. It reheats well with a splash of stock or water to loosen the grains.
Why is my rice pilaf mushy? Too much liquid or stirring during the simmer are the two most likely causes.
Can I use water instead of stock? You can, but you’ll lose most of the flavor that makes this dish worth making instead of plain rice.