Fast Answer
Always pull meat 5–10°F before your target temperature — carryover cooking during rest finishes the job. Rest steaks 5–10 minutes, roasts 15–30 minutes, whole birds up to 45 minutes.
The Numbers You Need, by Cut and Animal
The charts below cover beef, pork, lamb, chicken, turkey, and fish — with pull temperatures, final target temperatures, and rest times for each cut. All temperatures are in °F and °C.
BEEF (Steaks & Roasts)
| Doneness | Remove From Heat | Target Temp | Rest Time (Steak) | Rest Time (Roast) |
|---|---|---|---|---|
| Rare | 120°F / 49°C | 125°F / 52°C | 5 minutes | 15–20 minutes |
| Medium Rare | 125°F / 52°C | 130°F / 54°C | 5–7 minutes | 20 minutes |
| Medium | 135°F / 57°C | 140°F / 60°C | 7 minutes | 20–25 minutes |
| Medium Well | 145°F / 63°C | 150°F / 66°C | 8 minutes | 25–30 minutes |
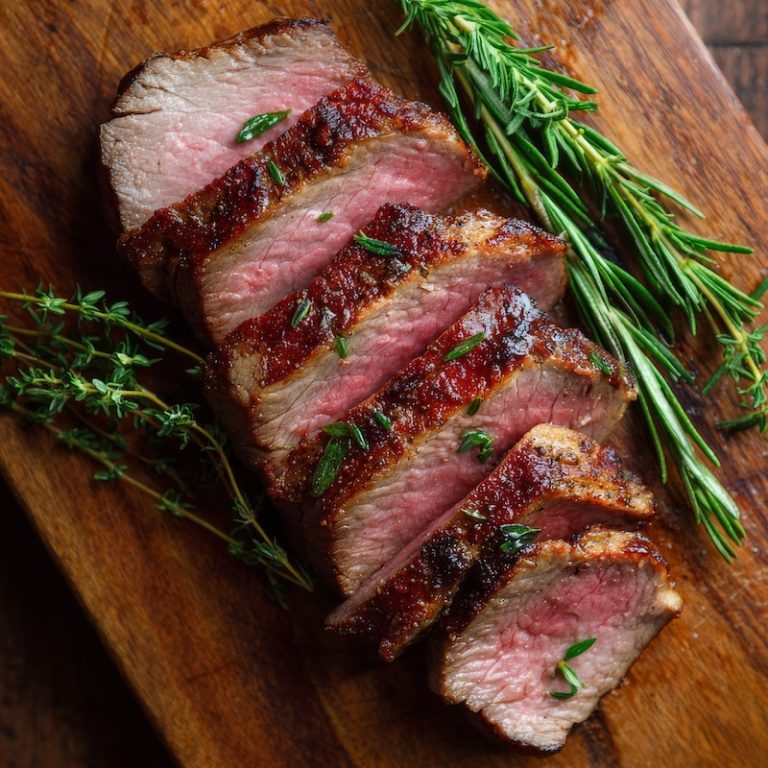
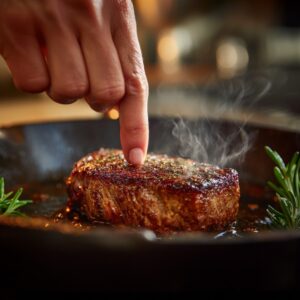
Medium Rare Steak Temperature
Pull at 125°F (52°C). Target after rest: 130–135°F (54–57°C).
Medium rare is where most beef — ribeye, strip, tenderloin, sirloin — is at its best. The muscle fibers are relaxed, the fat has started to render, and there’s still enough moisture in the tissue that each slice stays tender. Go past 140°F and you’re not in medium rare territory anymore, regardless of what the color looks like when you cut it.
Insert thermometer from the side of the steak into the thickest part, away from any bone. One insertion is enough.
Ground Beef Internal Temperature
Cook to 160°F (71°C). No rest needed.
Ground beef is the exception to the pull-and-rest logic that applies to steaks and roasts — it needs to reach 160°F all the way through, not just in the center. The reason is surface bacteria: whole cuts only have bacteria on the exterior, which is killed by searing. When beef is ground, that surface is mixed throughout. No carryover credit here; confirm 160°F before you pull it.
This applies to burgers, meatballs, meat sauce, and meat loaf equally. Ground turkey and ground chicken follow the same rule but at 165°F.

PORK (Chops & Roasts)
(USDA recommends a safe minimum temp of 145°F / 63°C for whole cuts)
| Doneness | Remove From Heat | Target Temp | Rest Time (Chop) | Rest Time (Roast) |
|---|---|---|---|---|
| Slightly Pink (Juicy) | 140°F / 60°C | 145°F / 63°C | 5 minutes | 15–20 minutes |
| Medium | 145°F / 63°C | 150°F / 66°C | 5–7 minutes | 20 minutes |
| Well Done | 155°F / 68°C | 160°F / 71°C | 6–8 minutes | 25 minutes |
Pork Tenderloin Internal Temperature
Pull at 140°F (60°C). Target after rest: 145°F (63°C).
Pork tenderloin is the leanest cut on the animal, which means it has almost no margin for error. A few degrees past 150°F and it’s noticeably dry. The USDA revised its safe pork temperature down to 145°F in 2011 — if you’re still cooking pork to 160°F out of habit, you can stop. A slightly pink center at 145°F is safe, intentional, and a better result.
Tenderloin cooks fast and thin, so check early and check often. It can go from 130°F to 155°F in under two minutes on a hot pan.
LAMB (Chops & Roasts)
| Doneness | Remove From Heat | Target Temp | Rest Time (Chop) | Rest Time (Roast) |
|---|---|---|---|---|
| Rare | 120°F / 49°C | 125°F / 52°C | 5 minutes | 15–20 minutes |
| Medium Rare | 125°F / 52°C | 130°F / 54°C | 5–7 minutes | 20 minutes |
| Medium | 135°F / 57°C | 140°F / 60°C | 7 minutes | 20–25 minutes |
| Medium Well | 145°F / 63°C | 150°F / 66°C | 8 minutes | 25–30 minutes |
CHICKEN (Whole, Breasts, Thighs, Drumsticks, Wings)
Notes:
Dark meat (thighs, legs) is best cooked to 175–180°F — it breaks down connective tissue and makes it tender.
White meat dries out above 165°F — so pulling it at 155–160°F and letting it rest is ideal.
Stuffed birds must hit 165°F in the center of the stuffing — not just the meat.
| Cut | Remove From Heat | Target Temp (USDA Safe) | Rest Time |
|---|---|---|---|
| Whole Chicken | 155–160°F / 68–71°C | 165°F / 74°C (white meat) 175–180°F / 79–82°C (dark meat preferred) |
15–20 minutes |
| Breast (bone-in or boneless) | 155°F / 68°C | 160–165°F / 71–74°C | 5–10 minutes |
| Thighs (bone-in or boneless) | 170°F / 77°C | 175–180°F / 79–82°C | 5–10 minutes |
| Drumsticks/Wings | 170°F / 77°C | 175–180°F / 79–82°C | 5–10 minutes |
| Stuffed Chicken | 165°F / 74°C (stuffing center!) | 165°F / 74°C | 15–20 minutes |
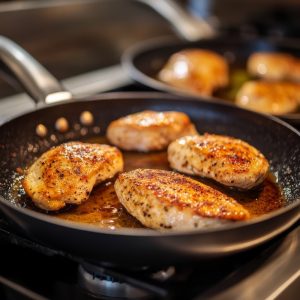
Chicken Breast Internal Temperature
Pull at 155°F (68°C). Target after rest: 160–165°F (71–74°C).
Chicken breast is where home cooks most often overcook — not because they’re careless, but because 165°F is the USDA number most people have memorized, and they cook to it rather than past it. The problem is that by the time the center reads 165°F on the heat, carryover pushes it higher during rest. Pull at 155°F, rest 5–10 minutes, and you’ll hit the safe zone with a noticeably juicier result.
This applies to both bone-in and boneless breasts. Bone-in takes longer to reach temperature but holds heat longer during rest — account for that with a slightly earlier pull.
Turkey (Whole, Breast, Thighs, Ground)
| Cut | Remove From Heat | Target Temp (USDA Safe) | Rest Time |
|---|---|---|---|
| Whole Turkey | 155–160°F / 68–71°C | 165°F / 74°C (breast) 170–175°F / 77–80°C (thighs) |
30–45 minutes |
| Breast (bone-in or boneless) | 155°F / 68°C | 160–165°F / 71–74°C | 15–20 minutes |
| Thighs / Legs | 170°F / 77°C | 175–180°F / 79–82°C | 15–20 minutes |
| Ground Turkey | 160°F / 71°C | 165°F / 74°C | 5 minutes |
| Stuffed Turkey | N/A (don’t rely on meat temp) | 165°F / 74°C in the center of stuffing | 30–45 minutes |
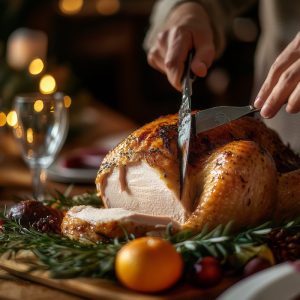
Tips for Juicy Turkey:
Pull at 155–160°F for breasts to allow for carryover to 165°F. This keeps it juicy and avoids drying out.
Thighs benefit from higher temps (175–180°F) to melt collagen and stay moist.
For a whole bird, test both breast and inner thigh.
Always let it rest before carving — this is essential for even juiciness and easier slicing.
Stuffed Bird Warning:
Make sure stuffing hits 165°F in the center, or it’s not safe.
It’s often easier (and safer) to cook stuffing separately to ensure both it and the turkey are cooked perfectly.
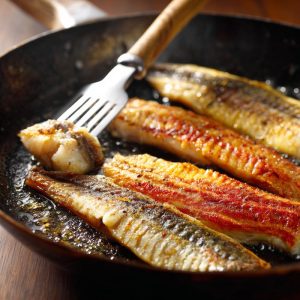
Fish Internal Temperature
Cook to 140–145°F (60–63°C) for most fish. Thinner fillets: cook to opacity.
Fish is where the thermometer-for-everything rule gets complicated. A thick salmon fillet or a whole roasted fish absolutely benefits from a thermometer — pull at 125–130°F (52–54°C) for medium, which leaves the center just translucent and the texture silky. The USDA’s official safe temperature for fish is 145°F, which produces a fully opaque, cooked-through result — appropriate for ground fish or anyone immunocompromised, and for most white fish where you want it flaking cleanly.
Thin fillets (sole, tilapia, thin trout) are easier to judge by texture and opacity than temperature — a thermometer probe is often wider than the fillet itself.
Fish Internal Temperatures — By Cut
| Cut | Remove From Heat | Target Temp (USDA Safe) | Rest Time |
|---|---|---|---|
| Salmon fillet (thick) | 125–130°F / 52–54°C | 145°F / 63°C | 2–3 minutes |
| Tuna steak | 115–120°F / 46–49°C (sear only) | 145°F / 63°C | 2 minutes |
| Halibut steak or fillet | 130°F / 54°C | 145°F / 63°C | 2–3 minutes |
| Cod / Haddock fillet | 130°F / 54°C | 145°F / 63°C | 2 minutes |
| Whole fish (any species) | 130°F / 54°C at thickest point | 145°F / 63°C | 3–5 minutes |
| Thin fillets (sole, tilapia, trout) | Judge by opacity — flakes easily | 145°F / 63°C | 1–2 minutes |
| Swordfish steak | 130°F / 54°C | 145°F / 63°C | 2–3 minutes |
Note: The "Remove From Heat" temperatures reflect culinary preference — particularly for salmon and tuna, where most cooks prefer a slightly translucent center. The USDA safe target of 145°F applies universally and is recommended for anyone immunocompromised, pregnant, or cooking for young children.
Note: Consuming undercooked fish carries food safety risk. The lower temperatures above reflect culinary preference, not USDA guidelines.
How Long to Rest Meat
The rule most people skip — and the one that matters most after the pull temperature.
Resting is what allows carryover cooking to finish and the muscle fibers to relax enough that juice stays in the meat rather than running out on the cutting board. Cut too early and you’ll see it happen in real time.
One useful method from the comment thread here: rather than watching a clock, use your thermometer. When the center of the meat drops to around 120°F (49°C), the fibers have relaxed enough that it’s ready to slice — regardless of the size of the cut.
Resting Times — Minimum by Cut
- Thin steaks (under 1"): 5 minutes
- Thick steaks (1"+): 7–10 minutes
- Pork or lamb chops: 5 minutes
- Pork or beef roast: 15–30 minutes
- Whole chicken: 15–20 minutes
- Whole turkey: 30–45 minutes
Note: For large roasts carved immediately off the cutting board — 15 minutes is the floor, not the ceiling.
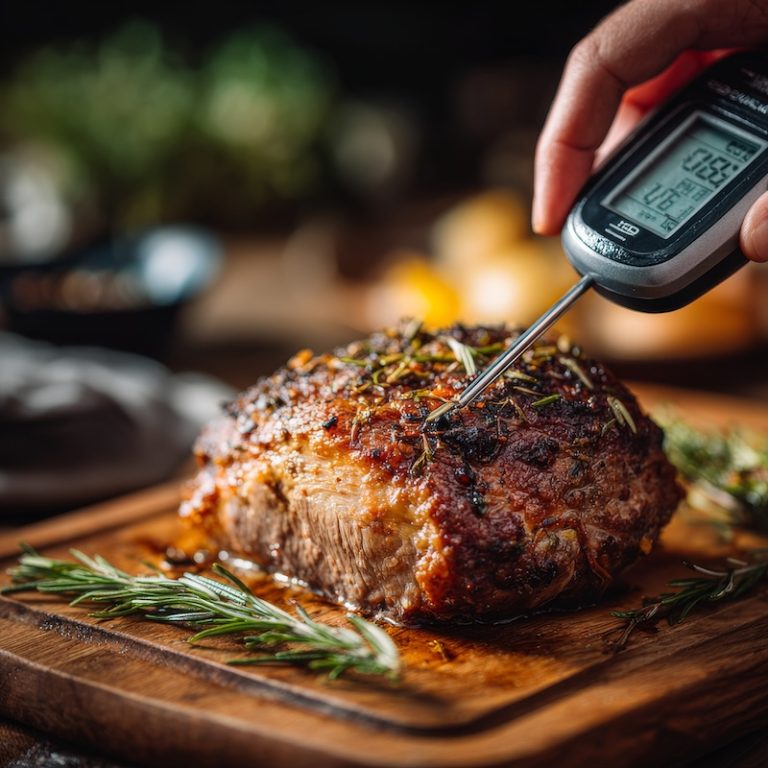
Does Piercing Meat with a Thermometer Dry It Out?
The short answer is no — not in any meaningful way. Meat isn't a water balloon. Juice doesn't pool in a cavity waiting to escape through the nearest hole. It's held in a dense network of muscle fibers, and what pushes it out is heat, not puncture. A thermometer probe displaces a small amount of fiber at the point of entry. That's it.
The real juice loss happens in two places: overcooking, which contracts the muscle fibers and physically squeezes moisture out, and cutting too early, before the fibers have had time to relax during rest. A thermometer used correctly — inserted once, into the thickest part — prevents both of those problems. It doesn't cause them.
Using a Thermometer Without Wrecking the Meat
- Insert once: One clean insertion into the thickest part is all you need. Repeated jabbing is where you start losing juice — and more importantly, accuracy.
- Steaks: Come in from the side so the probe tip sits in the center of the meat, not near the surface.
- Roasts and whole birds: Insert into the thickest part, away from bone and fat pockets — both read higher than the surrounding meat and will give you a false result.
- Leave-in probes: For large roasts and whole birds, a leave-in probe inserted before the oven eliminates the need to open the door repeatedly. Worth the modest investment.
Can You Tell Doneness Without a Thermometer?
Experienced grill cooks use touch — pressing the center of the steak and reading the resistance. Rare feels soft, medium rare has a little give with some spring, medium is firmer. It works, and with enough repetition it becomes reliable. Most professional line cooks use it for steaks because speed matters and they're cooking the same cuts hundreds of times.
For home cooks, the honest answer is that touch takes time to learn and varies by cut, thickness, and starting temperature. A thermometer gives you the same information without the repetition. I'd suggest learning both — use the thermometer until you trust your instincts, then keep it nearby anyway. Even experienced cooks reach for it on an unfamiliar cut or an unusually thick piece of meat.
Explore More
- How to Tell When Meat Is Done — Temperature gets you close. This page covers what else to look for, including touch, color, and when to trust your instincts.
- Why You Should Never Press Down on a Burger — If you're cooking ground beef, this is the other mistake worth avoiding. What you're actually squeezing out when you press.
- How to Buy a Good Steak — The cut you're starting with matters as much as the temperature you're cooking to. Grade, marbling, and what color actually tells you.
Meat Doneness FAQ
Q: Where exactly should I insert the thermometer?
Insert into the thickest part of the cut, away from bone and fat pockets. For steaks, come in from the side so the probe tip sits in the center of the meat. For whole birds, the inner thigh away from the bone is the most reliable spot — it’s the last part of the bird to come up to temperature.
Q: Does piercing meat with a thermometer dry it out?
No, not in any meaningful way. A thermometer probe displaces a tiny amount of muscle fiber; it doesn’t open a channel that drains the meat. Juices are lost through overcooking and through cutting too early, not from a single probe insertion. The myth persists but the science doesn’t support it.
Q: Why does the chart show a “pull” temperature and a “target” temperature?
Because meat keeps cooking after you take it off the heat. A steak pulled at 125°F will rise another 5–10°F while resting — that’s carryover cooking. If you cook to your target temperature and then rest, you’ve overshot. Pull early, rest, arrive where you meant to.
Q: Can I use the same temperatures for grilling, roasting, and pan-searing?
Yes. Internal temperature is independent of cooking method — 130°F is 130°F whether you got there over charcoal or in a cast iron pan. What changes is how quickly the meat reaches that temperature and how much carryover you get from a very hot surface vs. an oven.
Q: Why is pork allowed to be slightly pink now?
The USDA revised its safe temperature for whole pork cuts from 160°F to 145°F in 2011, with a 3-minute rest. At 145°F, pork can be slightly pink in the center and is safe to eat. The older guideline produced dry pork; the revised one produces better food.
Q: Should I use an instant-read thermometer or a leave-in probe?
Both have their place. An instant-read is faster and works for steaks, chops, and quick-cooking cuts. A leave-in probe — inserted before the roast goes in the oven — lets you monitor a large cut without repeatedly opening the oven door, which matters for heat retention. Several readers here have noted that wireless probe thermometers with phone alerts are worth the modest investment for roasts and whole birds.
Q: Do I really need to let a whole turkey rest for 30–45 minutes?
Yes, and it’s more forgiving than you’d expect — a properly rested turkey stays hot for a long time, especially if you tent it loosely with foil. The rest also makes carving significantly easier; the meat firms up slightly and holds together. Slicing a turkey that hasn’t rested is an exercise in watching the juices run onto the board.


51 Responses
I see the recommended “Resting Time” for the birds, but, I’m looking for the resting time for a beef roast. Where is THAT!??
For steaks, I most often see 3 to 10 minutes. For roasts, I’ve seen 5 minutes per inch of thickness or ten minutes per pound or half of the total cooking time. I just read an article at serious eats dot com and they suggest the best way to know if the meat has rested enough is with a thermometer. They suggest when the center of center of the meat reaches 120 degrees F., the meat is ready to cut and serve. For a 1.5 inc thick steak, this could be 10 minutes and for a prime rib roast, this could take as long as 45 minutes.
If your roast is less than 3lbs it’s a steak not a roast.
Followed the receipe for a 4.18 lb roast. 500 for 21 minutes, then oven off and Kept it in about 55 minutes. Perfect. Wow. Thanks. Will never cook the old way again.
Hi Chris, I will definitely give your method a try and see how it goes. As far as resting beef, I disagree with you. I’m not a food scientist and I admit, some of the concepts I originally learned when I first started cooking have currently been proved wrong but this isn’t one of them. I am a huge fan of J. Kenji López-Alt of Serious Eats and I wanted to see what he said about resting steaks and larger cuts of beef. He has a great post about this at http://bit.ly/1xQUUc1 and I urge you to check it out. One thing he said about this technique, “By far the easiest and most foolproof way to test if your meat has rested long enough is the same way you can tell if your meat is cooked properly: with a thermometer. Ideally, no matter how well-done you’ve cooked your meat, you want to allow it to cool down until the very center has reached 120°F (49°C). At this stage, the muscle fibers have relaxed enough that you should have no problem with losing juices. As shown in the graph, In a 1.5-inch-thick steak, this translates to around 10 minutes. For a prime rib, this may take as long as 45 minutes.”
This method depends on how well insulated your oven is. Since they are not all the same, results will vary between different brands and oven types.
Hi Chris, I just wanted to point out the fact that not only is what you said is comically wrong, but the way in which you said it is very rude. I hope you eat nothing but tough steaks the rest of your life you miserable old fart.
Where it says ‘Beef Roasts’ – under Beef Steaks.
Thank you for this article!
There are so many different guides to doneness out there, but very few (none that I’ve come across) really take into consideration resting. The ones that do only give some vague guidelines (ie, take it out before) without giving any specific ideas. I realize that it’s a bit of an art, but this is very helpful.
Thank you, thank you, thank you. I’m convinced this is the best way to determine when your meat is done just right.
No professional chef I’ve ever met would use a instant thermometer the moment you pierce the meat after it has started to cook it starts to toughen & it looses some of the juices this would happen normally through cooking but with the meat pierced it happens at a greater rate. The longer it continues to cook like this after you have pierced it the tougher & dryer it gets at a faster pace then normal. It’s a cardinal sin almost as bad as cutting the steak with a knife to see how it’s done.
Touch is the only way period if you want best results.
In terms of steak this is true. With roasts and whole birds, this is false.
When it comes to a roast beef there is no way you can use the touch method. Also, when I cook a roast beef I use an instant read thermometer and I’ve never had any issues whatsoever with losing juices, and or it becoming dry or tough.
Actually, Cathy, that perspective is outdated. Modern culinary science and professional kitchens rely on instant-read thermometers precisely because they provide accurate, safe measurements without significantly affecting moisture or texture. A tiny puncture from a high-quality thermometer does not cause the meat to dry out or toughen noticeably, and resting it afterward allows the juices to redistribute as usual. Even top chefs use thermometers to complement touch because they remove guesswork, ensure food safety, and guarantee consistent doneness, especially with thicker cuts or poultry, where relying solely on touch can be misleading.
The “top chefs would never pierce the meat” theory is pretty outdated, regardless of if professional chefs still do it or not. A number of sites and chefs have scientifically proven it to be pure myth that the meat loses any significant or detectable, amount of juices or tenderness from piercing. The best analogy was that because of the structure of meat, piercing to check temp is like popping 2 or 3 water balloons out of 100’s. You aren’t going to notice that water missing.
Great chart, very helpful and just what I was looking for to use with my new digital thermometer. Thank you.
Perry, I have also heard the same thing about piercing a steak and how it is no longer the accepted understanding although for a long time I did believe this was true.
What are your thoughts on using the thermometer probes that are left in the meat and the temperature is read outside of the oven. I like using them because, you do not loose heat from the oven each time you open it to check the temperature, and you have less chance of the temperature getting away from you.
Dennis, I think they are great especially for roasts and I agree, the less you open the oven door letting out a bunch of heat, the better.
According to top michelin-starred chefs in Paris, meat should be rested for however long it’s cooked. So, if you roast a 2kg beef joint for 2hrs 30 mins, it should be rested for 2hrs and 30 mins. Not many amateurs will follow this rule, but it is guaranteed to optimise the succulence of whatever meat has been cooked.
Hi Simon, not sure where you read this but I can’t imagine leaving a piece of roasted meat rest for 2 hours and 30 minutes. If you have a source for this information, I would appreciate your sharing it but I would not recommend following these top Michelin Starred chefs in Paris. Who wants to eat cold beef unless it’s a roast beef sandwich?
That’s funny, what Simon says, but was totally off. Thanks for setting him straight, as I wouldn’t want to eat a cold steak either….knowing him, he’d probably nuke it to warm it back up again, thus changing the temp again and making it harder to chew.
Simon, I’m pretty sure that advice applies only to steaks. Obviously a roast left at room temperature for over two hours is not going to be “succulent” in any way, it’s going to be cold with hardened, slimy fat and clumpy dripings.
I don’t think Simon was “totally off” at all. I rest my 6kg beef roasts for approximately the same time that I cooked them at. On removal from my barbecue, I wrap the roast in two layers of foil, then wrap a bath towel round it and place in an esky (cold box). They are still warm 4 to 5 hrs later and are perfect I re4st all my meat joints in this manner.
Health inspectors require that any food that is left in the “danger zone” where bacteria grows rapidly for 2 hours to be discarded. In fact, if they find the food anywhere between those temperatures and it is being held rather than being cooled or heated, they require you to throw it away and pour bleach on it in order to prevent the sale of it. This is in America, I’m not sure how strict health codes are in Europe but no, American professionals would never leave rest a roast for that long unless they want to be shut down for a food borne illness outbreak, which happens daily at less reputable restaurants.
Restaurants serve roasts and prime rib all the time, you’re quite mistaken about the entire issue and how health inspectors work.
I’m cooking a roast beef strictly for slicing into thin sandwich meat. I’m following the temps for medium/well for obvious reasons. My question is… How long should i let the roast rest before attempting to slice it with a meat slicer? Also… would you recommend putting it in the fridge to speed up the cooling process?
Any input at all would be welcome.
First of all,if you’re going to roast off a joint of beef for ‘sarnies’,please,cook it rare. Second, I’d recommend leaving the joint loosely covered with foil to allow the steam to escape, then letting it cool down a bit before you refrigerate it overnight. Slice it the following day, and you’ll have some lovely sandwiches. Am I invited over for tea ??
Francois,ex-professional chef.
Oh,by the way, having read the previous comments…NEVER,NEVER,NEVER, pierce your meat. If I EVER saw one of my chefs doing that, I’d fire him.
And that includes thermometer probes, too.
And just how do you propose measuring the internal temperature of your meat without piercing it. Feel free to stick by your old techniques, but actual cooking research has shown that piercing has negligible effect on the meat, and allows you to get it cooked perfectly every time.
Yes, I do agree with you and need to go back and revisit this article. Since I was taught many, many years ago that piercing lets the juices “bleed out”, I have seen the light and come to my senses that piercing does not have much if any effect on the outcome. Thank you for reminding me I have to get back and change this copy.
I’ve been cooking for 30 years professionally in high end restaurants, resorts, sports venues etc and have never seen anyone ( other than beginners ) use a thermometer to cook steaks. Whether there is science to back it up or not it just isn’t done. Roasts and chicken are a different story – but I repeat…Real experienced grill chefs do not check steaks with a thermometer for doneness – Period !
It has nothing to do with “‘old” or “new” techniques – it just isn’t done by any professional that is any good
Thanks for reading
Hi Chef B, I would agree with you most professionals use there senses, site, touch and even sound, when determining doneness but when learning how to cook in culinary school, they use thermometers to learn and that’s what I’m suggesting novice and intermediate home cooks do. Saying that, I’ve eaten at many high-end restaurants where I wish the seasoned professional chef used a thermometer because the medium-rare steak ordered came out medium-well. It happens all the time and I’m sure you would send it back but the majority of non professional cooks out there, including myself, do not. Chef, would you mind sharing some of your tips on determining doneness so I can share them with my readers. I am always looking to learn more about cooking steaks and would welcome your comments. Please drop me a line by email and I will give you a call. Thanks.
Maybe this is why very few restaurants actually get my steak done to the level I request? Restaurants in my area seem to have a less than 50% success rate actually getting my steak to the requested medium rare, and it appears that “it’s always been done that way” thinkers like you are the problem!
For roast beef intended for thin sandwich slices, let it rest at room temperature for about 20–30 minutes after cooking. This allows the juices to redistribute evenly, keeping the meat moist and ensuring clean slices with your meat slicer. Putting it directly in the fridge to cool faster is not recommended because chilling it too quickly can firm up the outer layer unevenly and make slicing more difficult, and it can also trap heat in the center, affecting food safety. If you need it cooler for slicing, let it rest at room temperature first, then move it to the fridge for a short additional chill, ideally wrapped loosely so it cools evenly without sweating.
Why can’t you cook a roast rare for slicing? The butchers sell it rare.
Cooking sous-vide guarantees that the internal temperature is exactly where it should be, and there’s no need for a thermometer or for the meat to rest. You can’t overcook the item, so there’s no worry or stress. Our new device ($180-$200) has, so far, produced perfect pork chops, salmon, mahi-mahi, and chicken breast. In a couple of days, it will enable me to perfectly cook a rack of lamb, and I came to this page in search of a temperature target. I kid you not: perfect, edge to edge.
Larry, love sous vide and yes, with it, you get the right temperature every time.
Hi – great chart, thanks – but do you have a version in degrees Celsius perhaps?
Now have Celsius. Thanks for the recommendation.
My medium rare beef steaks get eaten right out of the oven. I like my meat hot!
Thermometers are a great tool for the home cook. Of course professional chefs can check the doneness of the meat by touch. My question is “Why are so many ‘professional’ chefs checking this website’s meat temperature and doneness chart?” True professional chefs would already know this information.
Well said Ray, I consider myself a foodie of sorts and would not take a chance of cooking a great cut of Prime Rib or Beef Tenderloin roast without a probe. You’re right, why would “professional” chefs be even looking here other than to bore us with their snobby attitudes. I too have been to high end restaurants with less than ideal steaks served to me.
This is a great chart for cooks of any level.
While I appreciate the previous conversations, I am having trouble in guestimating how long to cook a roast based on the internal temperature BEFORE putting it in the oven. Roasting a 7.8 # beef roast that was refrigerated to 40° and taken out for an hour before roasting does NOT bring it up to room temperature brings it up to 49°F. I have no desire to keep checking its’ temp, roasting in a small rv oven causes a significant loss of heat every time the oven for is opened. My cook book says for medium rare after roasting at 450° for 15 min turn down the heat to 325° and roast for 18-20 min a pound. That would be about 2.5 hrs. I know that won’t be enough time. Any guidelines?. I understand the answer won’t help me today but will for the future. Thank you
Hi Sandy, I can see your dilemma so I have a couple of suggestions. First decide what your targeted internal temperature will be based on my chart or any other chart you find useful. If your oven door has glass window, you can use a standard meat thermometer to give you the internal temperature while it is cooking. If you don’t have a window you can look through, there are some wireless digital meat thermometers you can pick up for as little as $20. Some of them will even sound an alarm on your phone to let you know when you hit your target temperature. I don’t like to use the time and temperature recommendations most recipes give you as a guideline because they often lead to overcooking and don’t take into consideration resting time. You can always adjust the time and temperature and then check the meat with a thermometer to see how much more you have to roast the beast.
I love this place! I am doing a 4-H quiz bowl and have to know how to find if meat is done so this comes in real handy! Also, do you have a chart for ham?
Thanks Caroline. Check out my Pork Cuts Charts on Pinterest at https://www.pinterest.com/reluctantgourme/pork-cuts-charts/
Isn’t ham already cooked when you buy it? All that needs to be done is glazing (if desired) and heating.
But WHERE do you test for these ideal temperatures? If by the bone, the rest of the meat is overcooked in my experience. This is the most confusing part by far for me as a non-professional home cook.
Nova Mom, you are correct. You don’t want to test right next to the bone or on the bone. You typically want to insert your thermometer into the center of the thickest part of the meat. For steaks, I like to come in from the side if possible, for chicken I like to poke the thigh away from the bone. I should work on a chart of where I like to test meat temperatures so please let me know readers, where you test for ideal temperatures.
Hi all.
What a great site to find giving good professional advice on cooking meat, I can now cook meat with confidence and get a perfect result every time.
Just one thing would make the site perfect, please add the centigrade equivalent temperatures as in an awful lot of countries like Australia, everything is calibrated in centigrade.
Thanks for the kind words Phil. Celcius numbers are now available.
I’m not a professional chef, but I use the “touch test.” When I order steak at a restaurant, and they ask me to cut into it to check, I just press it with the flat of the knife and I know immediately.
Same with grilling at home – it’s easy to learn the touch test!