Fast Answer
Caramelizing onions means cooking them slowly over medium-low heat — 40 to 60 minutes minimum — until their natural sugars break down and turn sweet, soft, and deeply browned. There is no shortcut that produces the same result.
What a Restaurant in New Jersey Taught Me About Patience
Years later, I figured out what I’d been eating at that restaurant. Not magic — though it still feels like it. Raw onion is sharp, sulfurous, and aggressive. Cooked low and slow for long enough, those same compounds break down completely and the onion’s natural sugars take over.
What you’re left with is something sweet, soft, and almost unrecognizable as the thing you started with. I taught my younger daughter this by having her taste a raw onion first, then the finished product. She’s been making them ever since.
Start Here: What You're Actually Trying to Do
- The goal: Onions that are deeply browned, completely soft, and sweet enough that someone who claims not to like onions will eat them without complaint.
- The obstacle: Time. The transformation requires sustained low heat over 40 to 60 minutes. Every shortcut either undercooks them or burns them.
- What success looks like: A deep amber to mahogany color, a jammy texture that holds together but isn't crisp, and a smell that fills the kitchen with something between sweet and savory.
- What underdone looks like: Pale gold, slightly translucent, still a little sharp on the tongue. Better than raw — but not what you're after.
- Who this is for: Anyone who has either rushed the process and been disappointed, or avoided it entirely because it seemed too slow. Both problems are solved the same way.
Why This Technique Works: What's Actually Happening in the Pan
- First, the water has to go: Raw onions are about 90% water. Before any browning can happen, that moisture has to evaporate. This is the sweating stage — the onions look wet and limp and nothing seems to be happening. Something is happening. It just takes time.
- Then the Maillard reaction: Once enough moisture has left, the heat triggers a reaction between the onions' amino acids and their natural sugars, producing hundreds of new flavor and aroma compounds. This is what creates the color and the complexity. It's the same reaction that browns a steak or a loaf of bread — just slower, because the moisture keeps suppressing it until it's gone.
- Then true caramelization: At higher temperatures, the sugars themselves begin to break down and recombine into new compounds — caramels, with their characteristic bittersweet depth. This is where the mahogany color and the slight nuttiness come from.
- Why low heat matters: High heat drives off moisture too fast, browns the outside before the inside softens, and pushes into burning before the sugars have time to develop properly. Low heat lets all three stages happen in sequence.
- Why they shrink so much: A pound of raw onions loses most of its volume as the water cooks off. Plan on getting about a cup of finished caramelized onions from two large onions. This surprises people every time.
Think Like a Cook: The Transformation Is the Technique
- Most techniques ask you to preserve something — the moisture in a braise, the crust on a sear, the structure of a vegetable. Caramelizing onions asks you to destroy everything the raw onion is and replace it with something entirely different.
- That's why patience isn't just practical advice here — it's the actual mechanism. You're not waiting for something to finish. You're waiting for a complete chemical transformation to occur. Rushing it stops the transformation partway through.
- The test your tongue can do: Taste the onions at 15 minutes, 30 minutes, and 45 minutes. They'll be noticeably different each time — softer, sweeter, deeper. Once you've done this, you'll never pull them too early again. This is exactly how I taught my younger daughter — raw onion first, finished product second. One taste and she understood something no amount of explanation could have conveyed.
- The practical implication: Make more than you need. Caramelized onions keep in the refrigerator for four days and freeze well. The time cost is the same whether you're making one cup or three.
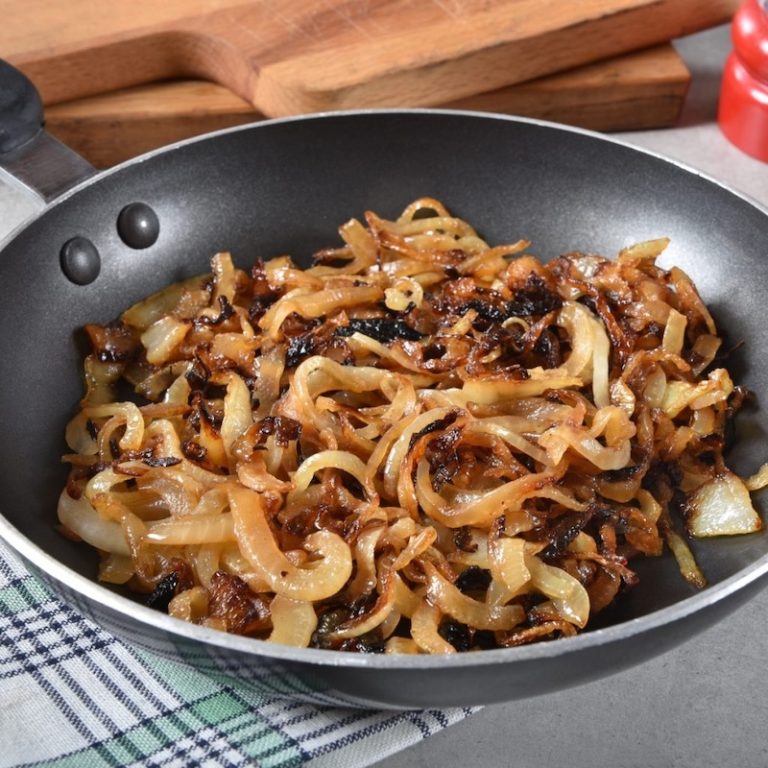
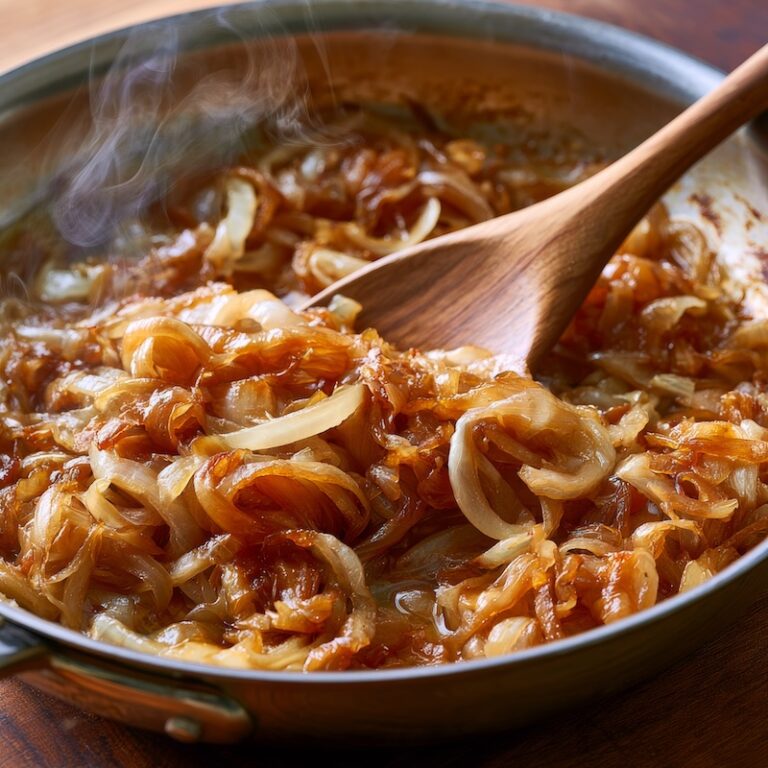
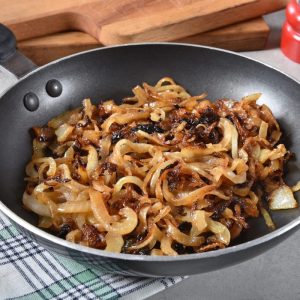
Onions – Caramelizing Onions
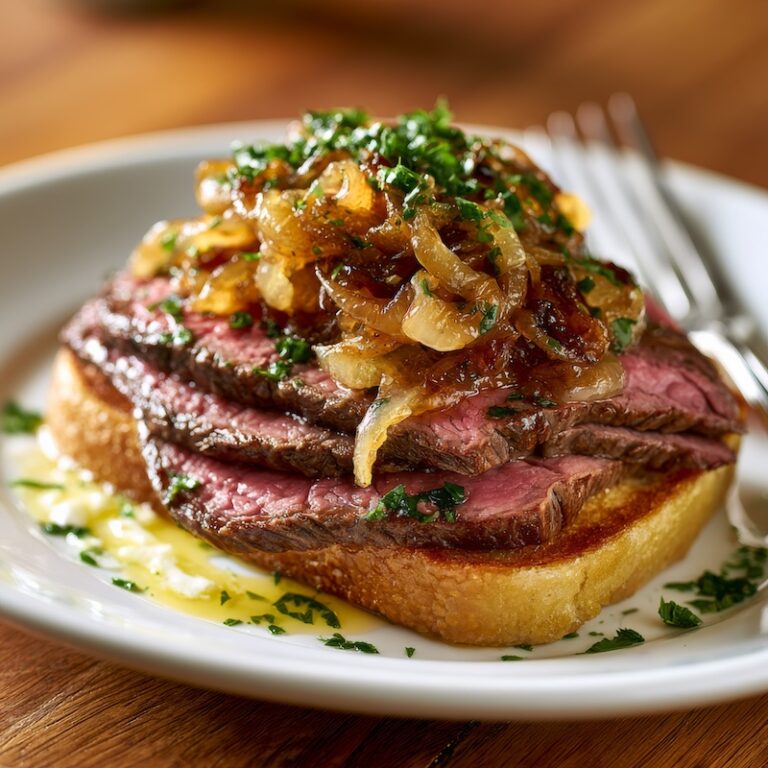
Equipment
- large saute pan
Ingredients
Optional additions for extra flavor
- freshly ground black pepper
- fresh herbs minced, or dried herbs
- 1 teaspoon honey agave nectar or corn syrup
Instructions
Heat the Pan
- Place a large sauté pan over medium-low heat. Add the olive oil, butter, or a mixture of both. Allow the butter to melt completely and the fat to heat gently.Tip: You want the fat hot but not smoking. A calm surface shimmer is perfect.
Add the Onions
- Add the sliced onions in an even layer about ½ inch thick. If needed, cook in batches. Sprinkle with a pinch of salt.Tip: Salting early draws out moisture. It may slow browning at first, but it improves flavor and ensures even caramelization.
Sweat the Onions
- Cook over medium-low heat, stirring every couple of minutes. You should hear only a faint, steady sizzle.
- As the onions release moisture, they will soften and reduce in volume.Tip: This slow “sweating” stage allows water to evaporate gradually so the natural sugars can concentrate instead of burn.
Adjust & Continue Cooking
- If the pan becomes crowded, wait until the onions cook down, then add more if needed. Adjust the heat as needed to maintain a gentle simmer.Tip: If they begin browning too quickly, lower the heat. Deep flavor comes from patience, not high heat.
Add Optional Flavor Boosters
- Once the onions are soft and beginning to turn golden, stir in any optional additions such as black pepper, herbs, or a teaspoon of honey, agave, or corn syrup.
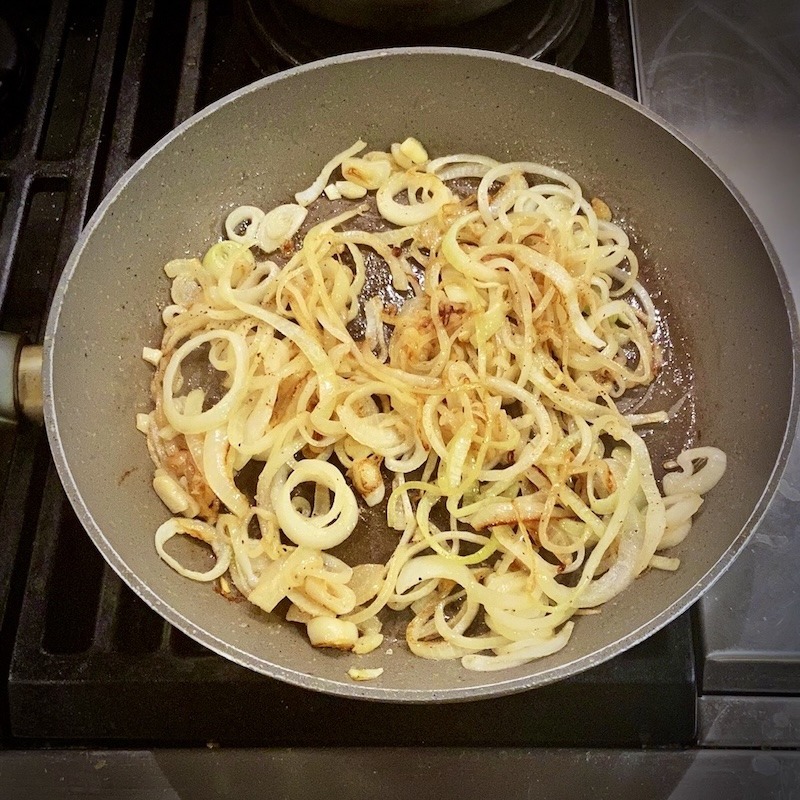
- Continue cooking, stirring frequently, until the onions reach your desired color, from light honey-gold to deep brown.
Finish
- Remove from heat once the onions are soft, richly colored, and fragrant.
- The full process can take anywhere from 10–15 minutes to 30 minutes or more, depending on quantity and desired depth of color.Tip: Slow cooking and regular stirring prevent burning. If they ever look dry, a small splash of water can loosen flavorful browned bits from the pan.
Step-by-Step: Caramelizing Onions
- Step 1 — Choose your onion: Yellow onions are the standard — they have enough sugar to caramelize well and enough sharpness to give the finished product some depth. Sweet onions (Vidalia, Walla Walla) work but finish milder. Red onions produce a slightly deeper, more complex result. All three work; yellow is the most forgiving.
- Step 2 — Slice evenly: Aim for slices between ⅛ and ¼ inch thick, as uniform as you can manage. Uneven slices mean some pieces burn while others stay pale. Pole to pole (root to stem) produces strips that hold together better than crosswise rings, which tend to break apart and scatter in the pan.
- Step 3 — Choose your fat: Butter alone gives richer flavor but burns more easily. Olive oil alone tolerates more heat. A combination of both — a tablespoon of each — gives you flavor and stability. Heat over medium-low until the butter melts and the foam subsides but before it browns.
- Step 4 — Add the onions and salt: Add sliced onions in no more than a ½-inch layer. If your pan looks crowded, cook in batches — overcrowding steams instead of caramelizes. Add a pinch of salt immediately. The salt draws out moisture and begins the softening process.
- Step 5 — The sweating stage (0–15 minutes): Stir every few minutes. The onions will look wet, limp, and pale. They'll release liquid and the pan may seem soupy. This is correct. You're evaporating water, not caramelizing yet. Resist the urge to raise the heat.
- Step 6 — The softening stage (15–30 minutes): The liquid will mostly be gone. The onions will be translucent, significantly reduced in volume, and starting to turn a light gold at the edges. Stir every couple of minutes. If you see any browning on the pan bottom, add a tablespoon of water and scrape it up — that fond is flavor you want in the onions, not burned to the pan.
- Step 7 — The caramelization stage (30–60 minutes): Color deepens from gold to amber to mahogany. The onions become jammy and fragrant — sweet, nutty, and unmistakably themselves. Stir more frequently now. This is the stage where neglect becomes burning. If you want to add honey, herbs, or black pepper, do it here.
- Step 8 — Know when to stop: Pull them when they reach the color and sweetness you want. Light gold is mild and sweet. Deep brown is complex, slightly bitter at the edges, and intensely savory. Neither is wrong — it depends on what you're using them for.
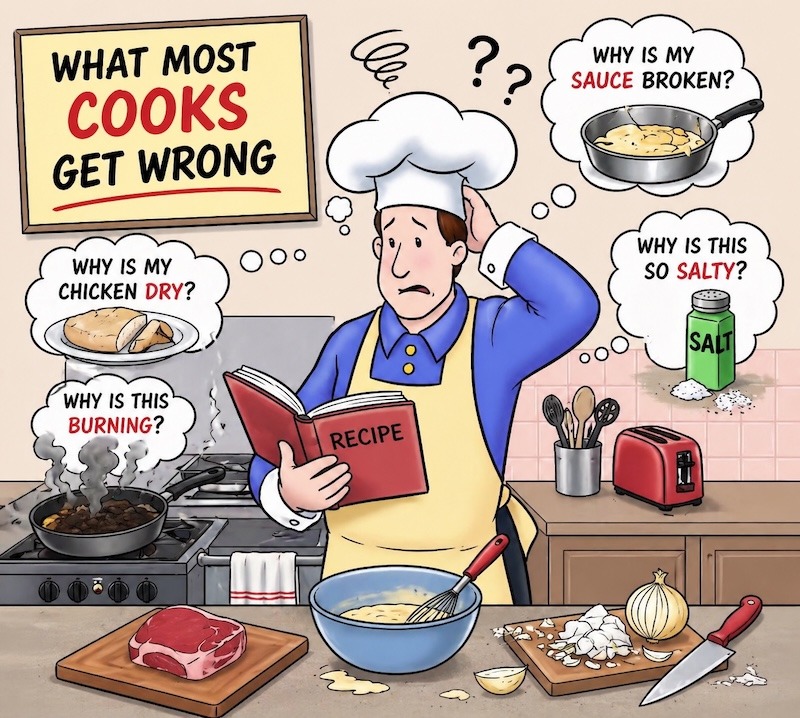
What Most Cooks Get Wrong
- Turning up the heat because nothing seems to be happening: Something is happening — the moisture is evaporating. It's just invisible. Raising the heat at this stage skips the sweating phase and forces browning before the onions are soft, which gives you crunchy, unevenly colored onions with a bitter edge.
- Believing recipes that say 10–15 minutes: They're wrong, or they're describing something different — sautéed onions, not caramelized ones. Twenty minutes gets you partway there. Forty-five minutes gets you there. An hour gets you somewhere worth going.
- Overcrowding the pan: Too many onions trap steam and the moisture can't escape. The onions soften but never properly brown. Use a wide pan and err toward less — you can always add more once the first batch cooks down.
- Walking away in the final stage: The first thirty minutes are forgiving. The last fifteen are not. Once the onions are deeply colored, the difference between perfect and burned is two minutes of inattention.
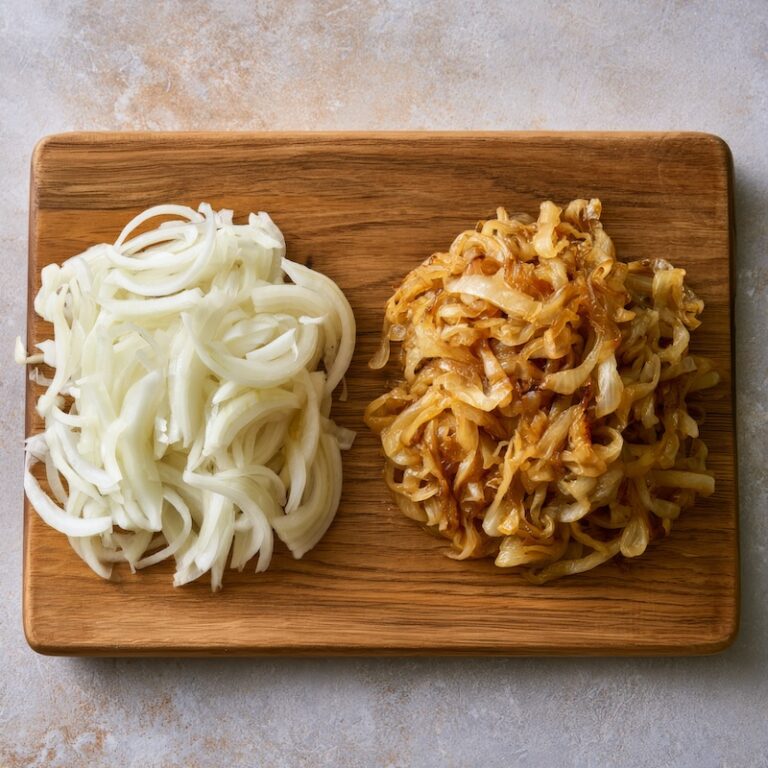
- Not making enough: Caramelized onions lose roughly 75% of their volume during cooking. Two large onions produce about a cup of finished product. If you're going to spend an hour at the stove, make a full batch and refrigerate or freeze what you don't use.
What Went Wrong — and Why
- Onions are browned but still sharp-tasting → Heat was too high, browned before fully sweating → They look done but aren't; lower the heat and keep cooking until the sharpness is completely gone
- Onions are pale and soft but not sweet → Pulled too early, moisture gone but sugars haven't developed → Keep cooking; you're in the right zone, just not there yet
- Onions burned on the bottom, pale on top → Heat too high, not stirred frequently enough → Deglaze with a tablespoon of water, scrape the fond, lower the heat, and stir more often from here
- Onions turned to mush with no color → Pan too crowded, steamed instead of caramelized → Reduce quantity or use a wider pan; the moisture needs somewhere to go
- Bitter flavor in finished onions → Taken too far, sugars pushed past caramelization into burning → Pull earlier next time; deep mahogany is the limit, black edges are past it
- Onions stuck to the pan → Heat too high or fat ran out → Add a tablespoon of water or a small knob of butter, scrape gently, and lower the heat
Control the Variables
- Heat (medium-low is the target): Too high and the outside browns before the moisture escapes and the inside softens. Too low and you'll be there all day with acceptable but not exceptional results. Medium-low — a steady, quiet sizzle — is the range where all three stages happen in the right sequence.
- Fat type: Butter adds flavor and encourages browning but burns above 300°F. Olive oil is more stable. A combination gives you both. For deeper flavor, a tablespoon of rendered bacon fat works well in the final stage.
- Pan size and material: Wide and heavy. Wide gives the moisture somewhere to escape; heavy distributes heat evenly and prevents hot spots that cause burning. A 12-inch stainless or cast iron pan handles two large onions comfortably. Nonstick works but browns less effectively.
- Quantity: More onions means more moisture means longer cooking time. One large onion: 30–40 minutes. Three or four: closer to an hour. Scale the time, not just the ingredients.
- Salt timing: Early salting draws out moisture and accelerates the sweating stage. It also seasons from the inside. Add it when the onions go in, not at the end.
- Optional additions: A teaspoon of honey or balsamic vinegar added in the final 10 minutes deepens sweetness and color. Fresh thyme or rosemary added at the same point adds an herbal note without overpowering. These are additions, not substitutes for time.
- The slow cooker option: Reader Lija Wills cooks five or six onions on low in a crock pot for 7–8 hours with butter and olive oil, lid propped open slightly to release moisture. The result can be used in soups and stews, or anything where you don't need the precise texture of stovetop caramelized onions. Worth knowing about for batch cooking.
When to Caramelize — and When Not To
- Use it when: You want sweetness, depth, and complexity rather than the sharp bite of raw onion or the mild softness of a quick sauté. Anywhere the onion is a featured element — French onion soup, a proper burger topping, a flatbread, a steak — caramelized onions do something no other preparation can.
- Use it when: You have time to make a large batch. The labor is the same for one cup as for three; refrigerate or freeze what you don't use immediately.
- Skip it when: You need texture contrast — raw onion on a taco, quick-sautéed onion in a stir fry, or crispy fried onion as a garnish. Caramelized onions are soft and jammy; if the dish needs bite or crunch, this isn't the preparation.
- Skip it when: You're short on time and tempted to rush. A 20-minute version isn't a faster caramelized onion — it's a different, lesser thing. Better to sauté quickly and call it what it is than to half-caramelize and be disappointed.
- Consider other alliums: Leeks, shallots, and even garlic respond beautifully to the same slow technique. Shallots caramelize faster and finish slightly more delicate. Leeks need to be cleaned carefully but are worth the effort.
Apply It to Real Food
- Steak: The combination that started this for me — thinly sliced sirloin over toast points with caramelized onions. The sweetness of the onion against the savory char of the meat is as good as it sounds. Pile them on generously; this isn't a garnish.
- French onion soup: The entire flavor base of the soup depends on properly caramelized onions. Under-caramelize them and the soup tastes thin. The onions should be deep mahogany before the stock goes in.
- Burgers and sandwiches: A thin layer of caramelized onions does more for a burger than most condiments. They also work on grilled cheese, pressed sandwiches, and anything with sharp cheese — the sweetness cuts the sharpness.
- Pizza and flatbreads: Spread directly on the dough before baking, with or without sauce. Pair with goat cheese, gorgonzola, or fontina — all three have enough character to hold up against the sweetness.
- Pasta and risotto: Stir a few spoonfuls into a finished pasta with butter and parmesan, or fold into risotto in the last few minutes. They dissolve into the dish and add a sweetness that's hard to identify but immediately noticed.
- Eggs: Into an omelet or frittata with a sharp cheese. One of the better uses for leftover caramelized onions from a batch made the day before.
- Dips and spreads: Folded into cream cheese or stirred into hummus, they transform a standard spread into something worth making again. Reader Karen Valentini grates her onions for dishes where she wants the flavor without visible pieces — useful to know if you're cooking for skeptics.
Explore More About Onions and Technique
- Cooking Onions at Home — Everything about onion varieties, how to cut them, and which preparation suits which dish.
- The Maillard Reaction — The chemistry behind why browning creates flavor — in onions, in meat, in bread, in everything.
- Olive Oil — Which type to use for longer, lower-heat cooking and why smoke point matters here.
- Butter — Why butter and olive oil together outperform either alone at medium-low heat.
- Pan Heat 101 — How to read your pan temperature before anything goes in — useful context for getting the heat right here.
Frequently Asked Questions about Caramelizing Onions
How long does it take to caramelize onions?
Properly caramelized onions take 45 minutes to an hour over medium-low heat. You’ll see recipes claiming 10 to 20 minutes — they’re describing sautéed onions, not caramelized ones. The difference in flavor is not subtle.
Can I caramelize onions in a slow cooker?
Yes, and it works well for large batches. Cook on low for 7–8 hours with butter or olive oil, leaving the lid slightly ajar to let moisture escape. The texture is softer than stovetop and better suited for soups, stews, and sauces than for toppings where you want more structure.
What is the best onion for caramelizing?
Yellow onions are the most popular choice because they balance sweetness and sharpness beautifully when cooked. Sweet onions caramelize faster and taste milder, while red onions produce a slightly deeper, richer flavor.
Why aren’t my onions browning?
If your onions are not browning, the heat may be too low or there may be too much moisture in the pan. Continue cooking over medium-low heat and allow excess water to evaporate before expecting browning to begin.
Can I caramelize onions without sugar?
Yes, absolutely. Onions contain natural sugars that develop and deepen during slow cooking. Added sugar or honey is optional and simply boosts sweetness.
Should I cover the pan while cooking?
It is best to cook onions uncovered so moisture can evaporate. Covering the pan traps steam and causes the onions to soften but not properly caramelize.
Why did my onions burn?
Onions burn when the heat is too high or when they are not stirred frequently enough. Keep the heat moderate and stir every couple of minutes to prevent scorching.
Can I use only butter or only olive oil?
Yes. Butter adds richer flavor but has a lower smoke point. Olive oil tolerates heat better. Many cooks combine both to balance flavor and cooking performance.
Can I speed up caramelizing onions?
You can slightly increase the heat once most of the moisture has evaporated, but rushing the process risks burning. True caramelization depends on time and controlled heat.
How do I know when caramelized onions are done?
They should be very soft, reduced in volume, and evenly golden to deep brown. The flavor will be sweet, savory, and mellow with no sharp bite remaining.
How do I fix onions that are sticking to the pan?
If onions begin sticking, reduce the heat and add a tablespoon of water to loosen browned bits. Stir to incorporate the flavorful fond back into the onions.
Can I caramelize onions ahead of time?
Yes. Caramelized onions store well in an airtight container in the refrigerator for up to 4 days. They also freeze beautifully for up to 3 months.
Can I caramelize other vegetables the same way?
Yes. Leeks, shallots, and even garlic respond well to slow cooking and develop similar sweetness when caramelized gently.
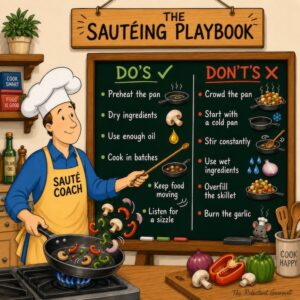
Some of My Favorite Cooking Techniques


7 Responses
Thank you for making recipes simple & easy to follow, it’s so much better like this for a rare change!
Thanks Wendy. Much appreciated.
I have made honeyed onions for many, many years, it is a family and friends favorite but I never thought to add an extra flavor such as a spice.
I added a roasted red pepper spice (just a little) and boy did it ever enhance the flavor. I am making this today for a Christmas dinner of about 50 people and I know they will love it.
Thanks for the extra advice.
You are welcome Marilyn and Merry Christmas.
I salt my onions in the beginning of cooking ( sautéing ) them. I also grate my onions, using the the largest grating side of my 4 sided grater, ( not the large slit on the side ) for certain dishes ( so my kids don’t think I am using onions, because they can’t see them in their favorite foods, as they say, they don’t like onions ? Lol .) Salting them makes them sweeter and adds more flavor, that you can’t get otherwise, as I lightly brown them.
When cooking the onions for meats that are already with salt content I don’t add salt. I also don’t always grate the onions . Thank you for all the wonderful advice !
Hello. I never thought of adding spices either so I was glad to learn this.
And I was never sure when to salt them, so thanks for that info.
I have learned a new technique for caramelizing onions. I put them in my crock pot with butter / olive oil! After all, a crock pot is created for slow cooking on low heat, right? So I cook it on low for 7-8 hours. I leave the lid open a little and put paper towels underneath it to absorb the moisture.
I cook five to six onions this way, store them in a glass jar in the fridge and put some in the freezer. (The ones in the freezer can only be used in things like soup and casseroles of course.)
Give this way a try and you’ll be pleasantly surprised at the results.
Thanks Lija, I will give this method a try. Thanks for sharing.