
Roasting is where simple ingredients turn into something deeply flavorful with almost no effort. Hot, dry air surrounds your food, creating a browned, caramelized exterior while keeping the inside juicy and tender. Once you understand a few key signals—temperature, airflow, and timing—you can roast anything from chicken to root vegetables with confidence.
Roasting Made Simple: Get Juicy, Crispy Results Every Time
Roasting means cooking food uncovered in a hot oven using dry heat — no added liquid, no lid. High heat drives off surface moisture, triggering the Maillard reaction that creates a deep brown crust and complex flavor. The interior cooks evenly with gentle heat from all sides. Get the temperature, airflow, and timing right, and roasting is one of the most reliable techniques in the kitchen.
Roasting has been around since someone first left a piece of meat close enough to a fire for it to cook without charring. Spit roasting followed — rotating the meat so heat reached every surface evenly. Then came the oven: a box whose walls absorb heat and radiate it back from all sides at once. No more turning, no more uneven heat from one direction. The modern oven solved roasting’s oldest problem. What it didn’t solve was the cook’s relationship with it — the guesswork about temperature, timing, and why the same technique produces a juicy roast one Sunday and a dry one the next. That’s what this post covers.
A Short History of Roasting
The earliest form of cooking was probably direct heat: man drops raw meat into a fire. While this cooked the food, the guy likely ended up with black char on the outside and raw in the middle with a thin margin of "cooked" in between.
Next, probably, came roasting — also by accident. A man left raw meat close enough to a fire that the indirect heat cooked it more gently, albeit only in one direction. The side closest to the fire got cooked. Eventually somebody thought of putting the meat on a stick and turning it over the fire, and spit-roasting was born.
Spit roasting was the state of the art for hundreds of years. First there was the boy who turned the spit by hand. Then someone — probably one of those spit-turning boys — devised a way to turn it mechanically with weights and pulleys.
For centuries the heat source was a fire that came from one direction — the hearth — and more elaborate methods of spit roasting were devised to produce an evenly cooked, moist, and juicy end product.
Eventually someone came up with a box whose walls would absorb heat from the fire and radiate it back onto the food from all sides at once. No more spits. No more turning the food constantly over a fire. Oven roasting was born.
Start Here: Is Roasting What You Need?
- Roasting is for: Larger cuts and whole proteins that benefit from sustained dry oven heat — whole chickens, beef roasts, pork loin, leg of lamb, turkey, and dense vegetables like root vegetables, squash, and potatoes.
- The right cuts: Tender cuts from the center of the animal — rib, short loin, loin. Stay away from chuck, round, and brisket for dry roasting. Those cuts need moist heat to break down connective tissue. Roasting them dry produces something closer to rubber.
- What success looks like: A deep mahogany-brown exterior with complex flavor from the Maillard reaction. A uniformly cooked interior with no dry, grey overcooked band just under the surface. Juices that stay in the meat until you slice it — and redistribute evenly when you do.
- What you need: A roasting pan or heavy sheet pan, a rack (or an edible substitute — more on that below), and an instant-read thermometer. That last one is not optional.
Why Roasting Works: The Science in Plain Language
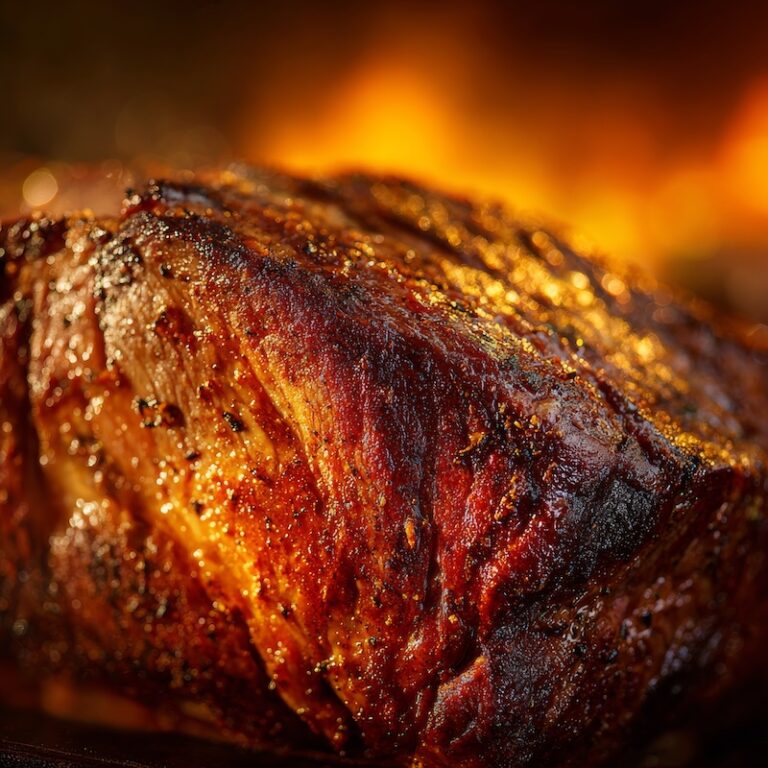
- The Maillard reaction — not caramelization: Many cookbooks call the browning of roasted meat "caramelization," but that's not accurate. Caramelization is what happens when sugar breaks down from heat alone. What happens to meat is the Maillard reaction — a set of chemical reactions between amino acids and sugars that produce hundreds of new flavor compounds and that characteristic deep brown color. You need surface temperatures above 300°F for it to happen. Below that, you get grey, steamed-looking meat with a fraction of the flavor.
- Why moisture is the enemy of crust: Water on the surface of meat boils at 212°F and stays there until it evaporates. As long as there's surface moisture, the meat's surface temperature can't climb above 212°F — and browning requires 300°F+. This is why patting meat dry before roasting isn't a suggestion. It's the step that makes browning possible at all.
- How the oven cooks the interior: Unlike a stovetop, which heats from below through direct contact, an oven surrounds the food with hot air that radiates heat from all sides simultaneously. This is why oven-roasted meat cooks more evenly than stovetop-cooked meat of the same thickness. The interior temperature rises gradually as heat penetrates inward through conduction.
- Carryover cooking: When meat comes out of the oven, cooking doesn't stop. The exterior is hotter than the interior, and that heat continues migrating inward — raising the center temperature by 5°F to 15°F depending on the size of the cut. This is why you pull roasts before they reach target temperature and let them rest. It's not a suggestion. It's physics.
Think Like a Cook: The One Idea That Changes Everything
- Roasting has two separate goals happening at the same time — browning the exterior and cooking the interior — and they require almost opposite conditions. Browning needs high heat and a dry surface. Interior cooking needs time and controlled, even heat. The tension between those two goals is why roasting goes wrong. Once you understand that every roasting decision — temperature, rack position, whether to sear, when to pull — is about managing that tension, you stop following recipes blindly and start making intelligent adjustments based on what you see in front of you.
- A large roast is more forgiving than a small one because it spends enough time in the oven for both goals to be met naturally. A small, thin cut reaches internal doneness before the exterior browns properly — which is why smaller cuts often get a stovetop sear first. That's not a different technique. It's the same logic applied to a different situation.
Before You Start: Decisions That Are Up to You
- To sear or not to sear: For large cuts — whole chicken, turkey, prime rib — the meat spends enough time at high oven heat that it develops a proper crust on its own. For smaller cuts like tenderloin, the interior reaches doneness before the exterior has time to brown. In those cases, a stovetop sear before the oven finishes the job is the right move. See the Pan Roasting technique for how that works.
- To marinate or not to marinate: A marinade brings flavor and, because of the acids it contains, begins to chemically denature proteins on the surface — which can speed cooking slightly and help retain moisture. It's entirely a personal choice. Some of the most beautiful roasts I've eaten were seasoned with nothing more than salt and pepper. If you do marinate, dry the meat off thoroughly before it goes in the oven. Wet meat can't brown properly.
- Brining: A brine is a salt-based solution that carries salt and flavor deep into the meat through osmosis — unlike a marinade, which mostly affects the surface. Brining brings about physical changes in the muscle cells, making them better at retaining moisture during cooking. If you have the time, brining a chicken or turkey 24 hours ahead produces noticeably juicier results. Again — dry it off before roasting.
- Bone-in or boneless: Bone-in meat has more flavor. The tradeoff is longer cooking time, because the bone conducts heat slowly toward the meat around it. If you're short on time, a boneless cut with a good marinade or rub gets you most of the flavor with less time in the oven.
- Larding and barding: Larding — threading strips of fat through a lean roast with a larding needle — was a standard technique for centuries when cuts were leaner and ovens less controllable. It's largely obsolete now. Barding — wrapping or laying fat over meat — is still useful. Bacon-wrapped tenderloin, a fillet mignon wrapped in bacon, meatloaf with bacon on top — these are all barding, and they work because the fat bastes the meat throughout cooking.
- Tying and trussing: The more uniform in shape your meat is, the more evenly it roasts. Tying a rolled or stuffed roast at intervals keeps it compact and evenly shaped. For poultry, I don't truss — I fold the wing tips back to prevent burning and leave the legs loose so the thigh meat cooks more evenly. Trussed birds look better on the table but take longer and cook less evenly in the thigh.
Step-by-Step: Roasting From Prep to Rest
- Step 1 — Choose the right cut: Season it properly and start with a cut that suits dry heat. Tender cuts from the center of the animal — rib, loin, tenderloin — are built for roasting. Shoulder, chuck, brisket, and round are not. If the cut has a lot of connective tissue, it needs braising, not roasting.
- Step 2 — Bring it to room temperature: Pull the meat from the refrigerator 30 minutes to 1 hour before cooking. Cold meat (38°F–40°F) contracts when it hits a hot oven, squeezing out moisture and cooking unevenly. Meat at 65°F–70°F is relaxed — touch it and you'll feel the difference.
- Step 3 — Pat completely dry: Use paper towels and be thorough. Surface moisture prevents browning. If you marinated or brined, this step is especially important — the exterior needs to be dry for the Maillard reaction to begin.
- Step 4 — Season: Salt at least 30 minutes before cooking, or up to 24–48 hours ahead if you have time. Early salting draws moisture to the surface initially, but given time that moisture gets reabsorbed along with the salt — flavoring the meat more deeply. If you salt right before cooking, it's fine — just make sure the surface is dry when the meat goes in.
- Step 5 — Set up the pan: Elevate the meat on a rack to keep it out of the fat and juices that accumulate in the pan. Meat sitting in its own liquid steams instead of roasts. If you don't have a rack, use an edible one: whole carrots, celery sticks, halved onions or apples cut-side down. They prop the meat off the pan, add flavor to the drippings, and become part of the sauce.
- Step 6 — Start hot: For most roasts, begin at 425°F–475°F for the first 15–20 minutes to drive browning. Then reduce to 325°F–350°F to finish cooking through without drying out. Alternatively, start low and finish high — the crust develops at the end instead of the beginning. Both work.
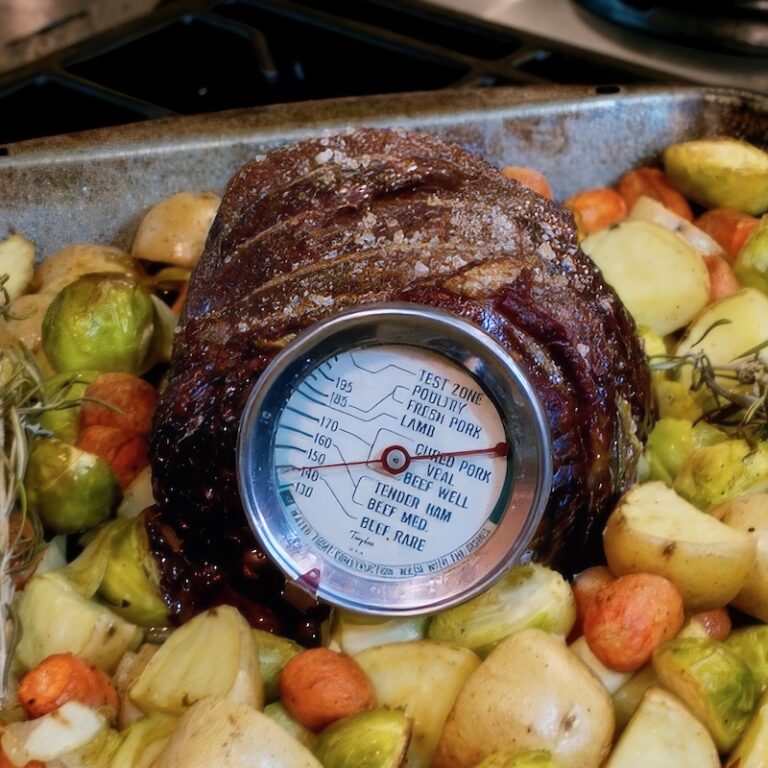
- Step 7 — Cook to temperature, not time: Use an instant-read thermometer. Pull the roast 5°F below target for smaller cuts, 10°F below for large roasts. Carryover does the rest.
- Step 8 — Rest: Cover loosely with foil. 15 minutes for smaller cuts, up to 45 minutes for a large turkey or prime rib. The juices redistribute back into the muscle fibers. Cut too soon and they end up on your cutting board.
- Step 9 — Cut against the grain: Cutting perpendicular to the muscle fibers shortens them into thin slices. Short muscle fibers equal tenderness. Look at the grain before the meat goes in the oven so you know which direction to cut when it comes out.
Visual Cues: What to Look For While It Roasts
- Surface color changes from pink/grey to deep mahogany brown → Maillard reaction is underway → this is what you want; if color isn't developing after 20 minutes at high heat, increase oven temperature slightly.
- Fat is rendering and pooling in the pan → normal and healthy → this is why the rack matters; fat in contact with the meat surface prevents browning on that surface.
- Juices collecting in the pan are golden-brown, not black → fond is forming correctly → this is the base of your pan sauce; if they're blackening, add a splash of water to the pan.
- Meat pulls slightly away from the bone on poultry → approaching doneness → confirm with a thermometer; don't rely on this alone.
- Juices run clear when the thickest part is pierced on poultry → close to done → confirm with thermometer; clear juice is a good signal but not definitive.
- Exterior is deeply browned but interior temperature is still climbing slowly → lower the oven temperature by 25°F and continue → the crust is set; no need for high heat anymore.
- Meat feels firm to a gentle press → well done → for red meat, very soft means rare, slight give means medium-rare, firmer means medium. Thermometer is still more reliable than feel alone.
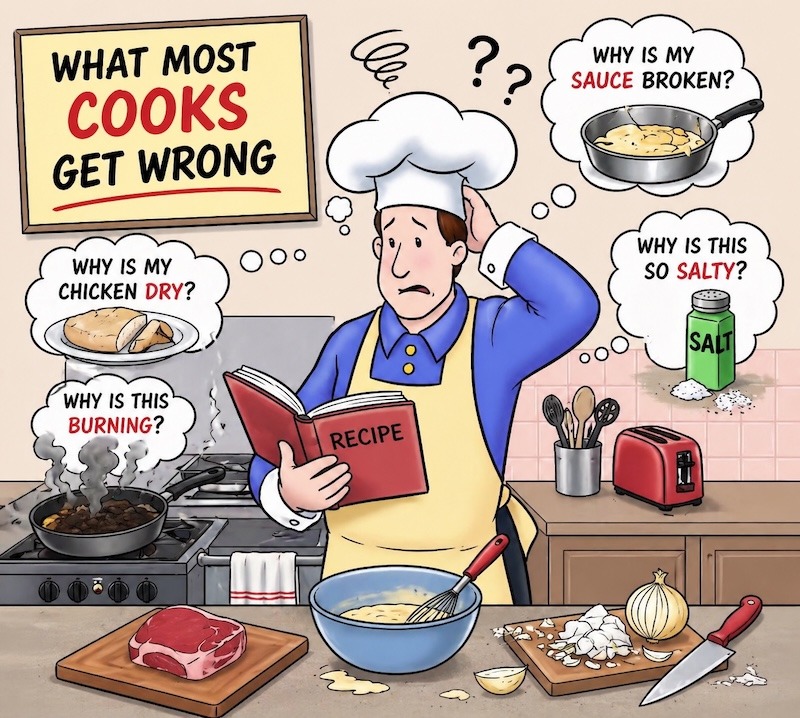
What Most Cooks Get Wrong: The Seven Roasting Mistakes
- Mistake 1 — Oven too hot or too cold: Too low and the meat never properly browns — you get grey, bland exterior with no crust. Too high and the outside chars before the interior cooks through. The fix is dual-temperature roasting: start at 425°F–475°F for browning, then reduce to 325°F–350°F to finish. Adjust based on what you see — not a fixed timer.
- Mistake 2 — Meat directly in the pan: Even a dry pan fills with fat and juices as the meat cooks. Soon the meat is sitting in liquid and steaming, not roasting. The bottom surface will never brown. Always elevate on a rack — metal, or a bed of vegetables that doubles as flavor for the drippings.
- Mistake 3 — Cold meat straight from the fridge: Cold proteins are coiled tight. When they hit a hot oven they contract hard, squeezing moisture out immediately. The result is dry meat that cooks unevenly. Give the meat 30–60 minutes on the counter. It relaxes, and goes into the oven ready to cook evenly rather than fighting the heat.
- Mistake 4 — Wet meat: Moisture on the surface stays at 212°F until it evaporates. Browning doesn't begin until the surface hits 300°F+. Wet meat spends the first stretch of oven time just drying itself out — steaming, not roasting. Pat it dry before it goes in. Thirty seconds with paper towels changes the entire result.
- Mistake 5 — Wrong cut: Chuck, brisket, round, and shoulder cuts are full of collagen that needs long, slow, moist heat to convert to gelatin. Dry roasting these cuts produces tough, chewy, rubbery meat. If the cut says "chuck," "brisket," "round," or "shoulder" — braise it, don't roast it.
- Mistake 6 — Rushing to serve: Right out of the oven, the juices are hot, loose, and concentrated near the surface. Slice immediately and they pour onto the cutting board. Wait 15–45 minutes and they redistribute back into the muscle fibers. The difference is not subtle — it's the difference between a juicy roast and a dry one, even when everything else was done correctly.
- Mistake 7 — Cutting with the grain: Slicing along the muscle fibers means you're presenting long, intact fibers to chew through. Slice perpendicular and you shorten them into thin cross-sections that break apart easily. Look at the meat before it goes in the oven — identify the direction of the grain — and cut against it when you serve.
Quick Diagnosis: What Went Wrong and How to Fix It
- Meat is dry and overcooked → pulled too late or oven too hot → use a thermometer next time; pull 5°F–10°F below target and rest properly.
- Exterior pale and grey, no crust → wet surface, oven too cool, or meat too cold → pat dry before cooking; start at higher heat; bring meat to room temperature first.
- Exterior charred, interior undercooked → oven too hot throughout → start high for browning then reduce heat; check temperature earlier next time.
- Bottom of roast is grey and steamed → meat sat directly in pan drippings → use a rack or edible vegetable platform; elevate the meat so air circulates underneath.
- Meat tough and chewy despite being cooked through → wrong cut for dry roasting, or sliced with the grain → tougher cuts need braising; always slice perpendicular to the muscle fibers.
- Juices ran out when sliced → didn't rest long enough → minimum 15 minutes for any roast; 30–45 minutes for large cuts; tent loosely with foil.
- Uneven cooking — overdone outside, underdone in center → meat went in cold, or oven temperature too high → rest meat at room temperature before roasting; reduce oven temperature and cook longer.
- Pan drippings burned black → oven too hot or roasting time too long → add a splash of water or stock to the pan partway through; use the drippings for a pan sauce before they go too far.

Quick Fixes and Tips Worth Knowing
- The edible rack: Whole carrots, celery ribs, halved onions or apples cut-side down in the roasting pan create a natural platform that lifts the meat off the pan floor. The vegetables absorb and concentrate the drippings as the roast cooks — making the best pan sauce base you'll ever have.
- If the exterior is browning too fast: Tent the roast loosely with foil. This slows the browning without trapping steam. Don't seal the edges — you want airflow, not a steam environment.
- If the roast is done but dinner isn't ready: Lower the oven to 170°F–180°F and hold the roast there, loosely tented, for up to 30 minutes. The interior temperature won't climb significantly at that low heat.
- The pan sauce while it rests: Put the roasting pan on the stovetop over medium heat. Add a splash of wine or stock and scrape every brown bit off the bottom — that's concentrated Maillard flavor. Reduce by half. Finish with a knob of cold butter. See Simple Pan Sauces for the full technique.
- Salt timing: If you have 24–48 hours, salt ahead. The salt draws surface moisture out initially, but given time that moisture reabsorbs back into the muscle — carrying the salt with it for deeper seasoning. If you're cooking tonight, salt right before cooking and make sure the surface is dry. Both work. The advance salting works better.
- Oven calibration: Most home ovens run 25°F–50°F off from what the dial says. A $10 oven thermometer tells you what your oven actually runs and saves you from chasing a problem that was never about technique.
Control the Variables: How to Adapt This Technique
- Oven temperature: Higher heat = more surface browning, more aggressive crust, more carryover cooking. Lower heat = more even interior cooking, less crust development, more forgiving on timing. Use dual temperatures — start high for browning, finish low for even cooking — and you get both.
- Starting temperature of the meat: Cold meat cooks unevenly and contracts in the oven. Room-temperature meat cooks more evenly and produces more consistent results. For very large roasts this difference is amplified significantly.
- Rack height: Higher rack exposes the meat to more radiant heat from the top element — useful for finishing a crust. Lower rack favors the bottom heating element. Center rack is the reliable default for even heat from all sides.
- Pan size: Too large and drippings spread thin and burn. Too small and the meat is crowded and steams. Aim for 1–2 inches of space around the meat.
- Fat content of the cut: Fattier cuts are more forgiving — they baste themselves as fat renders. Very lean cuts have no fat buffer and require more careful temperature monitoring or external fat through barding.
- Resting time: Longer rest = more juice retained, more even final temperature throughout. Minimum 15 minutes. For large cuts, 30–45 minutes produces meaningfully better results and the meat stays warm longer than most people expect.
When to Use Roasting — and When Not To
- Use it for: Whole birds and large cuts — whole chicken, turkey, prime rib, pork loin, leg of lamb, whole fish. Dense vegetables — potatoes, carrots, parsnips, beets, squash. Anything where dry heat and an uncovered pan will develop browning and concentrate flavor.
- Use it when: You have time to let the oven do most of the work. Roasting rewards patience, not hovering.
- Don't use it for tough braising cuts: Chuck, brisket, short ribs, pork shoulder, lamb shanks. These cuts have collagen that only converts to gelatin in low, slow, moist heat. Dry roasting them produces tough, dry results regardless of technique. They need braising.
- Don't use it for very thin cuts: A thin chicken breast or fish fillet reaches internal doneness before the exterior has time to brown in an oven. These are better suited to pan roasting or sautéing where you control the surface heat directly.
- Don't use it with the lid on: A covered roasting pan traps steam and prevents browning. A covered pan is braising, not roasting. The pan stays uncovered throughout.
Apply It: Roasting Across Different Proteins and Vegetables
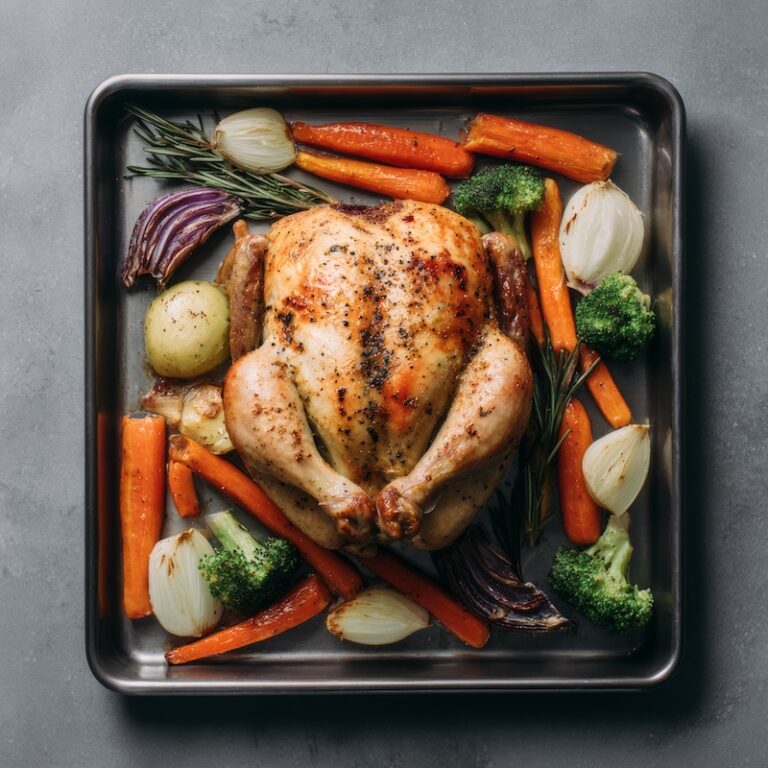
- Whole chicken: 425°F for the full cook. Pat the skin completely dry, season under the skin if you can, and use a rack or vegetable platform. Pull at 160°F in the thickest part of the thigh — carryover brings it to 165°F. Rest 10–15 minutes before carving.
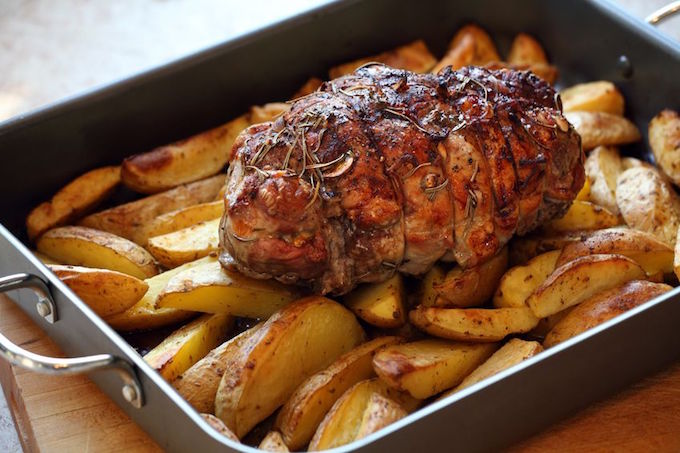
- Beef roast (prime rib, tenderloin): Start at 450°F for 15–20 minutes for the crust, then reduce to 325°F to finish. Pull at 125°F for medium-rare — carryover on a large roast adds 8°F–10°F during a 20–30 minute rest. Slice against the grain, always.
- Pork loin: 375°F for the whole cook. Pull at 140°F — the old 160°F guideline was revised by the USDA and produced dry pork. 145°F is safe and juicy. Rest 10 minutes.
- Leg of lamb: Bone-in at 325°F after a high-heat start. Most people find 135°F–140°F the sweet spot. Rest 15–20 minutes before slicing.
- Root vegetables: 425°F–450°F. Cut everything to the same size. Single layer in the pan — overcrowding steams them. Don't touch them for the first 20 minutes. Flip once and let the other side caramelize.
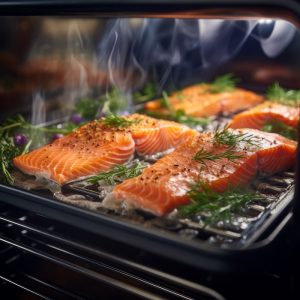
- Whole fish: 400°F for 12–15 minutes per inch of thickness. Score the skin to prevent curling. The flesh should flake at the thickest part and turn opaque when done.
Roasting Cheat Sheet
- Right cuts: Rib, loin, tenderloin, whole birds, dense vegetables. Not chuck, brisket, round, or shoulder.
- Prep: Room temperature meat (30–60 min out of fridge). Completely dry surface. Season generously — salt early if you can.
- Pan setup: Rack or vegetable platform. Uncovered. Pan sized to the meat with 1–2 inches to spare.
- Temperature: Start 425°F–475°F for browning (first 15–20 min), then reduce to 325°F–350°F to finish.
- Pull temps (carryover does the rest): Chicken 160°F → 165°F · Beef medium-rare 125°F → 135°F · Pork 140°F → 145°F · Lamb 135°F → 145°F
- Rest: 15 min minimum. 30–45 min for large roasts. Tent loosely with foil.
- Slice: Against the grain. Always.
- Pan sauce: Deglaze with wine or stock. Scrape the fond. Reduce by half. Finish with cold butter. See Simple Pan Sauces.
Explore More on This Topic
- Make a Quick Pan Sauce From the Same Pan — turn the drippings from your roast into a restaurant-quality sauce in under five minutes.
- Pan Roasting — the stovetop-to-oven technique for smaller cuts that need a sear first.
- Braising — what to do with the tough cuts that roasting can't fix.
- Whole Roasted Chicken — the roasting technique applied to the most common weeknight protein.
- Roast Turkey — everything that applies to roast chicken, scaled up with more variables.
- How to Season Generously — the foundation skill that determines how much flavor survives the oven.
- Cook to Temperature, Not Time — the single habit that eliminates most roasting failures.
| Food | Oven Temp | Pull At | Final Temp | Rest Time |
|---|---|---|---|---|
| Whole chicken | 425°F | 160°F | 165°F | 10–15 min |
| Turkey | 325°F (after sear) | 160°F | 165°F | 30–45 min |
| Beef (medium-rare) | 450°F then 325°F | 125°F | 135°F | 20–30 min |
| Beef (medium) | 450°F then 325°F | 135°F | 145°F | 20–30 min |
| Pork loin | 375°F | 140°F | 145°F | 10–15 min |
| Leg of lamb | 450°F then 325°F | 130–135°F | 140–145°F | 15–20 min |
| Vegetables | 425–450°F | Tender when pierced | — | None needed |
| Whole fish | 400°F | Flakes easily | 135–140°F | 5 min |
| Pull temp is when the meat comes out of the oven. Final temp is after resting. Carryover cooking does the rest — this is why resting is not optional. | ||||
Frequently Asked Questions About Roasting
Do I really need to bring meat to room temperature before roasting?
Yes — more than most people realize. Cold meat from the refrigerator is around 38°F–40°F. That’s not just cool — at that temperature, proteins are coiled tight. When cold meat hits a hot oven, those proteins contract hard, squeezing out moisture before the heat has a chance to work with it. The result is dry meat that cooks unevenly, with an overcooked exterior and an undercooked center. Give it 30–60 minutes on the counter. The meat relaxes, its temperature rises closer to 65°F–70°F, and it goes into the oven ready to cook evenly rather than reacting defensively to the heat.
What’s the difference between roasting and baking?
The honest answer is mostly convention. Both use dry oven heat. Roasting typically refers to meats, poultry, fish, and vegetables — usually at higher temperatures where browning is the goal. Baking refers to breads, pastries, and casseroles — where structure and internal cooking matter more than surface color. The techniques overlap significantly. A roasted chicken and a baked chicken are the same thing. Don’t get too attached to the terminology.
Should I cover the roasting pan?
Not if you want a properly roasted result. Covering the pan traps moisture and creates steam — which prevents browning and essentially turns your oven into a braising environment. A covered pan is braising, not roasting. If your goal is a browned, flavorful crust on the exterior, the pan stays uncovered. The one exception: if the exterior is browning too fast before the interior is done, a loose foil tent (not sealed) slows browning while still allowing some airflow.
How do I know when a roast is done without a thermometer?
The honest answer is: you don’t, not reliably. Touch tests, timing guides, and juice color are all indicators but none are definitive. A thermometer is a $15 investment that eliminates the single biggest source of roasting failure. That said — for poultry, juices running clear when you pierce the thickest part is a reasonable signal. For red meat, pressing the meat and comparing its firmness to the base of your thumb at various degrees of hand relaxation is a rough guide. But both methods require experience to calibrate. The thermometer is always more reliable.
Why does my roast come out dry even when I follow the recipe?
Usually one of four things: the wrong cut for dry roasting (tough cuts with connective tissue need braising); cooking to time rather than temperature (ovens vary, meat varies, time-per-pound is unreliable); not resting the meat long enough after cooking; or starting with cold meat straight from the fridge. Check each of those variables before assuming the recipe is wrong.
What temperature should I roast vegetables at?
425°F–450°F for most root vegetables and dense produce. The goal is caramelization — the sugars in the vegetable browning and concentrating. Lower temperatures produce soft, steamed-tasting vegetables even if they’re technically cooked through. High heat drives off surface moisture fast and gets you to browning. The two non-negotiables: single layer in the pan (crowding steams), and uniform cut size (everything needs to cook at the same rate).
What’s the best pan for roasting?
A heavy roasting pan or a sturdy rimmed sheet pan. What matters most is mass — a heavy pan distributes heat evenly and doesn’t warp at high temperatures. Thin pans develop hot spots that burn one area while undercooking another. For large roasts, a dedicated roasting pan gives you room and structural support. For vegetables and smaller cuts, a heavy rimmed sheet pan works beautifully. Add a rack to either for better airflow.
Can I roast from frozen?
Technically yes — food safety guidelines allow it, and it adds roughly 50% more cooking time. Practically, it produces worse results. A frozen roast starts at 0°F instead of 65°F, which means the exterior is in the oven much longer before the interior comes up to temperature. You get more overcooked exterior, less even interior, and no ability to develop a proper crust early. Thaw first, always, and bring to room temperature before cooking.

9 Responses
A really interesting article. Hope you get the chance to add the links and missing section about roasting tins, the bit I was initially looking for. (how high should the sides be?). To cover or not to cover is not discussed.
Not sure what is missing but a post about roasting pans is a great idea. Typically, I do not cover my roasts but I know there are some recipes that do call for it.
You had a well written wealth of information on meat. Thank you.
How do you roast an 8lb shell, which you will slice after it’s cooked?
Irene, not sure what you are asking. – RG
You give a lot of good GENERAL information… but that is not what I was looking for, or really, anyone else either. I wanted to know the TEMPERATURE for each DIFFERENT type of meat that is to be roasted. And how about a general length of time per pound? I can’t believe you wrote an entire article about how to roast meat and you don’t even give a temperature to set the oven at! You take the easy road and say there are too many variables. Other bloggers that write on the subject at least give temps and general lengths of time. And THEN they say that your results may vary depending on certain variables you have to take into consideration. Other than that keep up the good work.
Brad, did you see the chart at the end of the post? Most recipes I give the “general” length of time per pound but I would prefer if you use a thermometer. If you take a roast out of the refrigerator and throw it in the oven, the time difference will be substantially different than if you let the same roast come to room temperature and then roast it. So if I give you one time per pound, you could be way off.
It have a self basting roasting tin . How many mins. Do I cook a 4 lb chicken and what temperature do I roast the chicken
Excellent info. Thanks so much especially for the temperature/roasting chart. Linda
You are very welcome Linda